Clippard Valve Upgrade for the Breville Dual Boiler
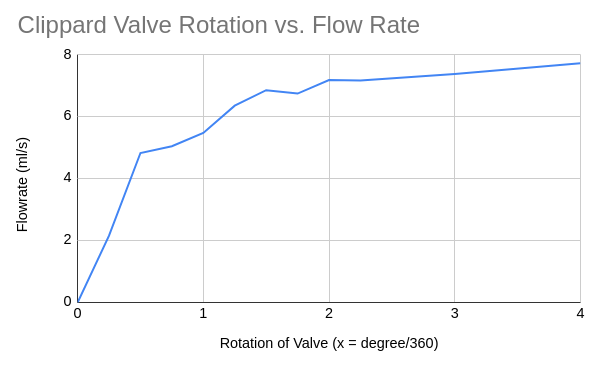
The Breville Dual Boiler can have manual flow profiling added by rerouting the flow path to pass through the stock hot water knob (which utilizes a needle valve to control flow). While this requires no additional parts and can be easily undone, the stock needle valve can be difficult to control. Namely, flow goes from 0% to ~99% in a radial movement of several millimeters.
This page will describe how to install a new and upgraded valve, developed by Home-Barista forum user Jake_G. This new needle valve expands flow control from a few millimeters to several rotations, allowing for greater accuracy in flow profiling.
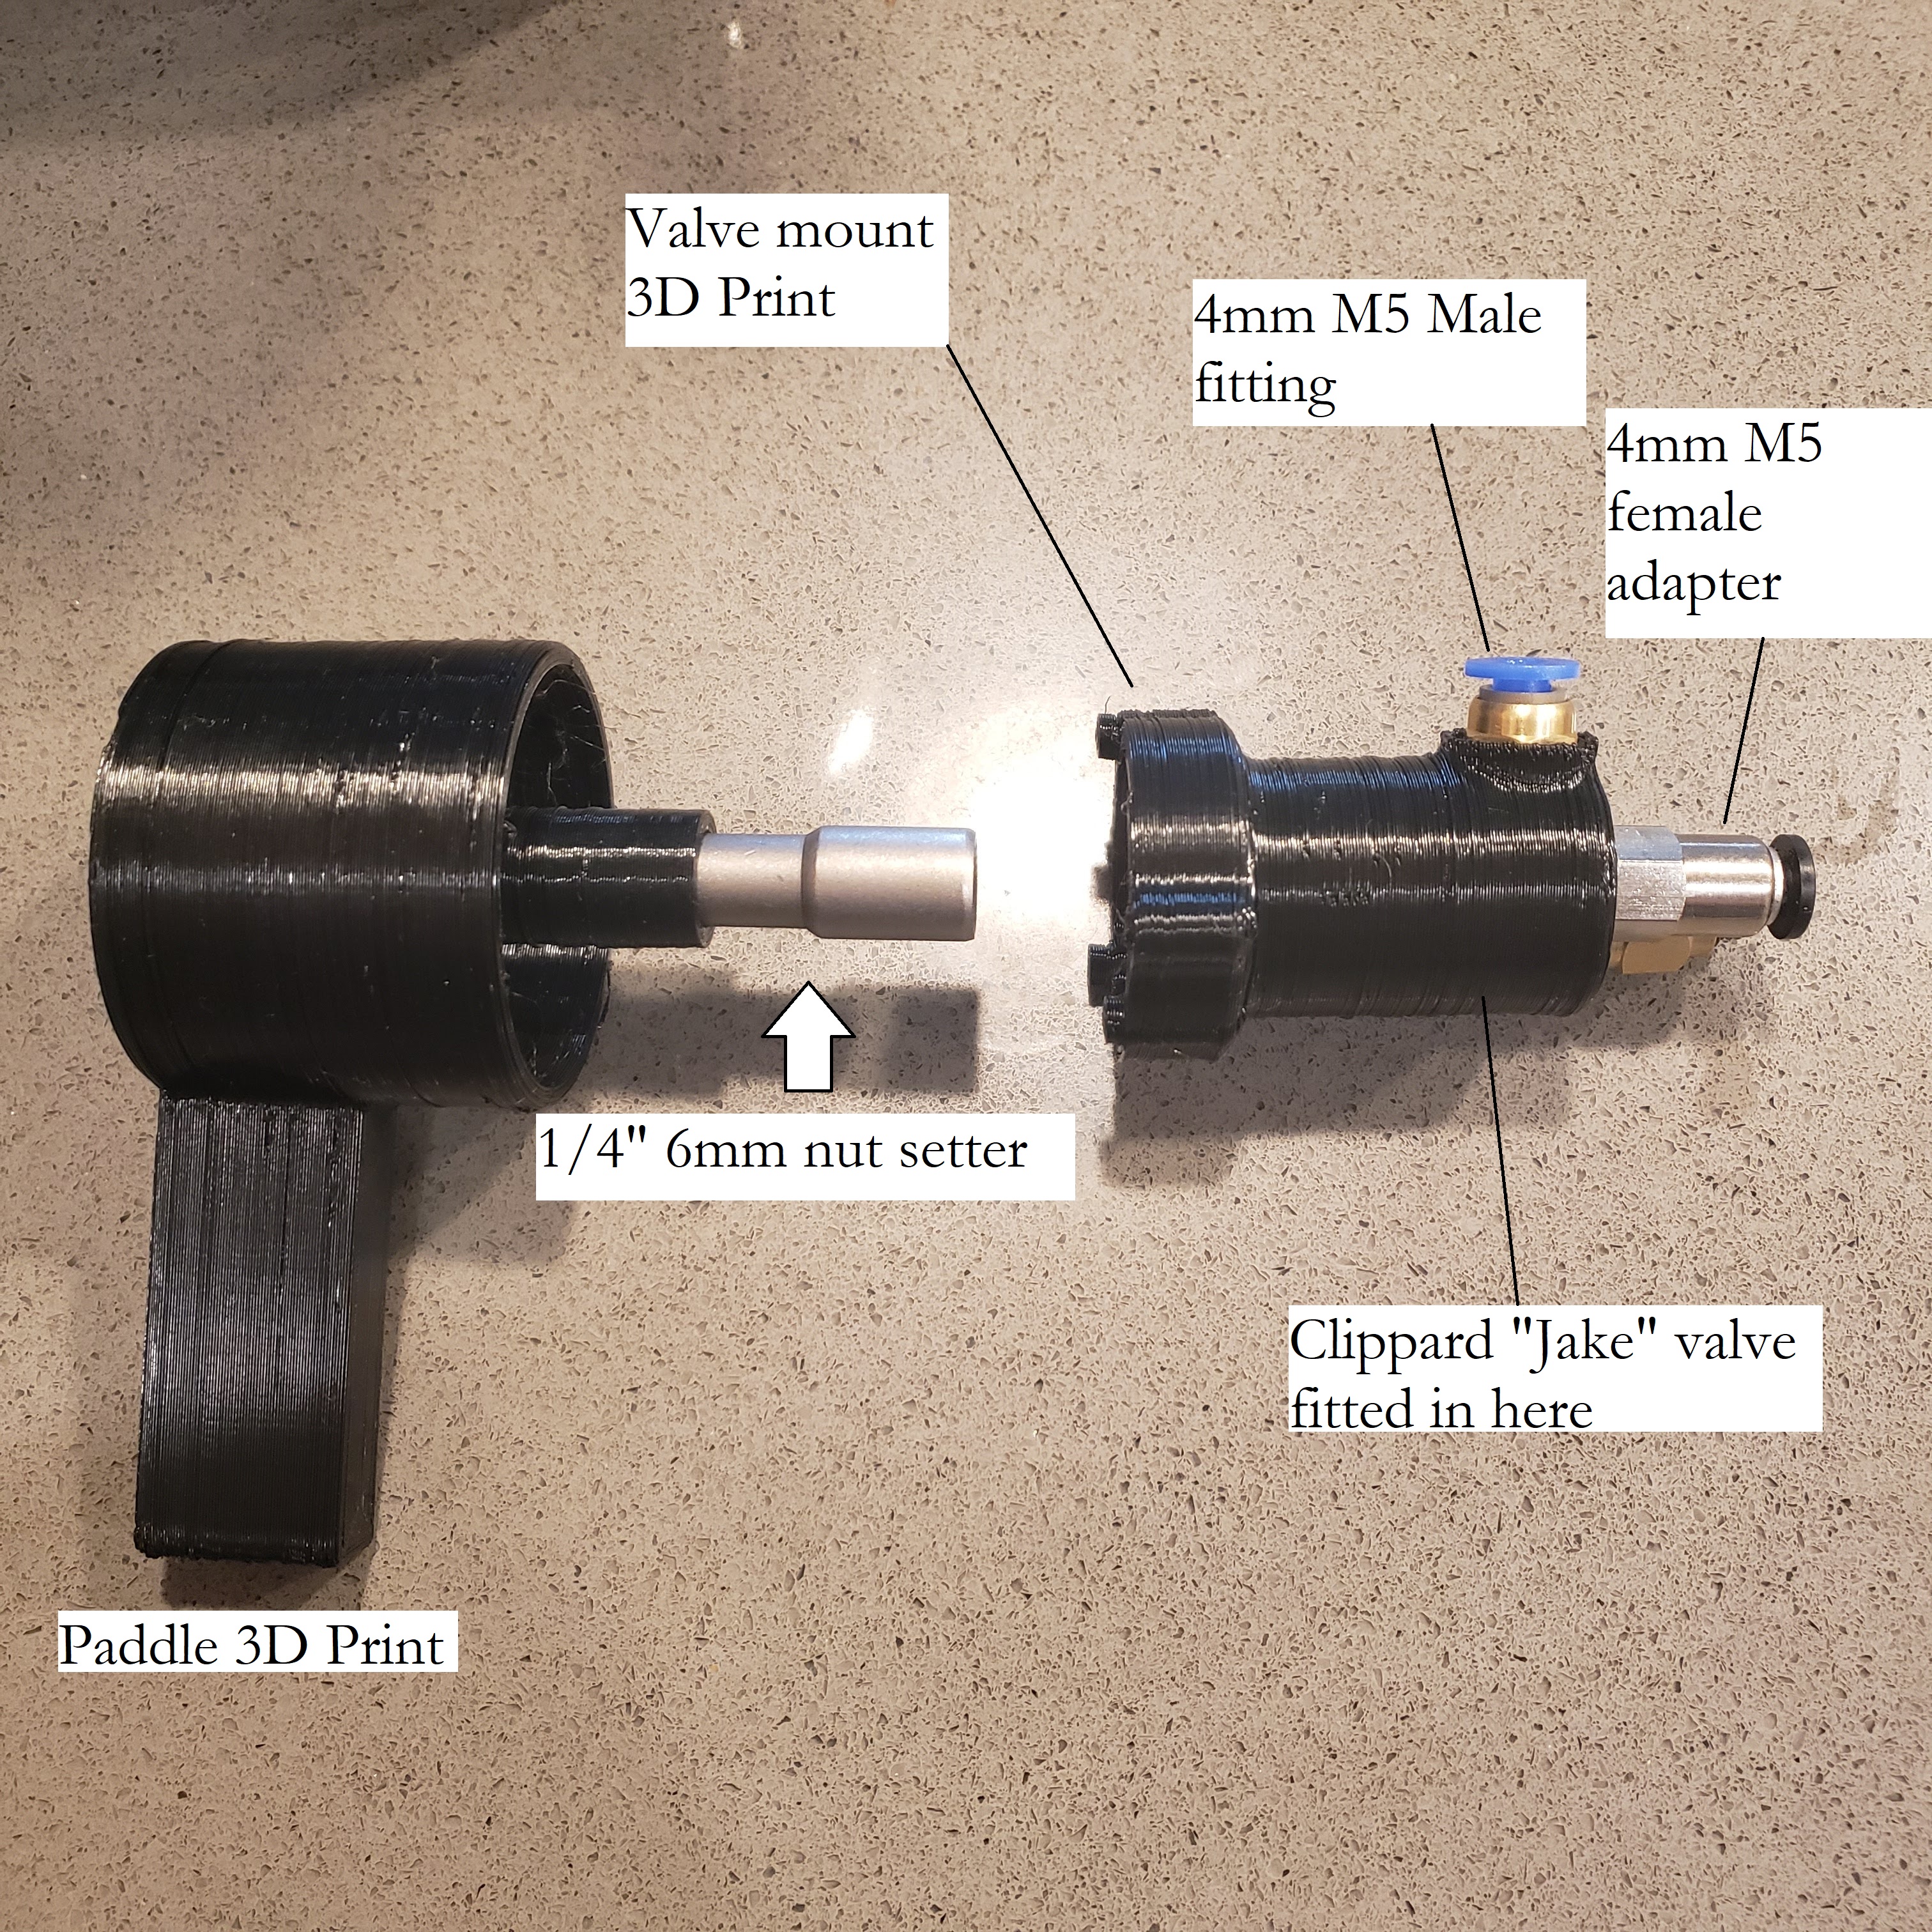
This installation is fairly easy, however it does require some purchased parts as well as two 3D-printed parts. I have designed the printed parts to fit with the specified retail parts exactly and I cannot guarantee other options will work, specifically the socket and the printed paddle.
DISCLAIMER
This is pretty cutting edge stuff and if you find something here doesn’t work for you—let me (anarcho) know on EAF! This is collaborative effort and improvements will happen over time.
Commercial Parts
Sometimes amazon changes what these link actually direct to, make sure to double check before purchasing.
- Clippard M-MNV-1K Needle Valve, M5 Ports with Knurled Knob
- Push to Connect Fitting 4mm Tube OD x M5 Female Straight Adapter
- Push to Connect Fitting 4mm Tube OD x M5 Male Straight Adapter
- Utoolmart 1/4” Hex Shank 6mm Nut Setter Driver Drill Bit, 65mm Length
- Teflon Tape
3D Printed Parts
These parts need to printed in filaments with some degree of heat resistance. I have not had good luck with PLA but I have found PETG to be adequate, however ABS and other higher temp filaments are ideal. The mount design was made by Qporzk.
Installation
Removing Stock Knob and Valve
- Remove top cover of machine
- Remove hot water knob cover - note that the cover is not held on by screws, but must be pulled very hard to remove
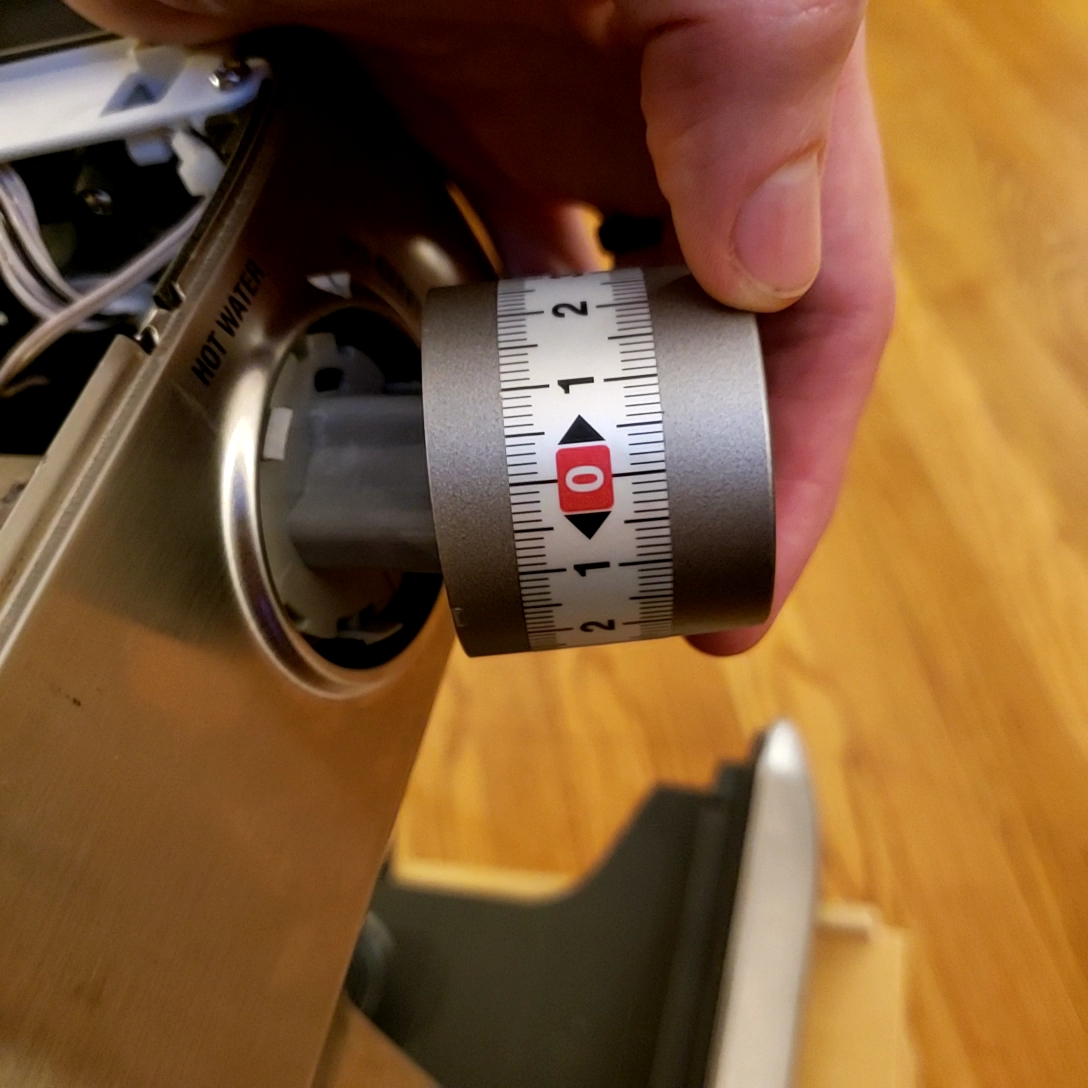
- Unscrew screw in center of water knob inner assembly
- Remove knob inner assembly (grey plastic post) by pulling
- Remove two screws holding valve to frame
- Remove two screws holding valve mount inside
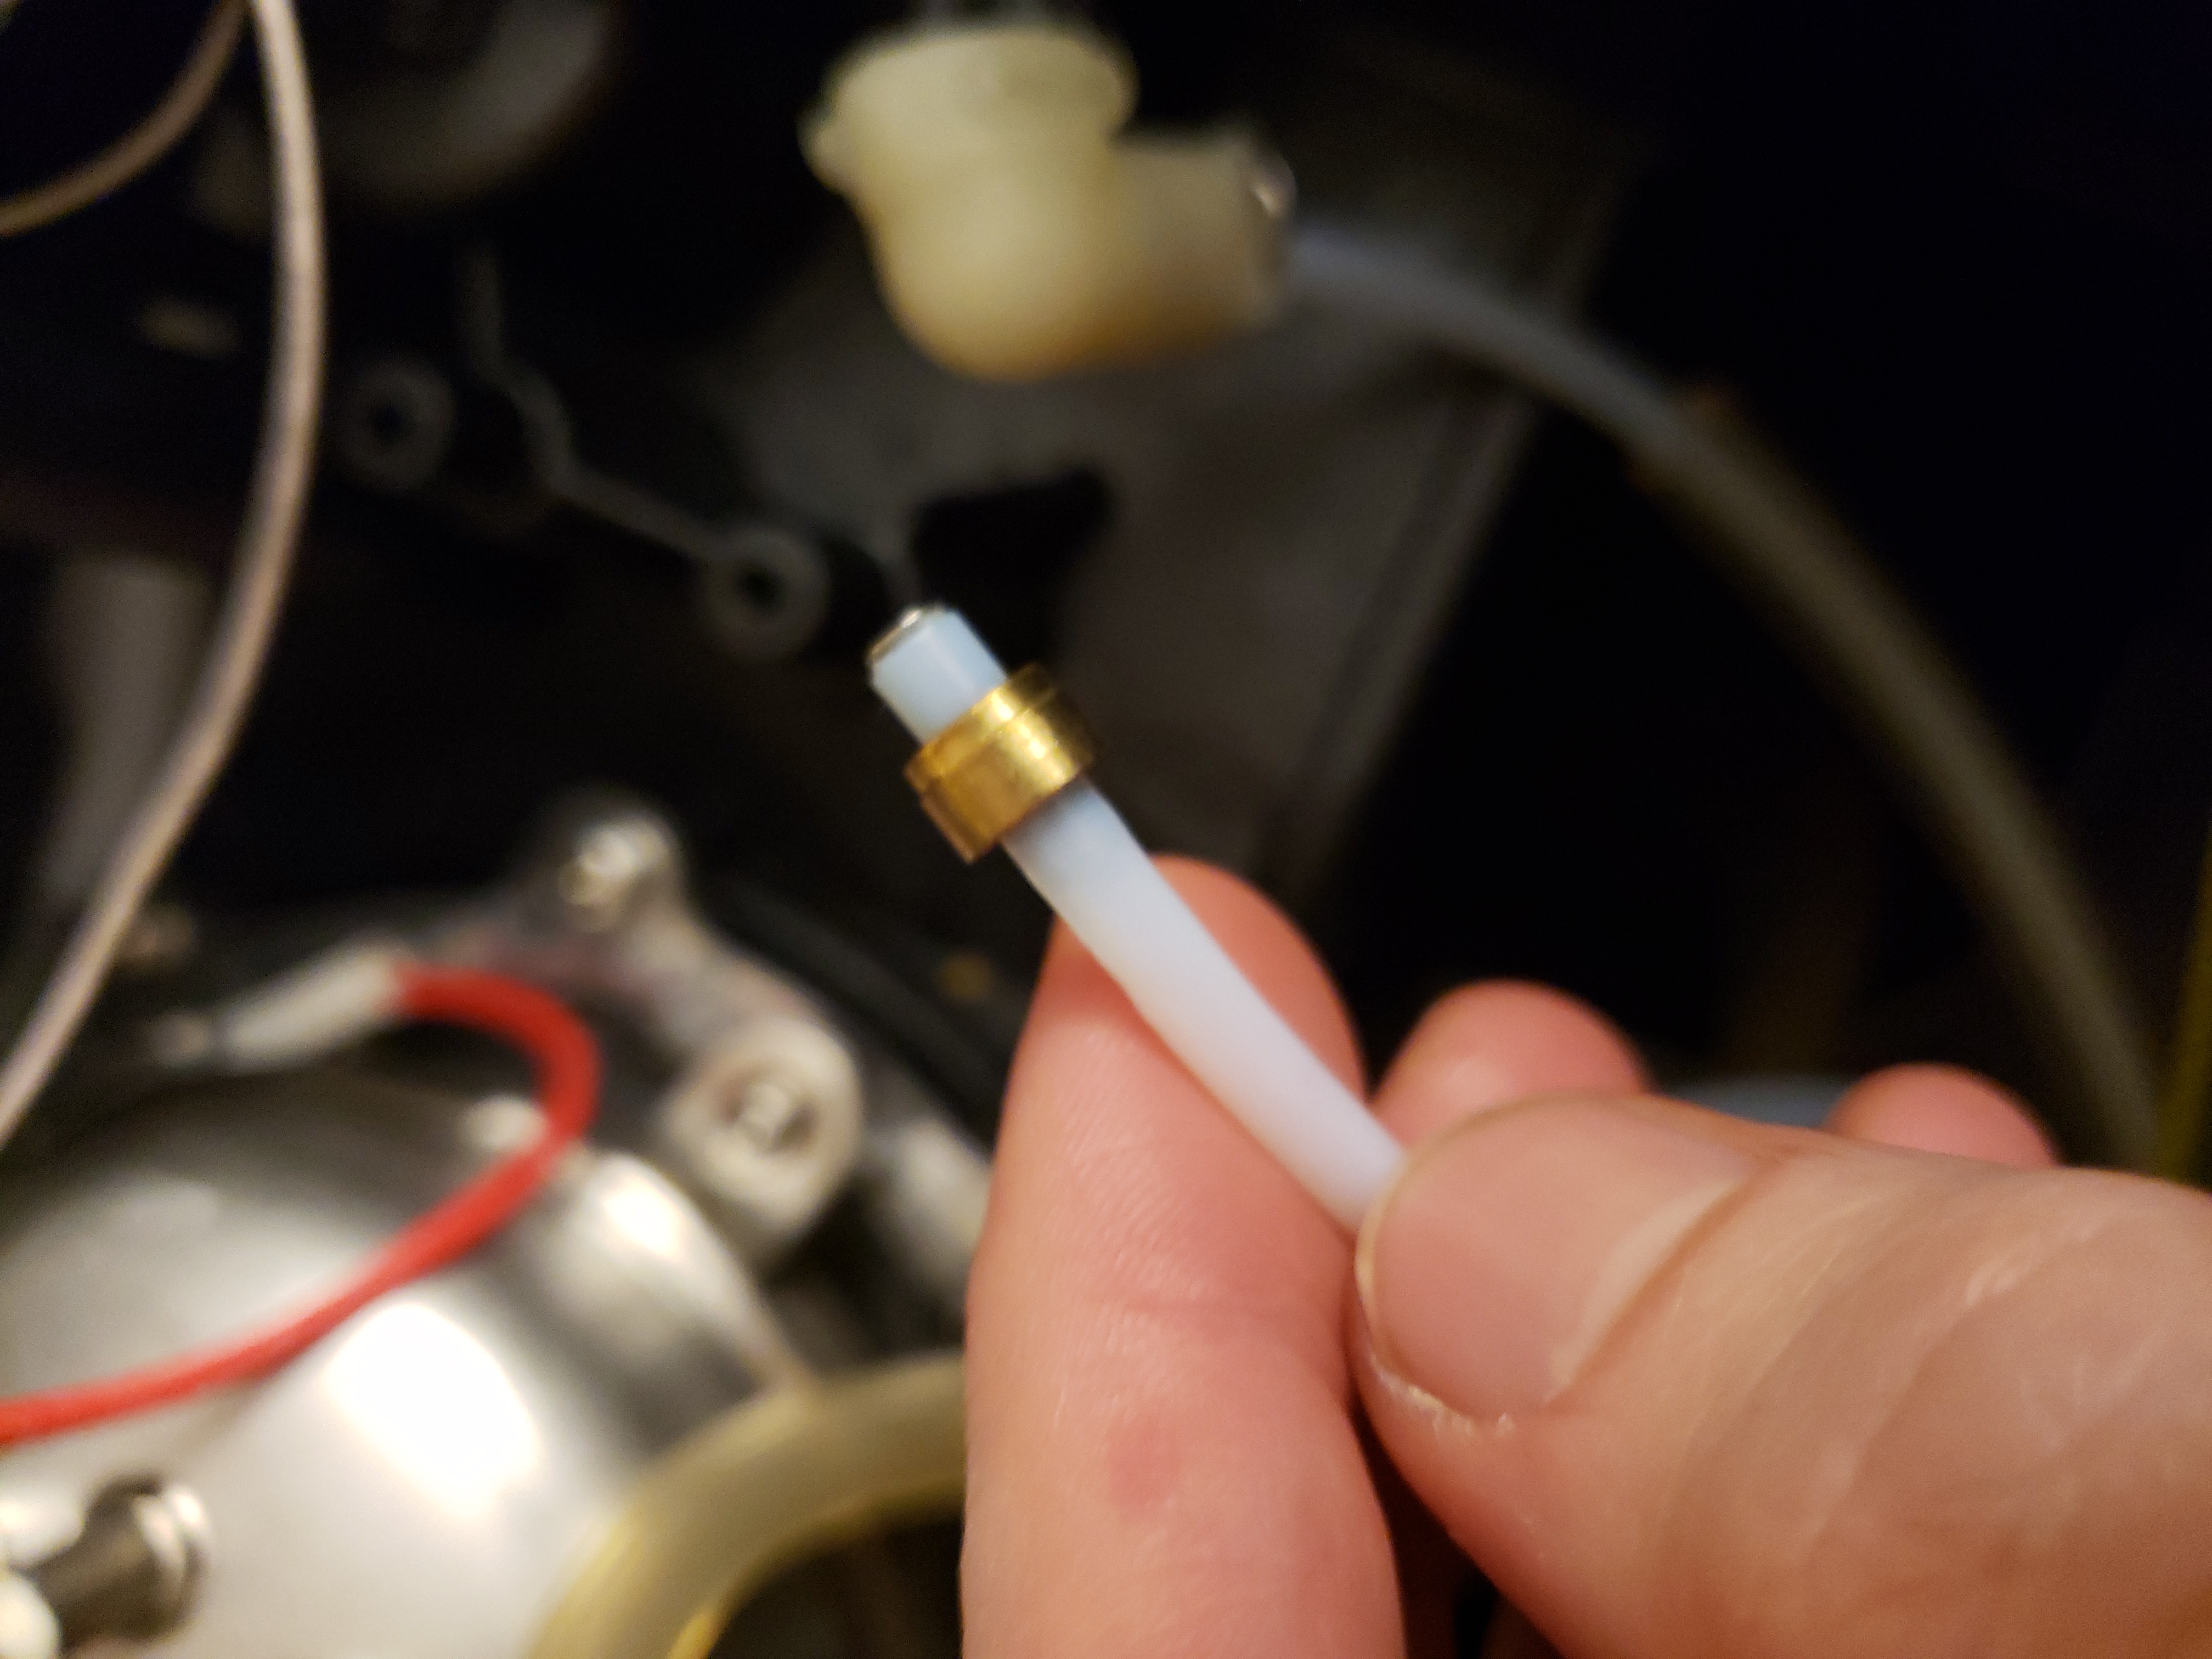
- Disconnect two tubes from valve and remove old valve
- Cut or pull out brass ferrule and sleeve from the tubes.
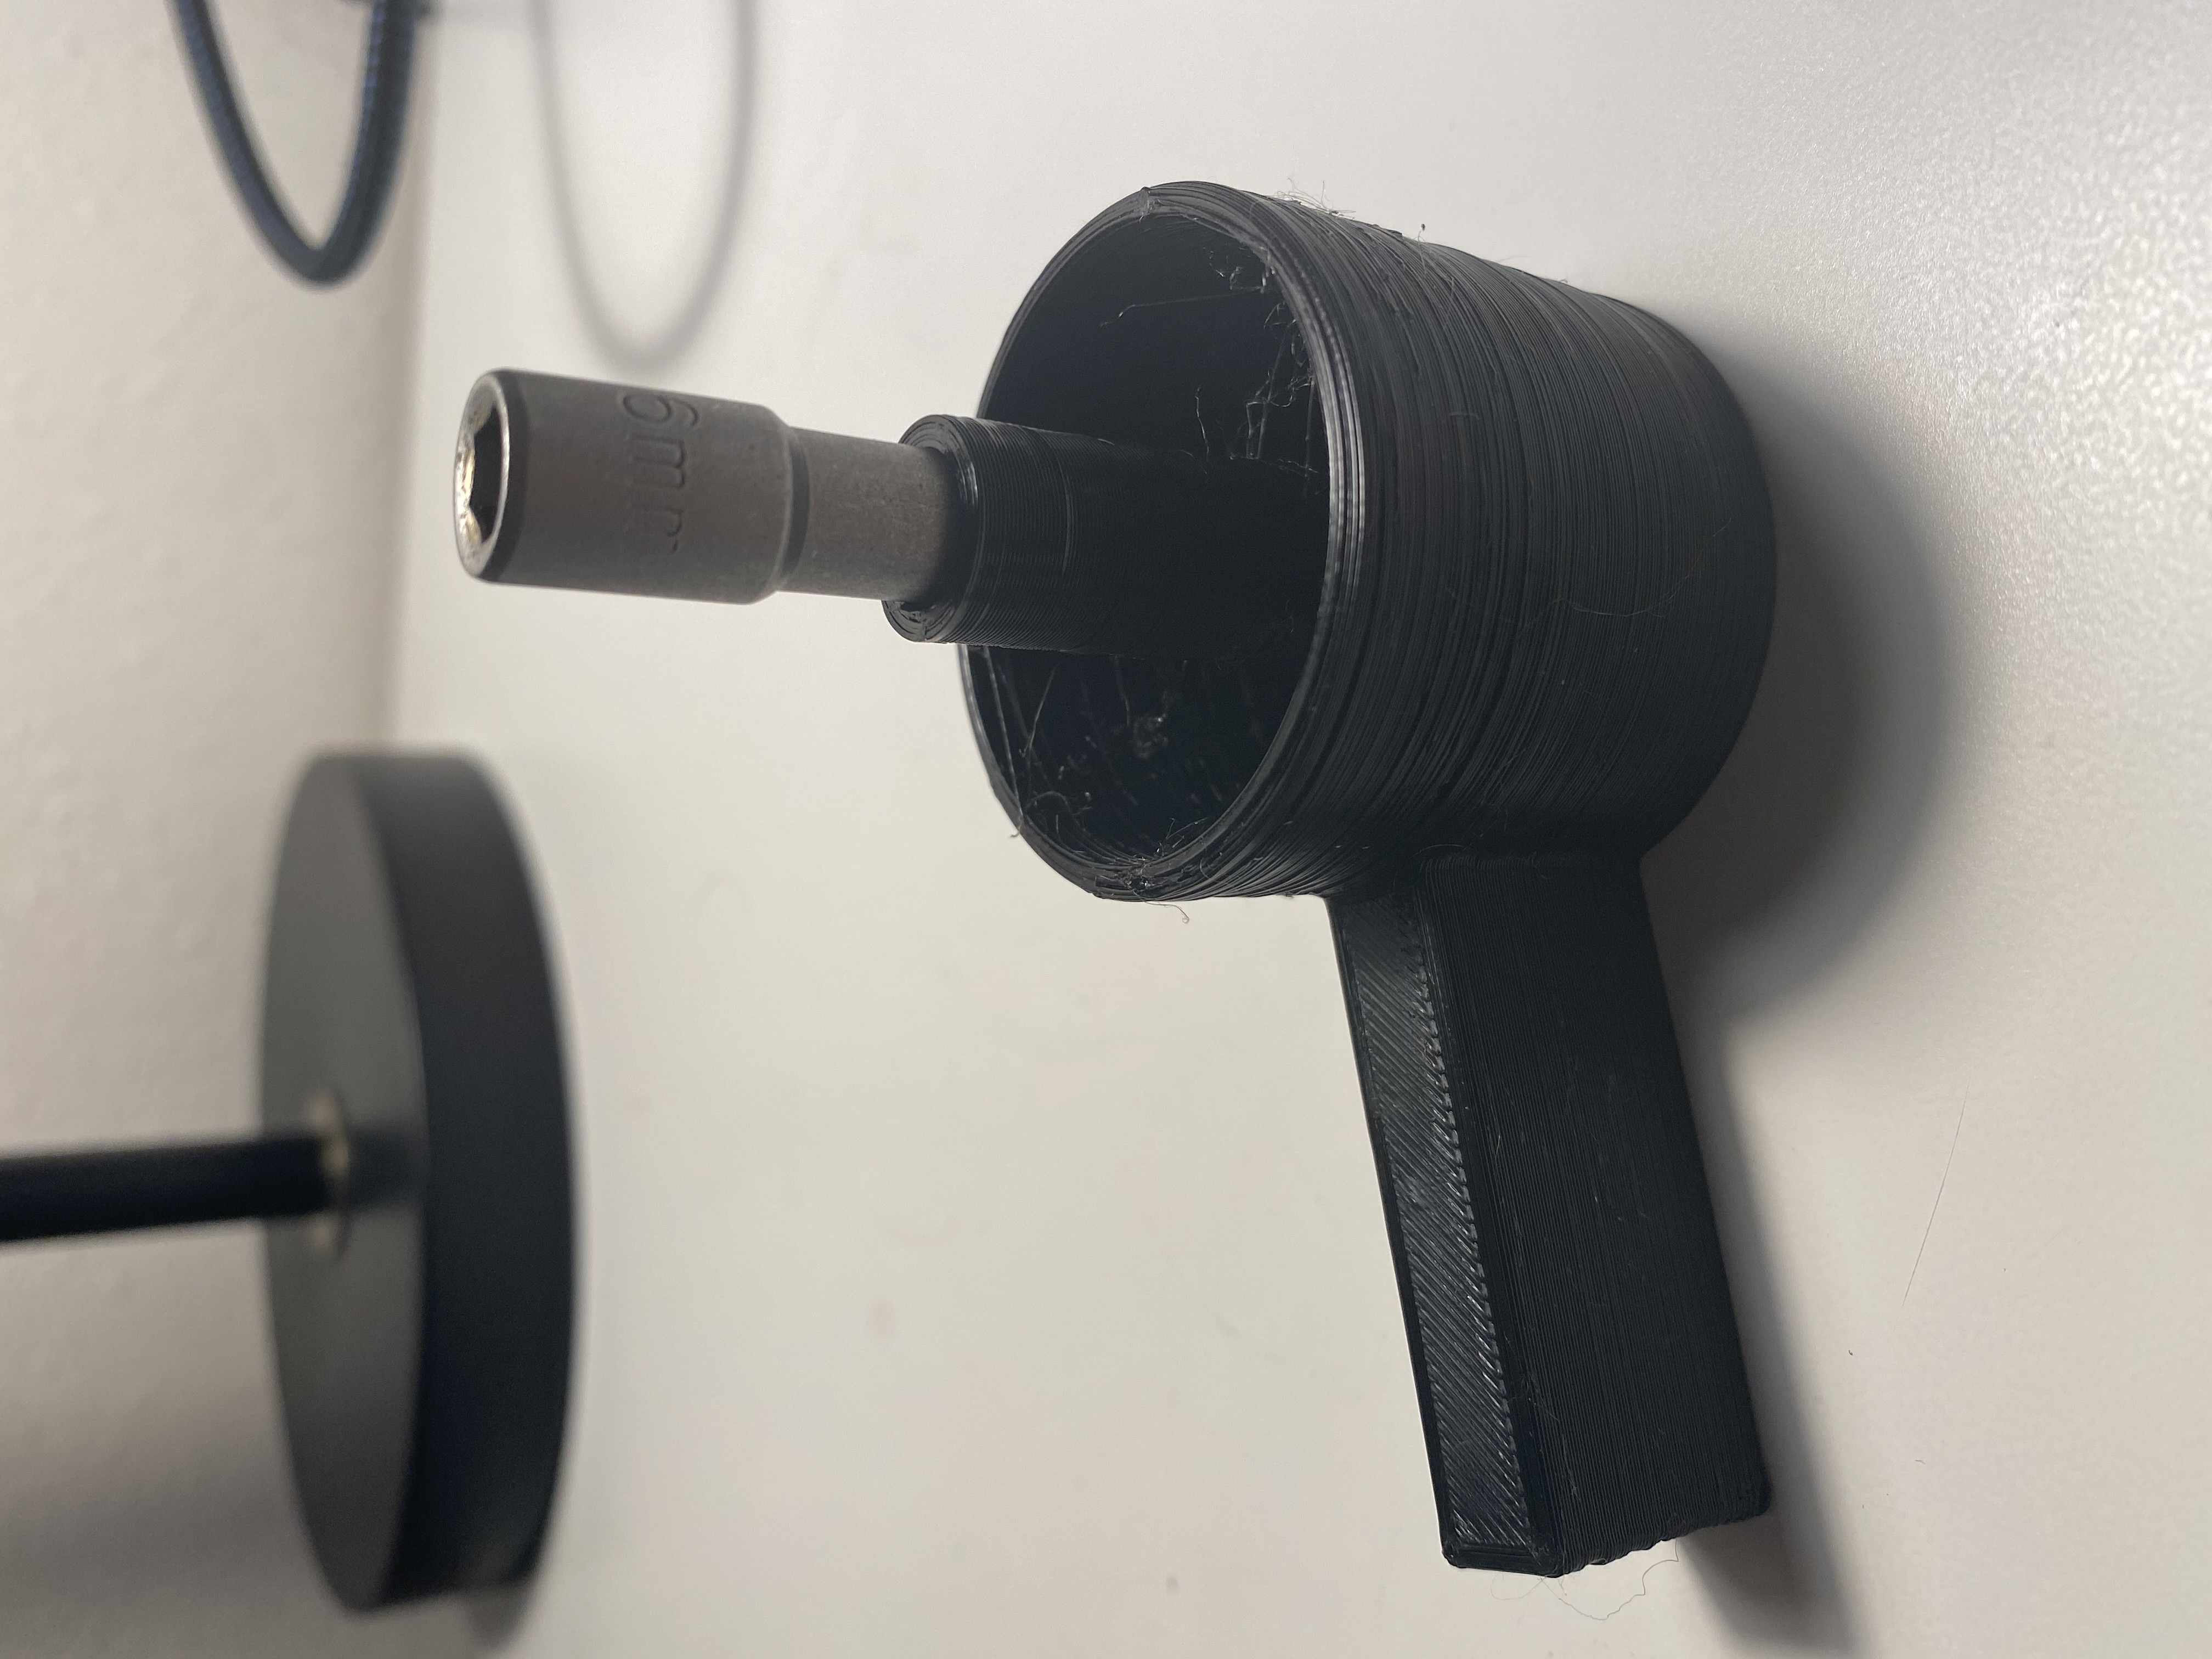
Paddle and Mount Assembly
The paddle can be assembled by hammering the nut settler into shaft, if your printer has tolerances making this difficult, heating the nut settler can help it fit.
The needle valve and mount can be assembled by first applying teflon tape to the male threads of the needle valve and the push connector. Then the Clippard valve can be pushed into the mount and the connectors can be screwed on.
Attaching the Mount and Final Assembly
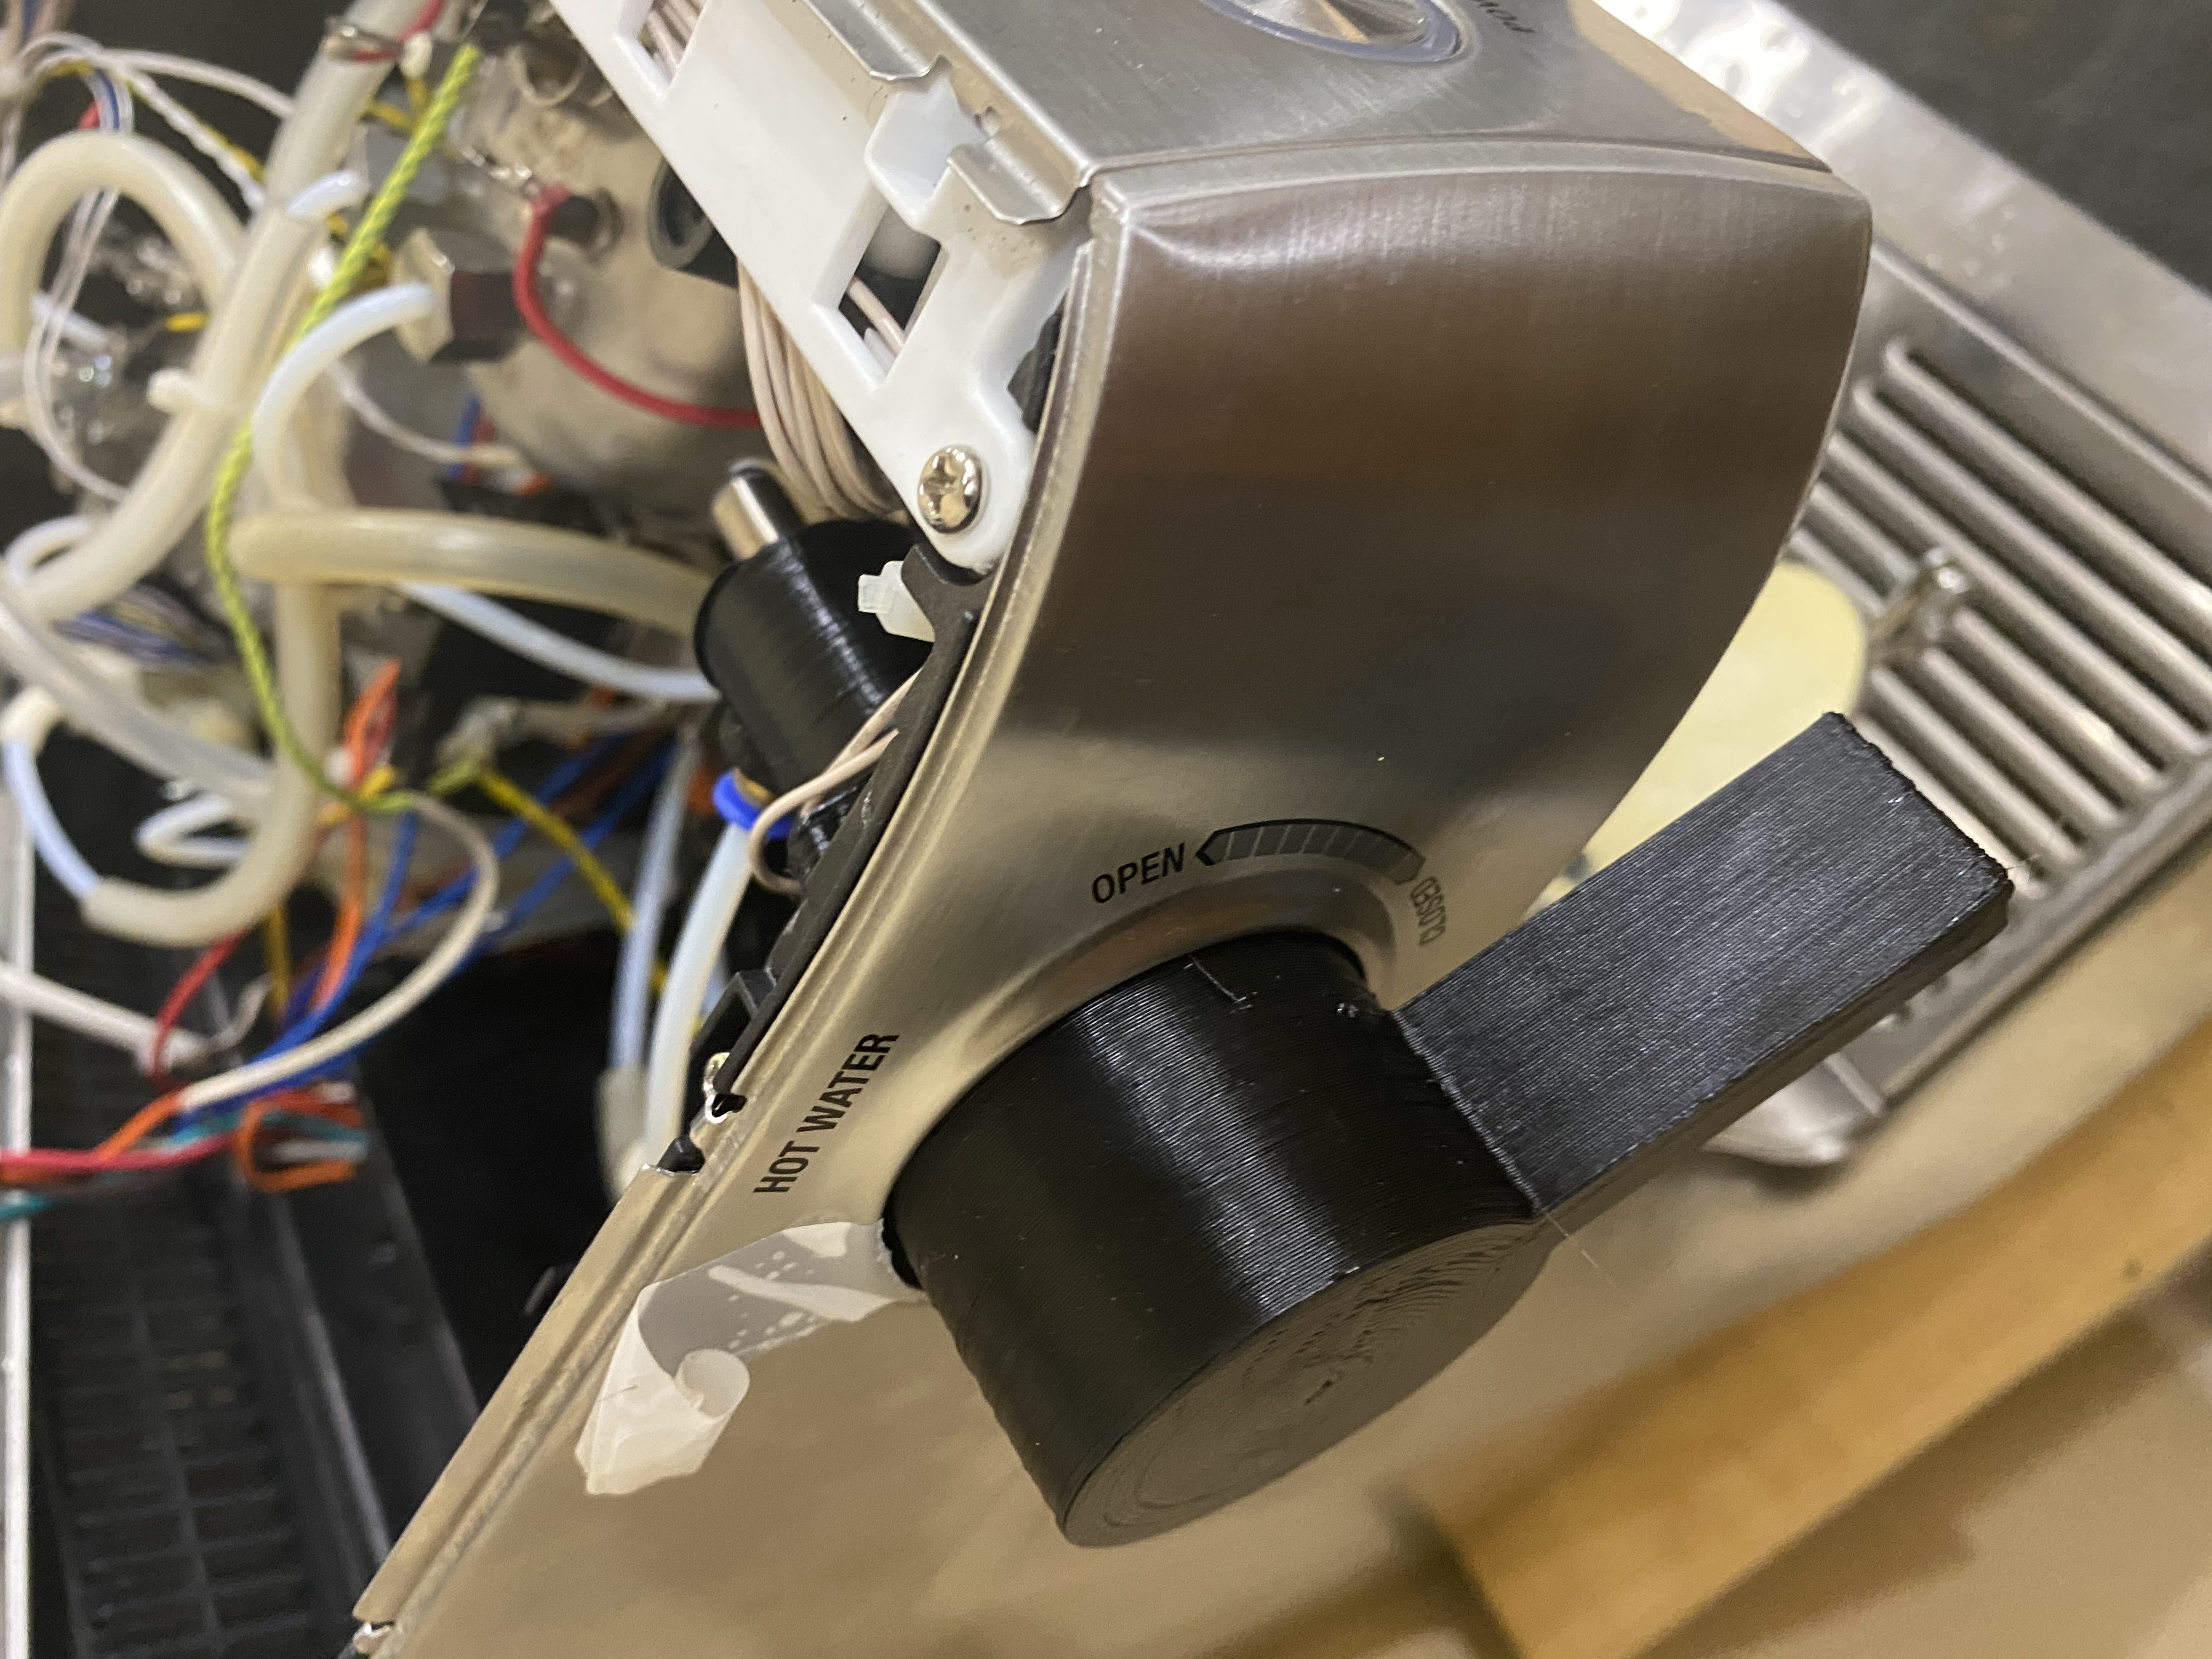
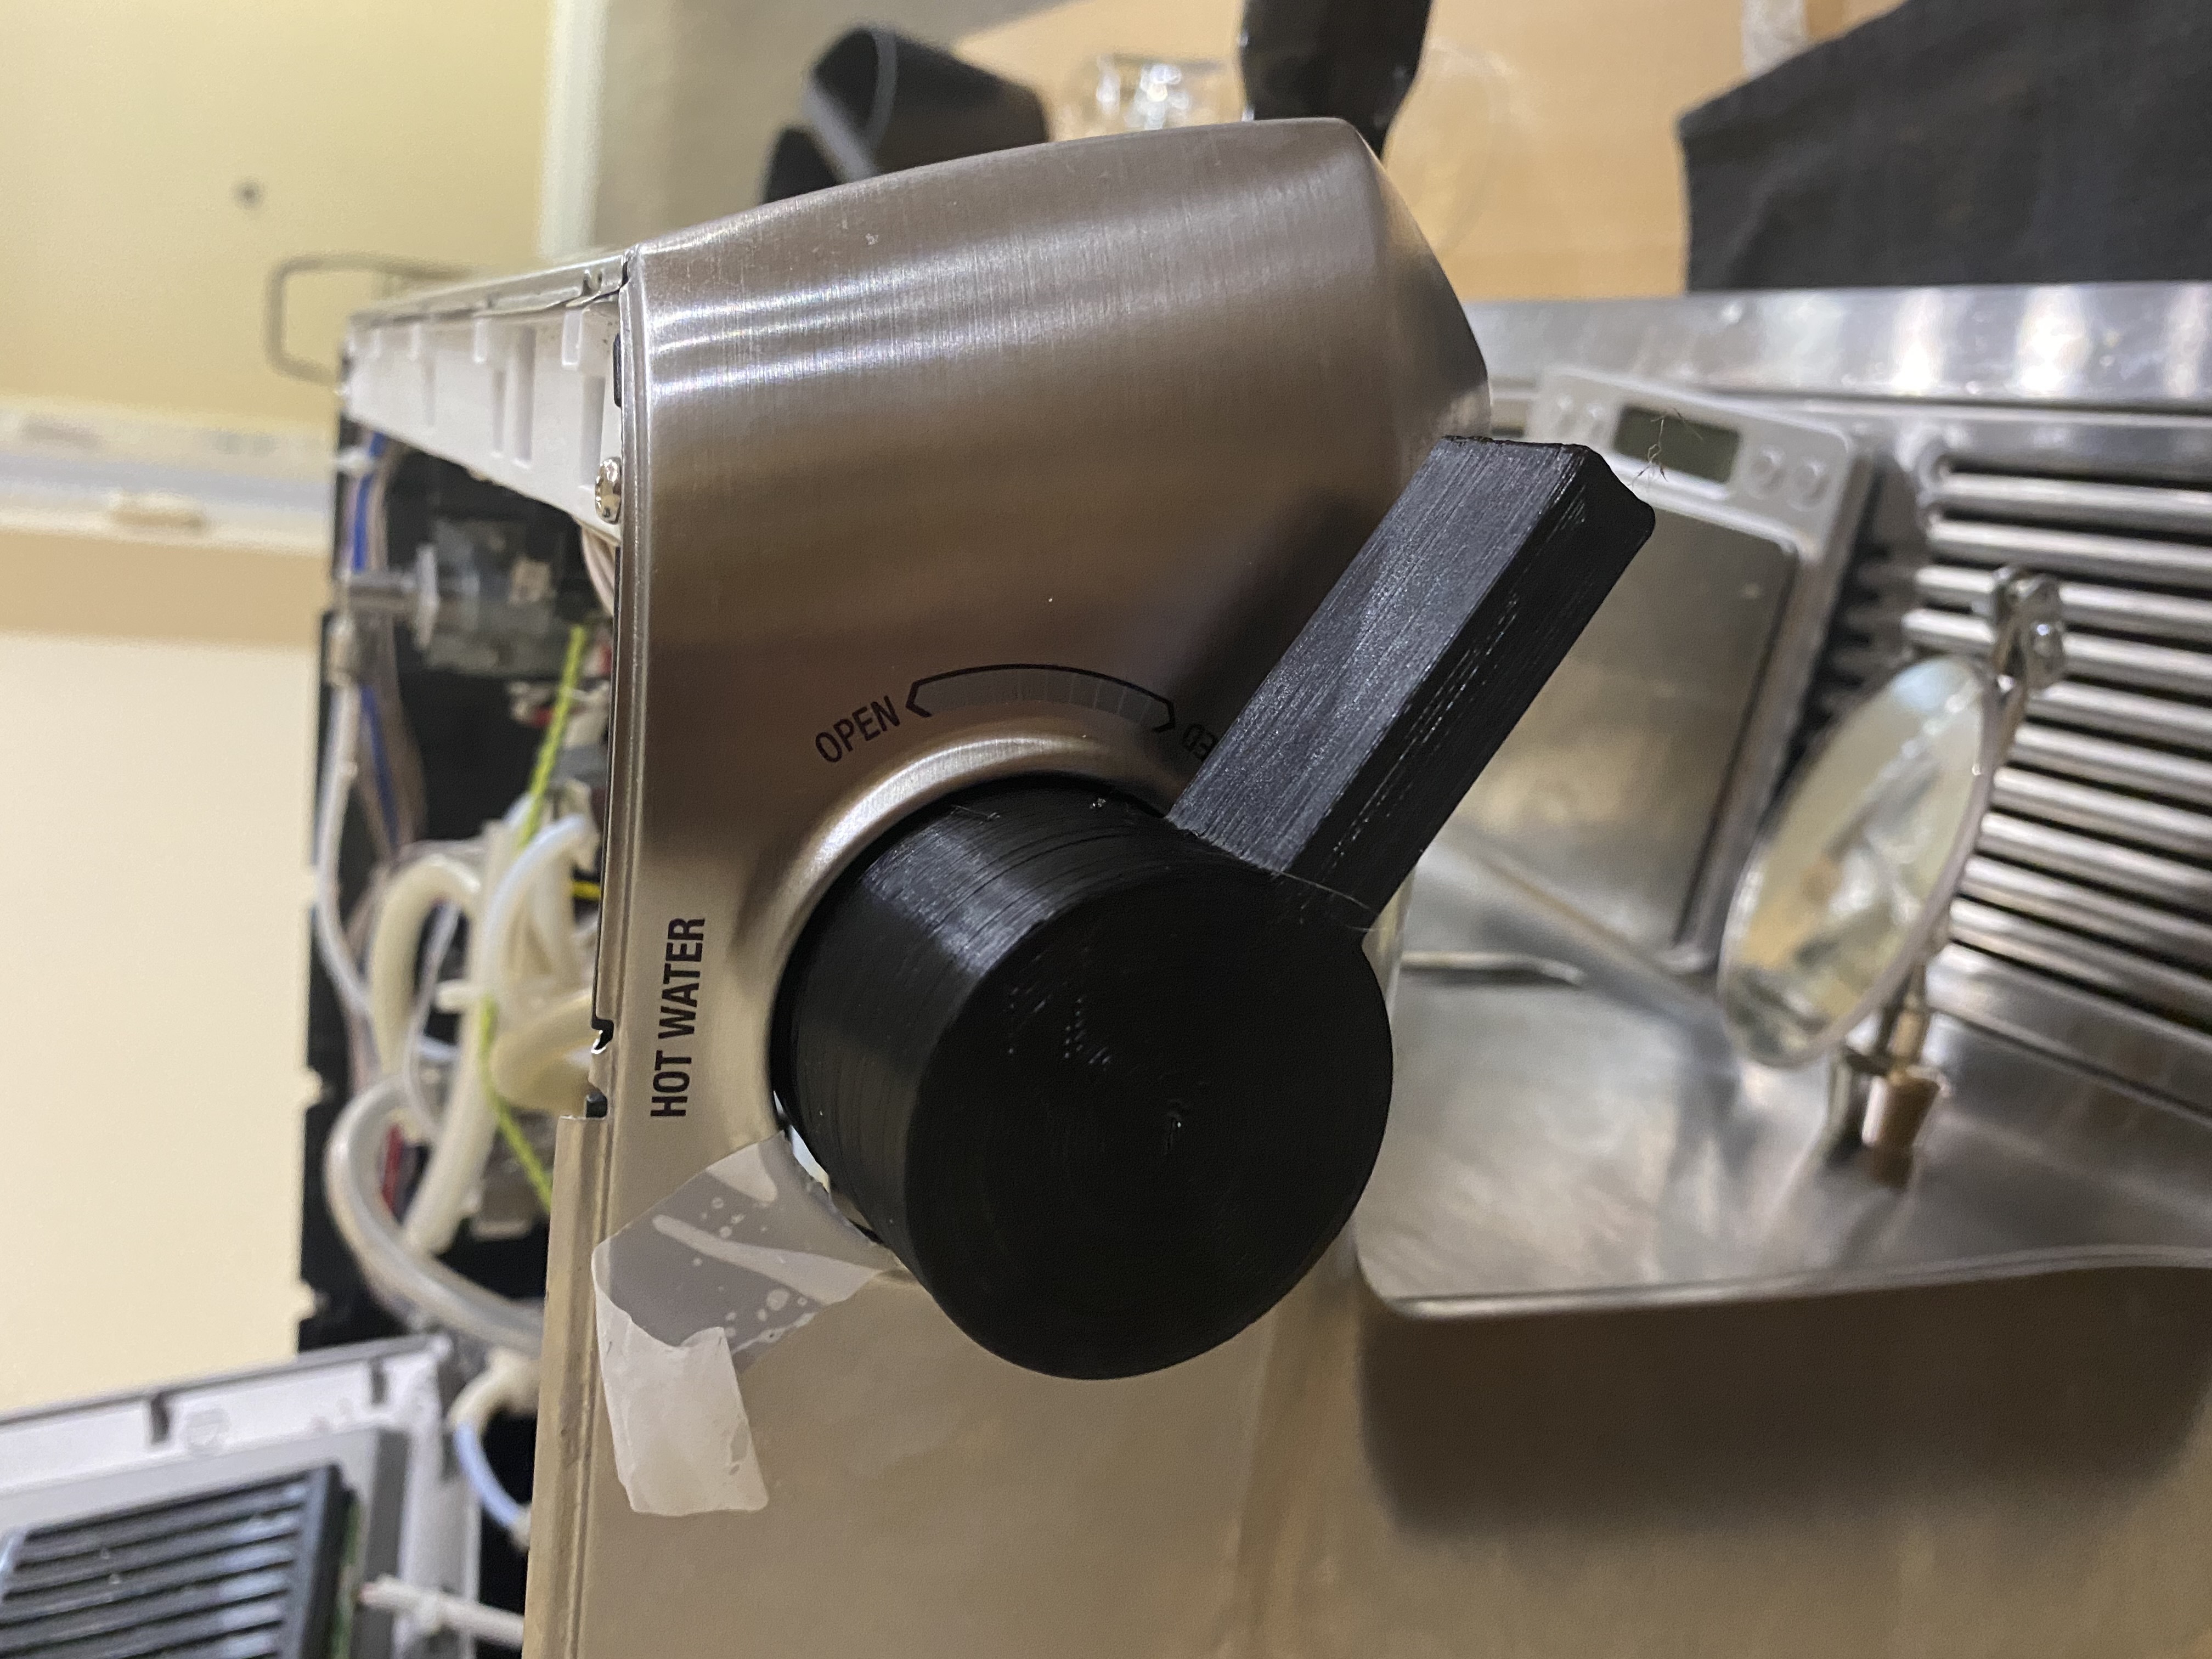
- Attach the new mount by screwing it in through the wall as shown below.

-
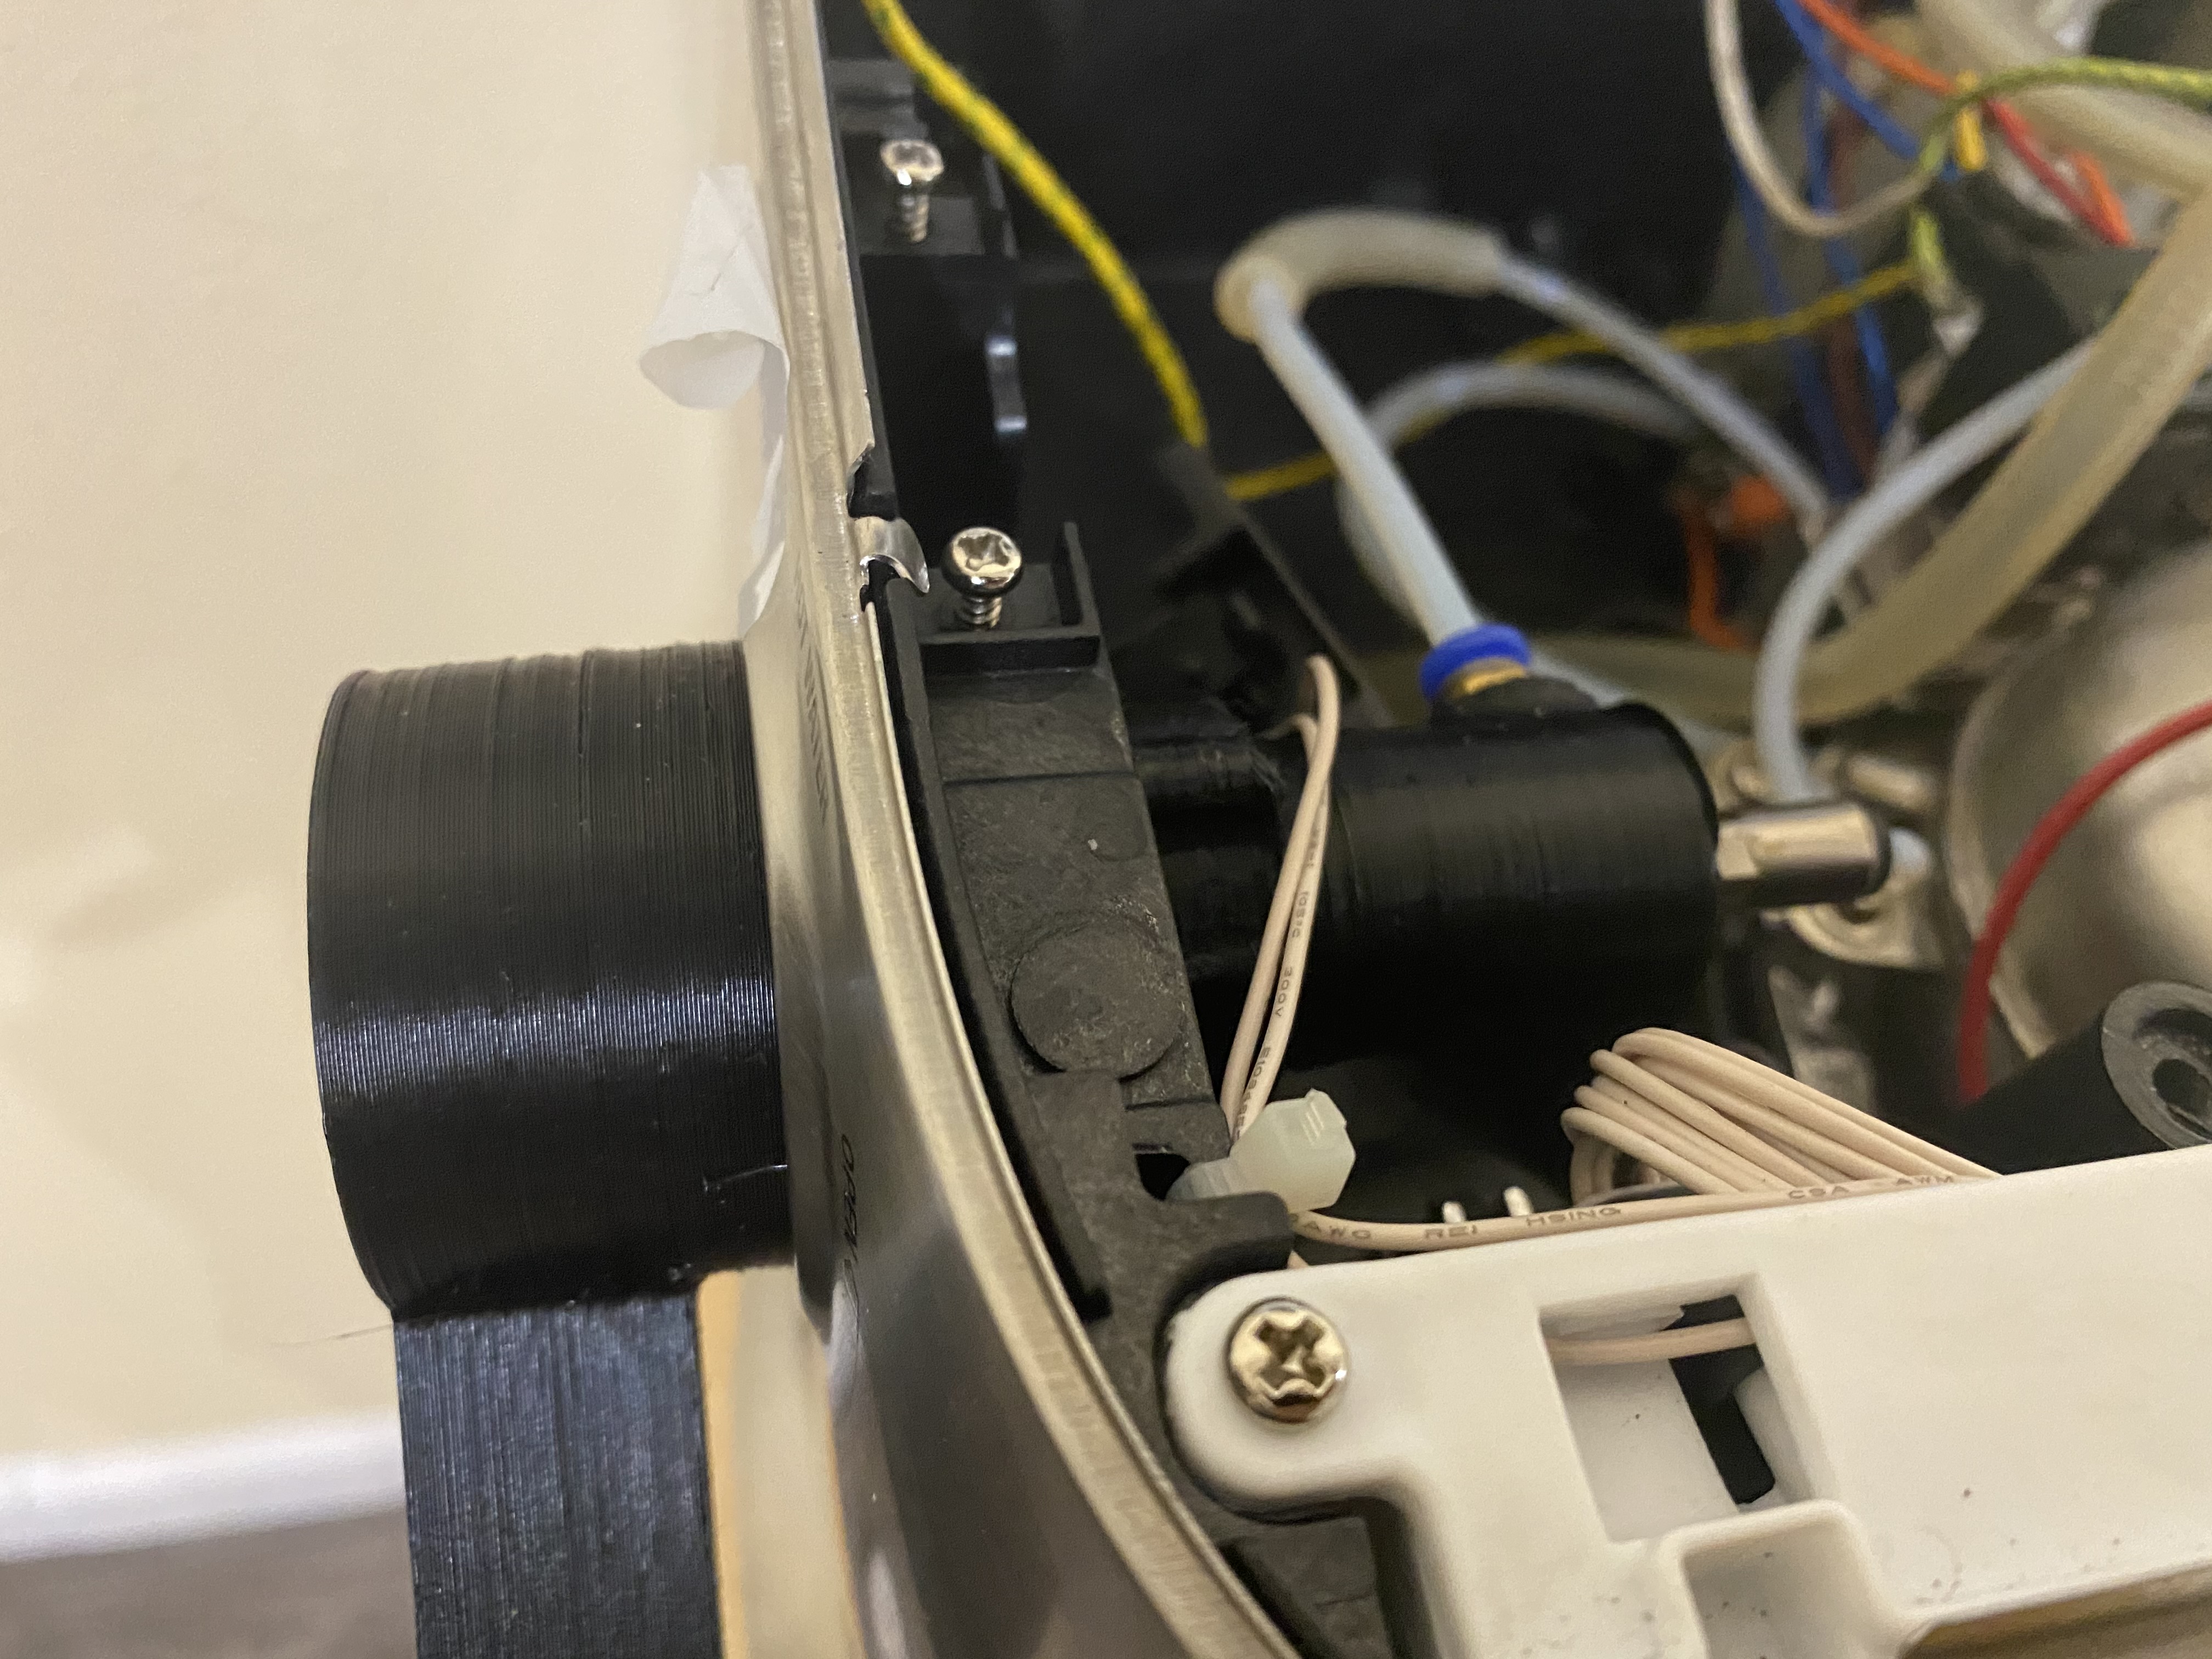
Attach tubes by pushing them into the new quick connectors.
-
Slide in the new paddle and make sure the Clippard valve is seated in the socket.
- I prefer the valve to be closed at the position shown below. This can be set by closing the valve, removing your paddle and resetting it in at the correct position.
- Reassemble the machine and use! I have found the paddle can feel stiff at the start but over time it will smoothen.
Some more images:
Credits and Acknowledgments
This project has absolutely been a collaborative effort, built up on the work of various members on HB such as Pcrusell50, Qporzk, Jake_G and work by various members of the Espresso Aficionados discord.