Breville Infuser Reversible Dimmer Mod for Flow Control
Tools and materials required
- Phillips head screwdriver
- Wire cutter
- Wire stripper and crimp tool
- Male and Female Spade connectors - size blue/16-14awg, preferably insulated
- Extra wire, preferably 14awg
- Something to splice the dimmer to extra wire - I prefer wago connectors for ease of use, especially when I had to quickly swap out different dimmers, but you can use whatever works
- Needle nose pliers
- Something to insulate your wire connections such as heat shrink or electrical tape
- Light dimmer such as this
- Optional: Small cable ties to tidy up your work
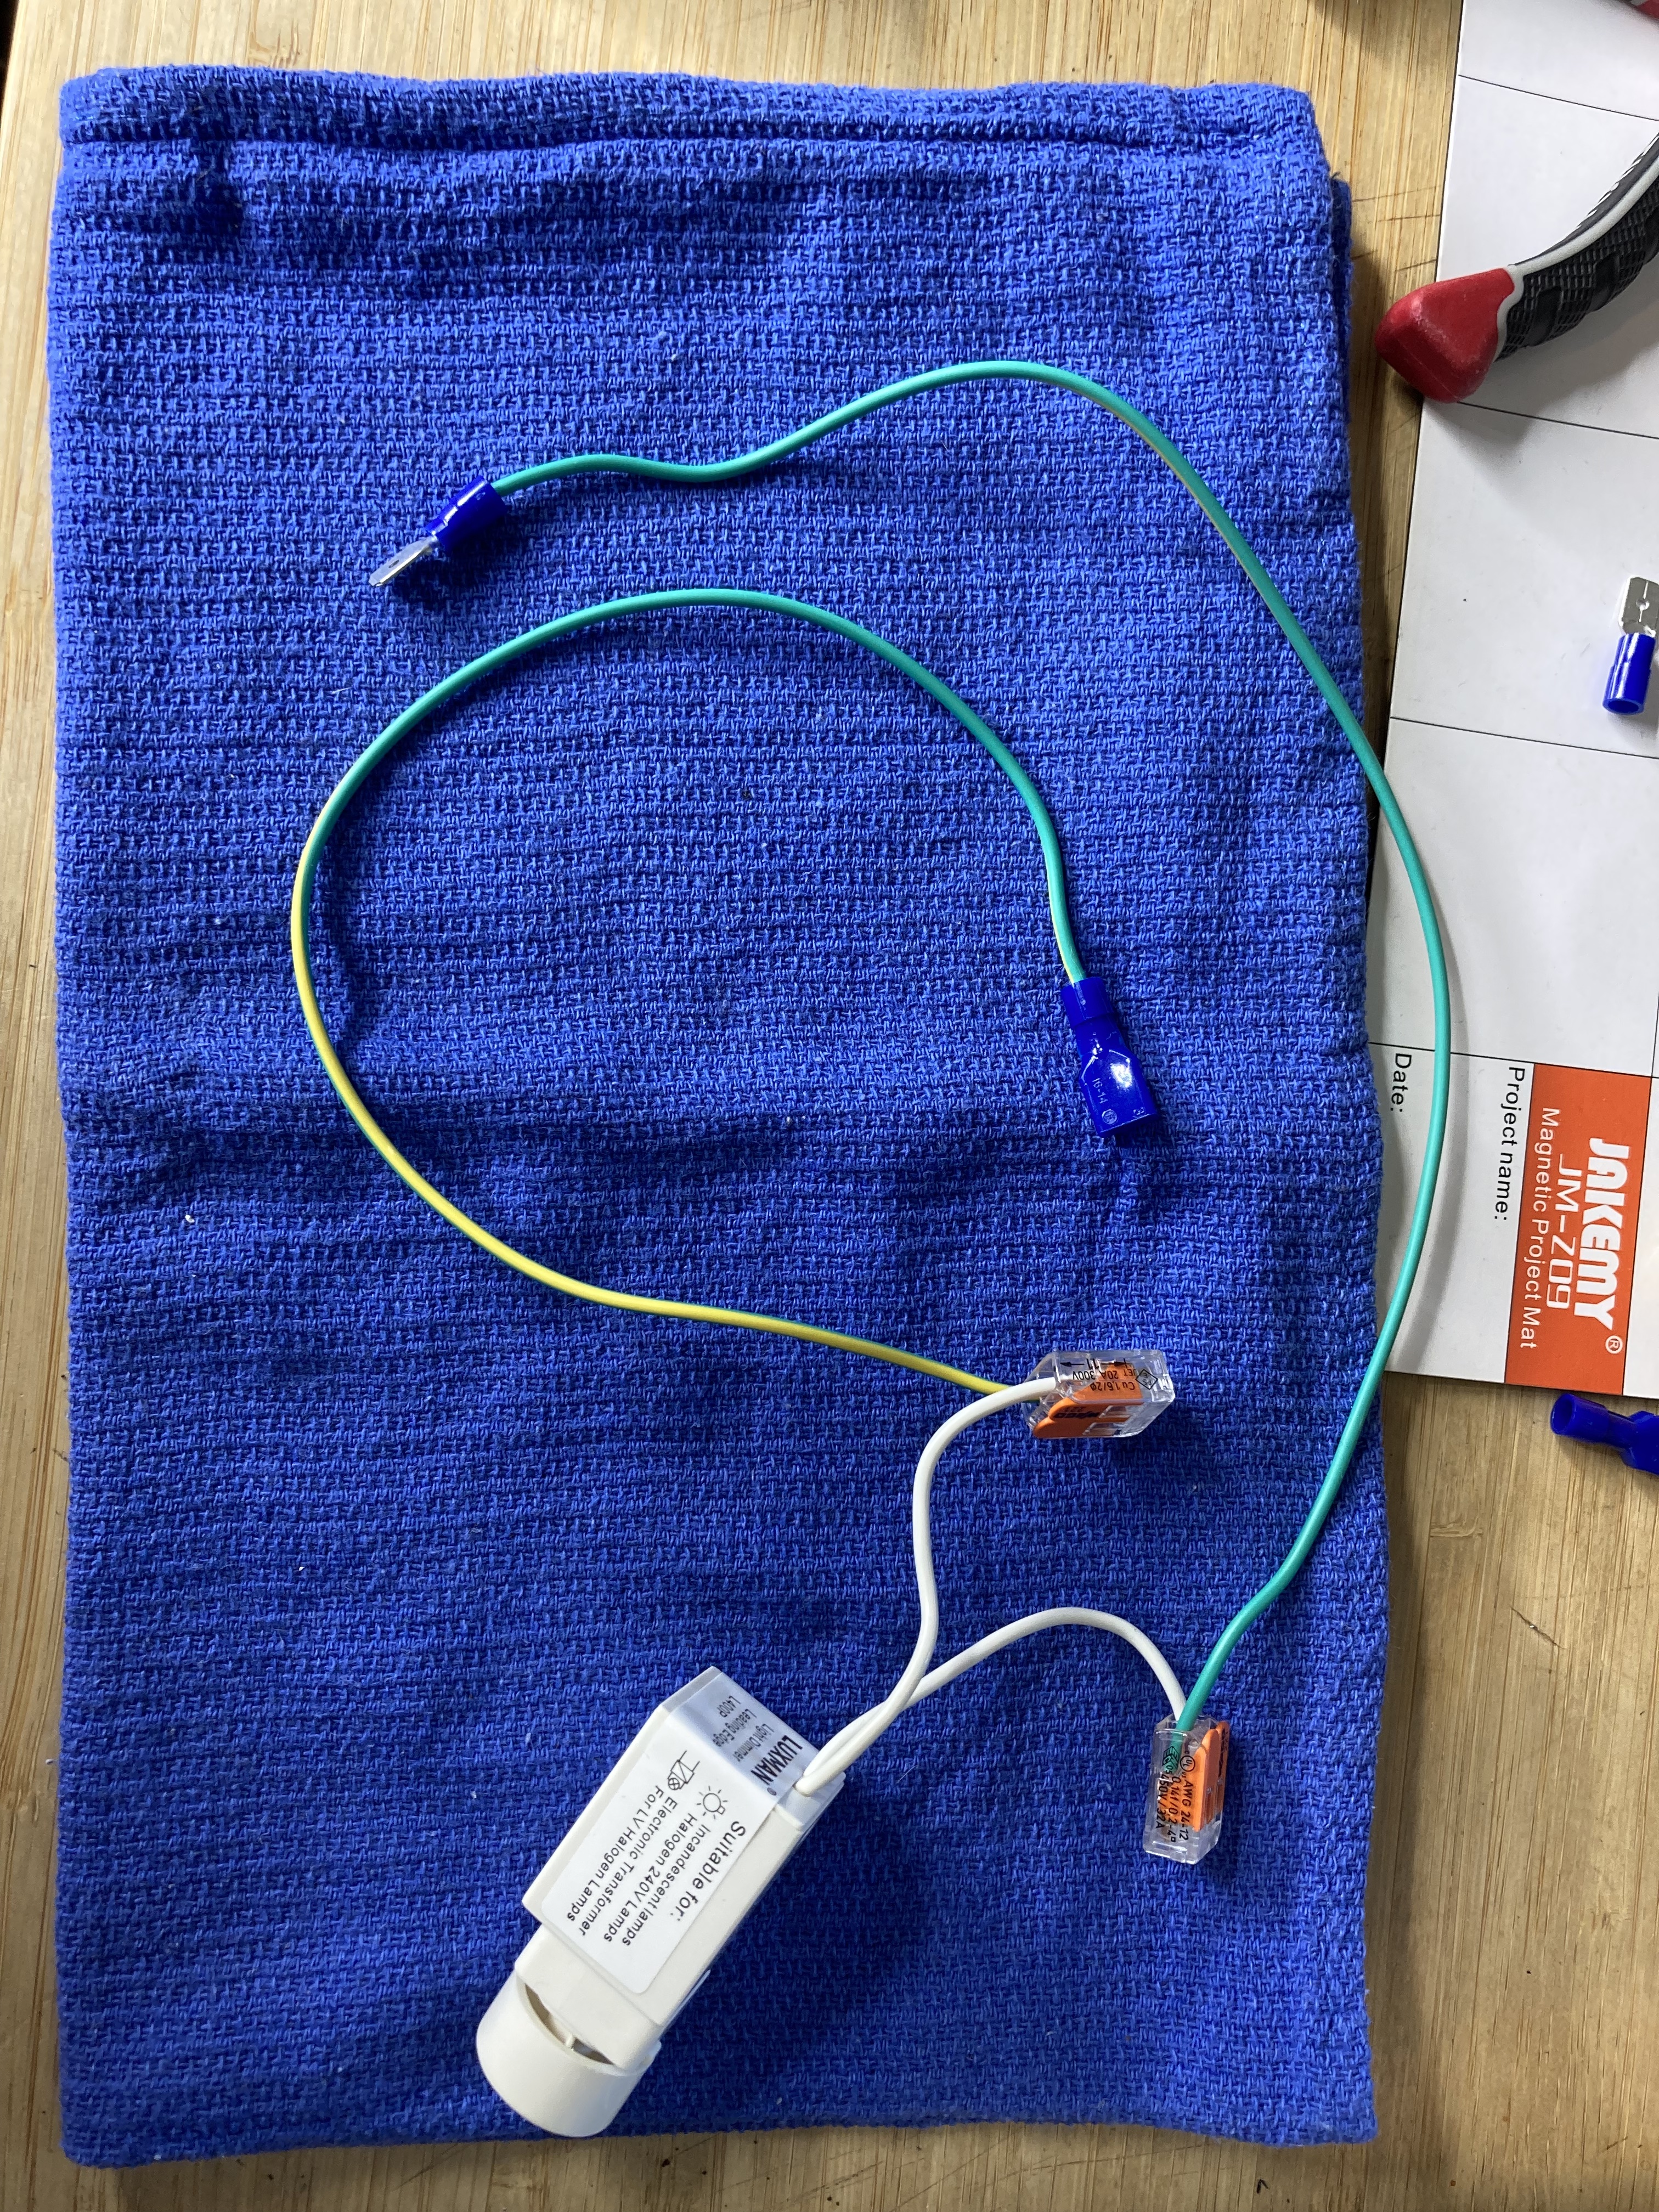
Splicing spade connectors onto your dimmer
Cut two lengths of wire and splice each length to either end of your dimmer. Make sure the wires are long enough for your dimmer to reach wherever it is you’d like to mount it. On the opposite ends, crimp a female spade connector to one wire, and a male spade connector to the other.
Getting inside the Infuser
MAKE SURE YOUR MACHINE IS TURNED OFF AND UNPLUGGED FROM THE WALL PRIOR TO ATTEMPTING THIS. Do not attempt to work on a machine that is still plugged into the wall socket, even if the switch is turned off.
There are screws in three locations that need to be removed prior to removing the top and back panels of the machine 1) At the front near the group head 2) At the back 3) At the back underside of the machine. Don’t worry about keeping track of what screw goes where, they are all the same size and length.
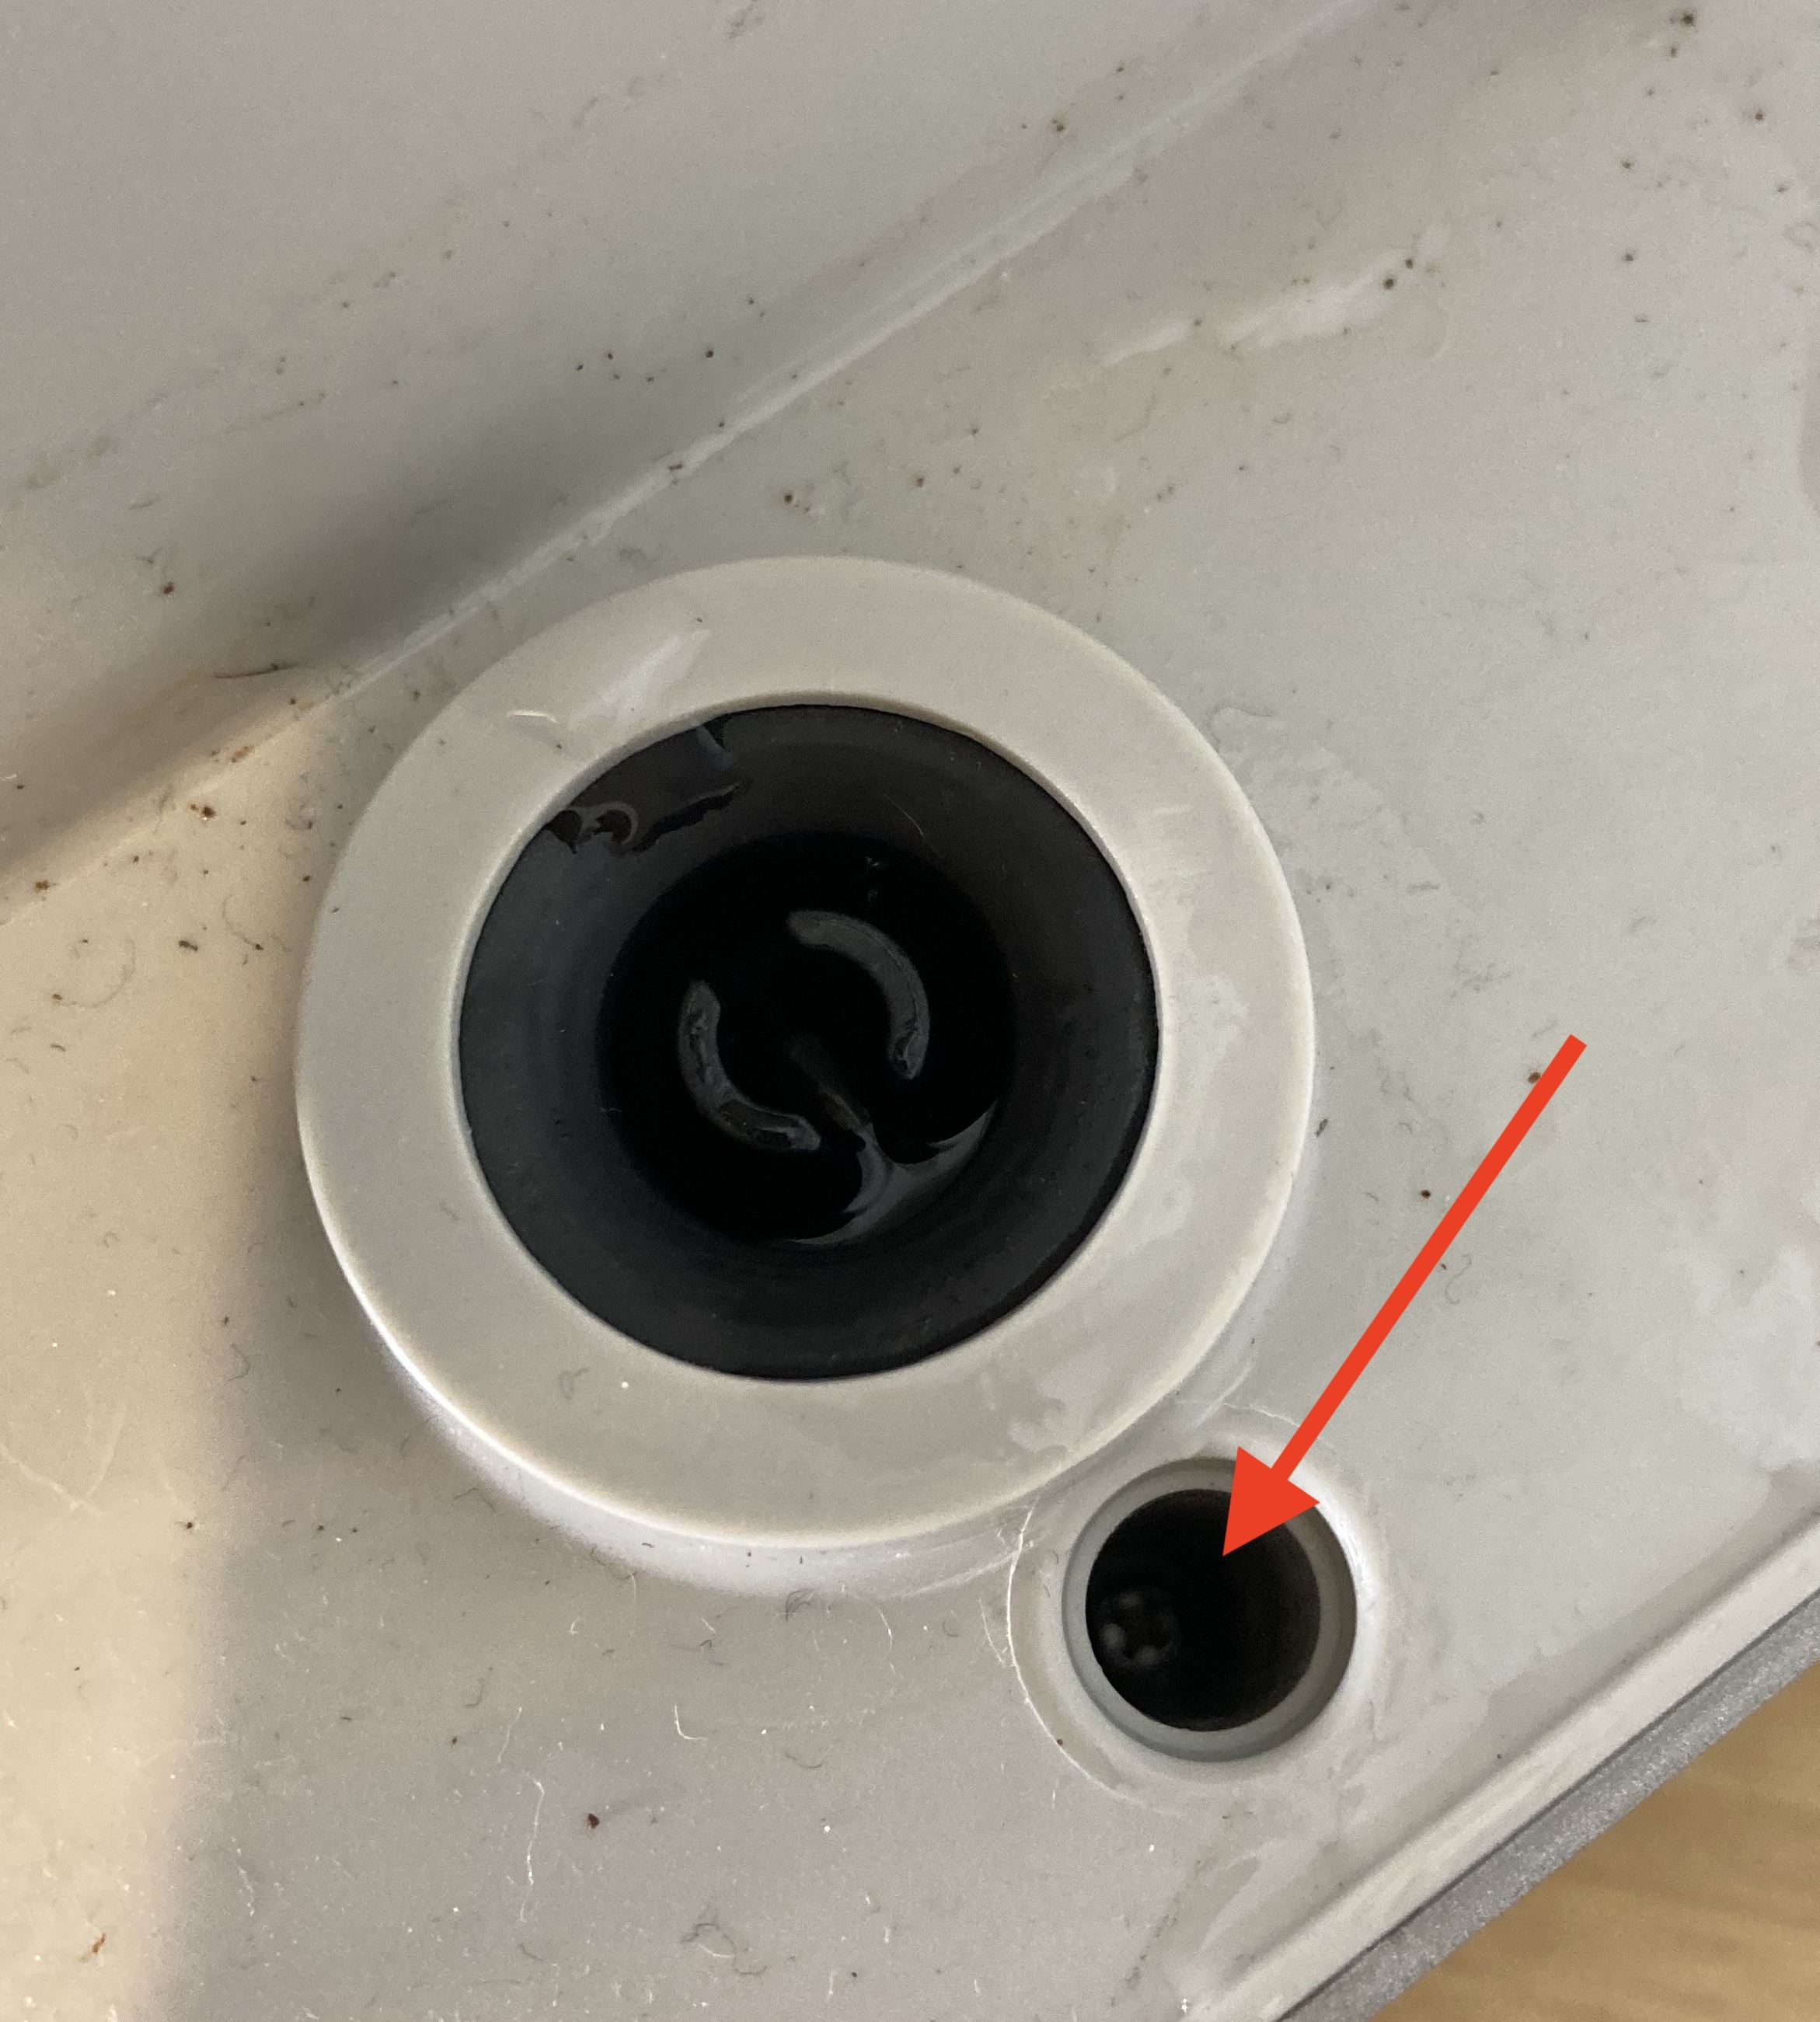
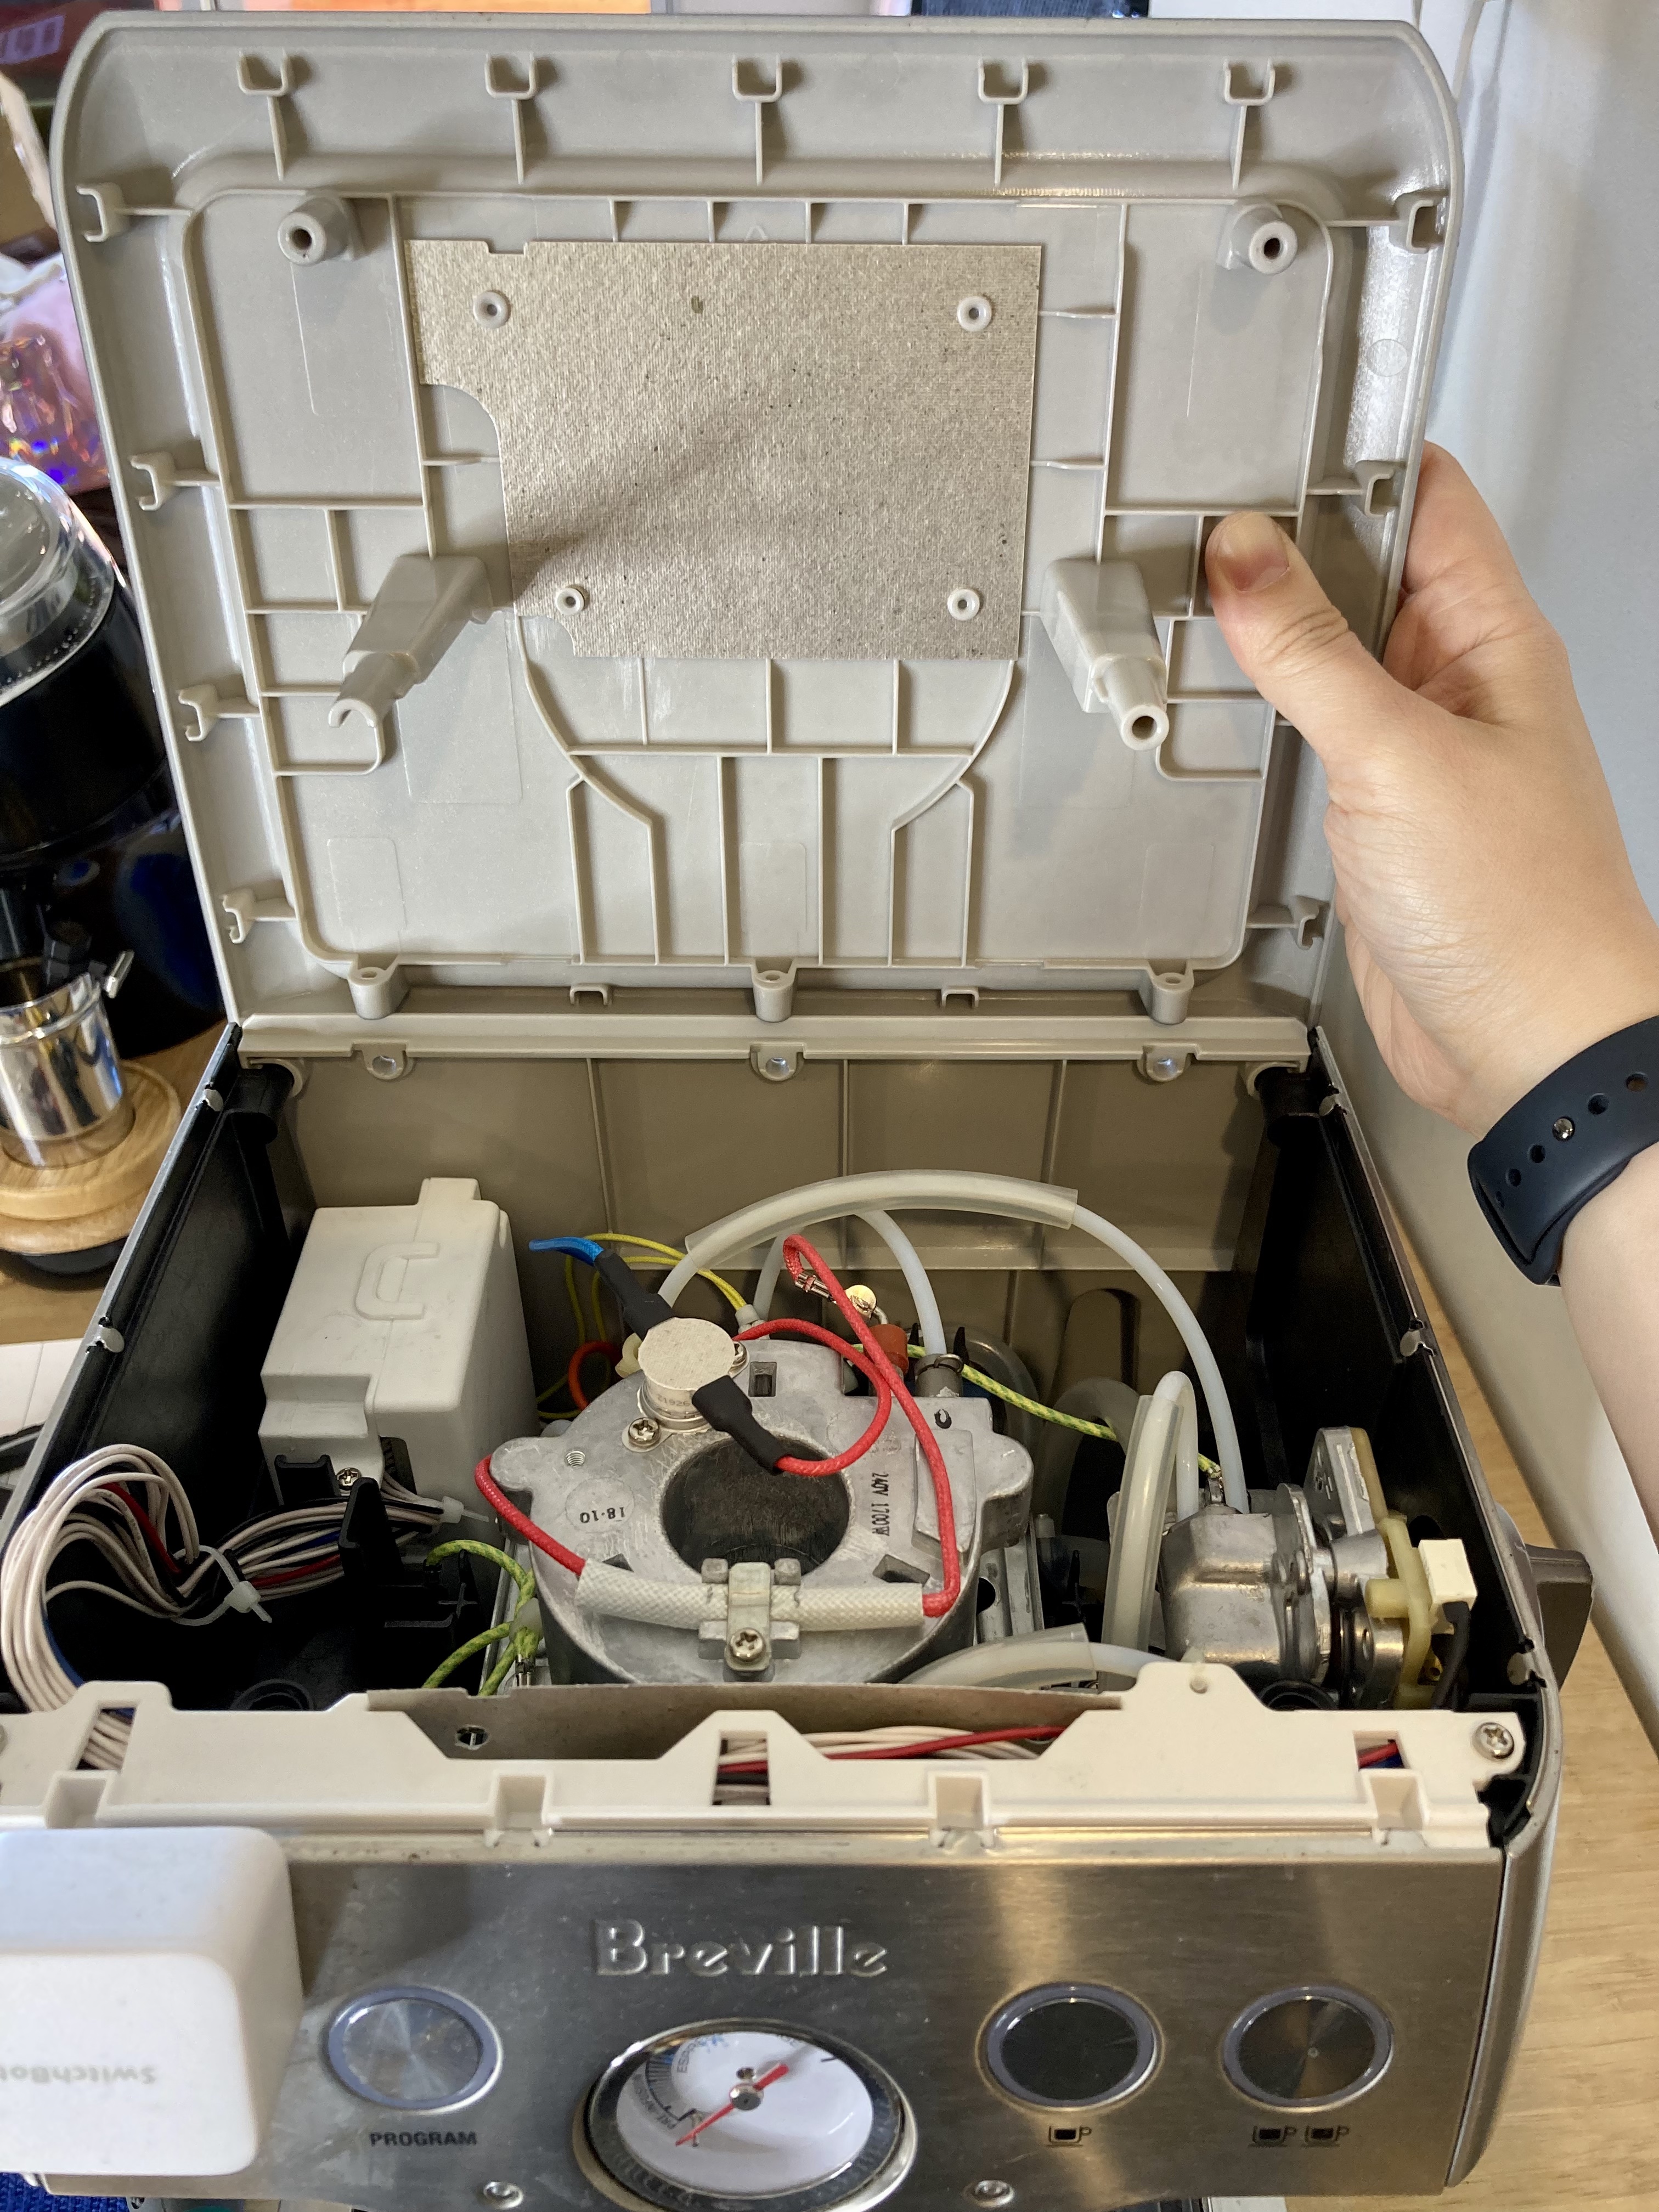
To reveal the screws at the back, remove the water tank. There are five screws at the top of the machine and a screw hidden under the small circular cover next to the tank port.
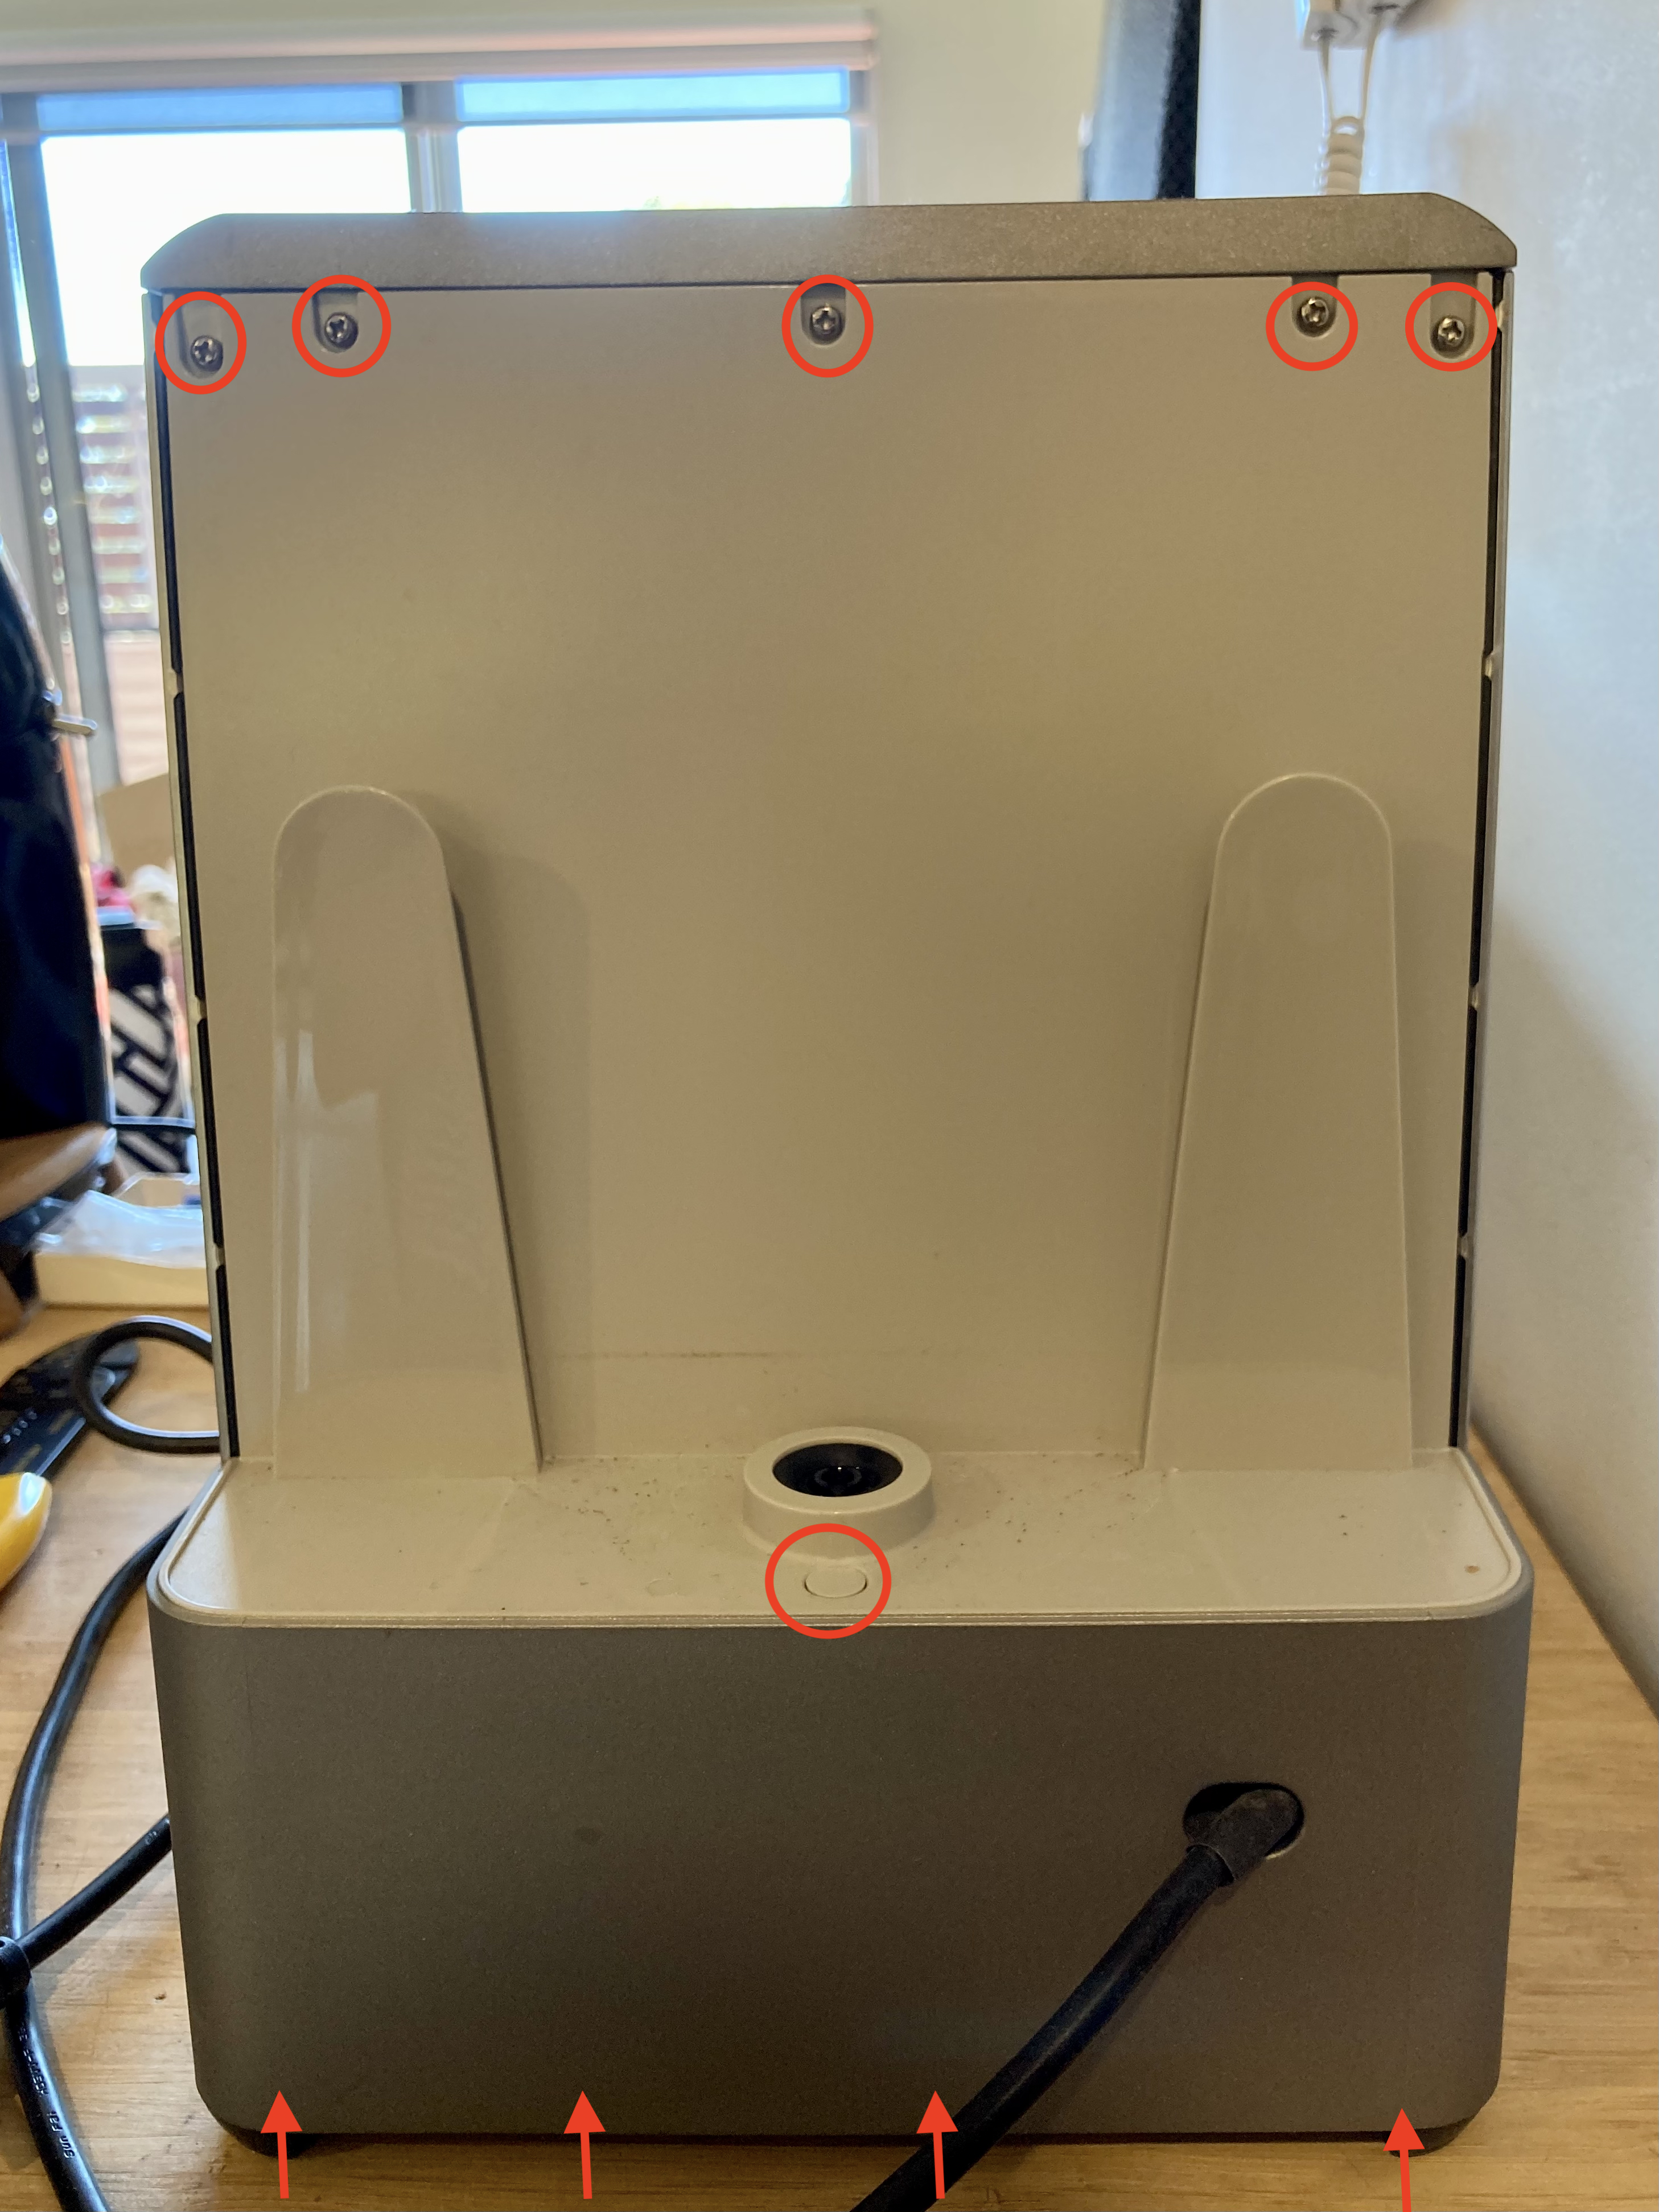
Here are the four screws on the under side of the machine. 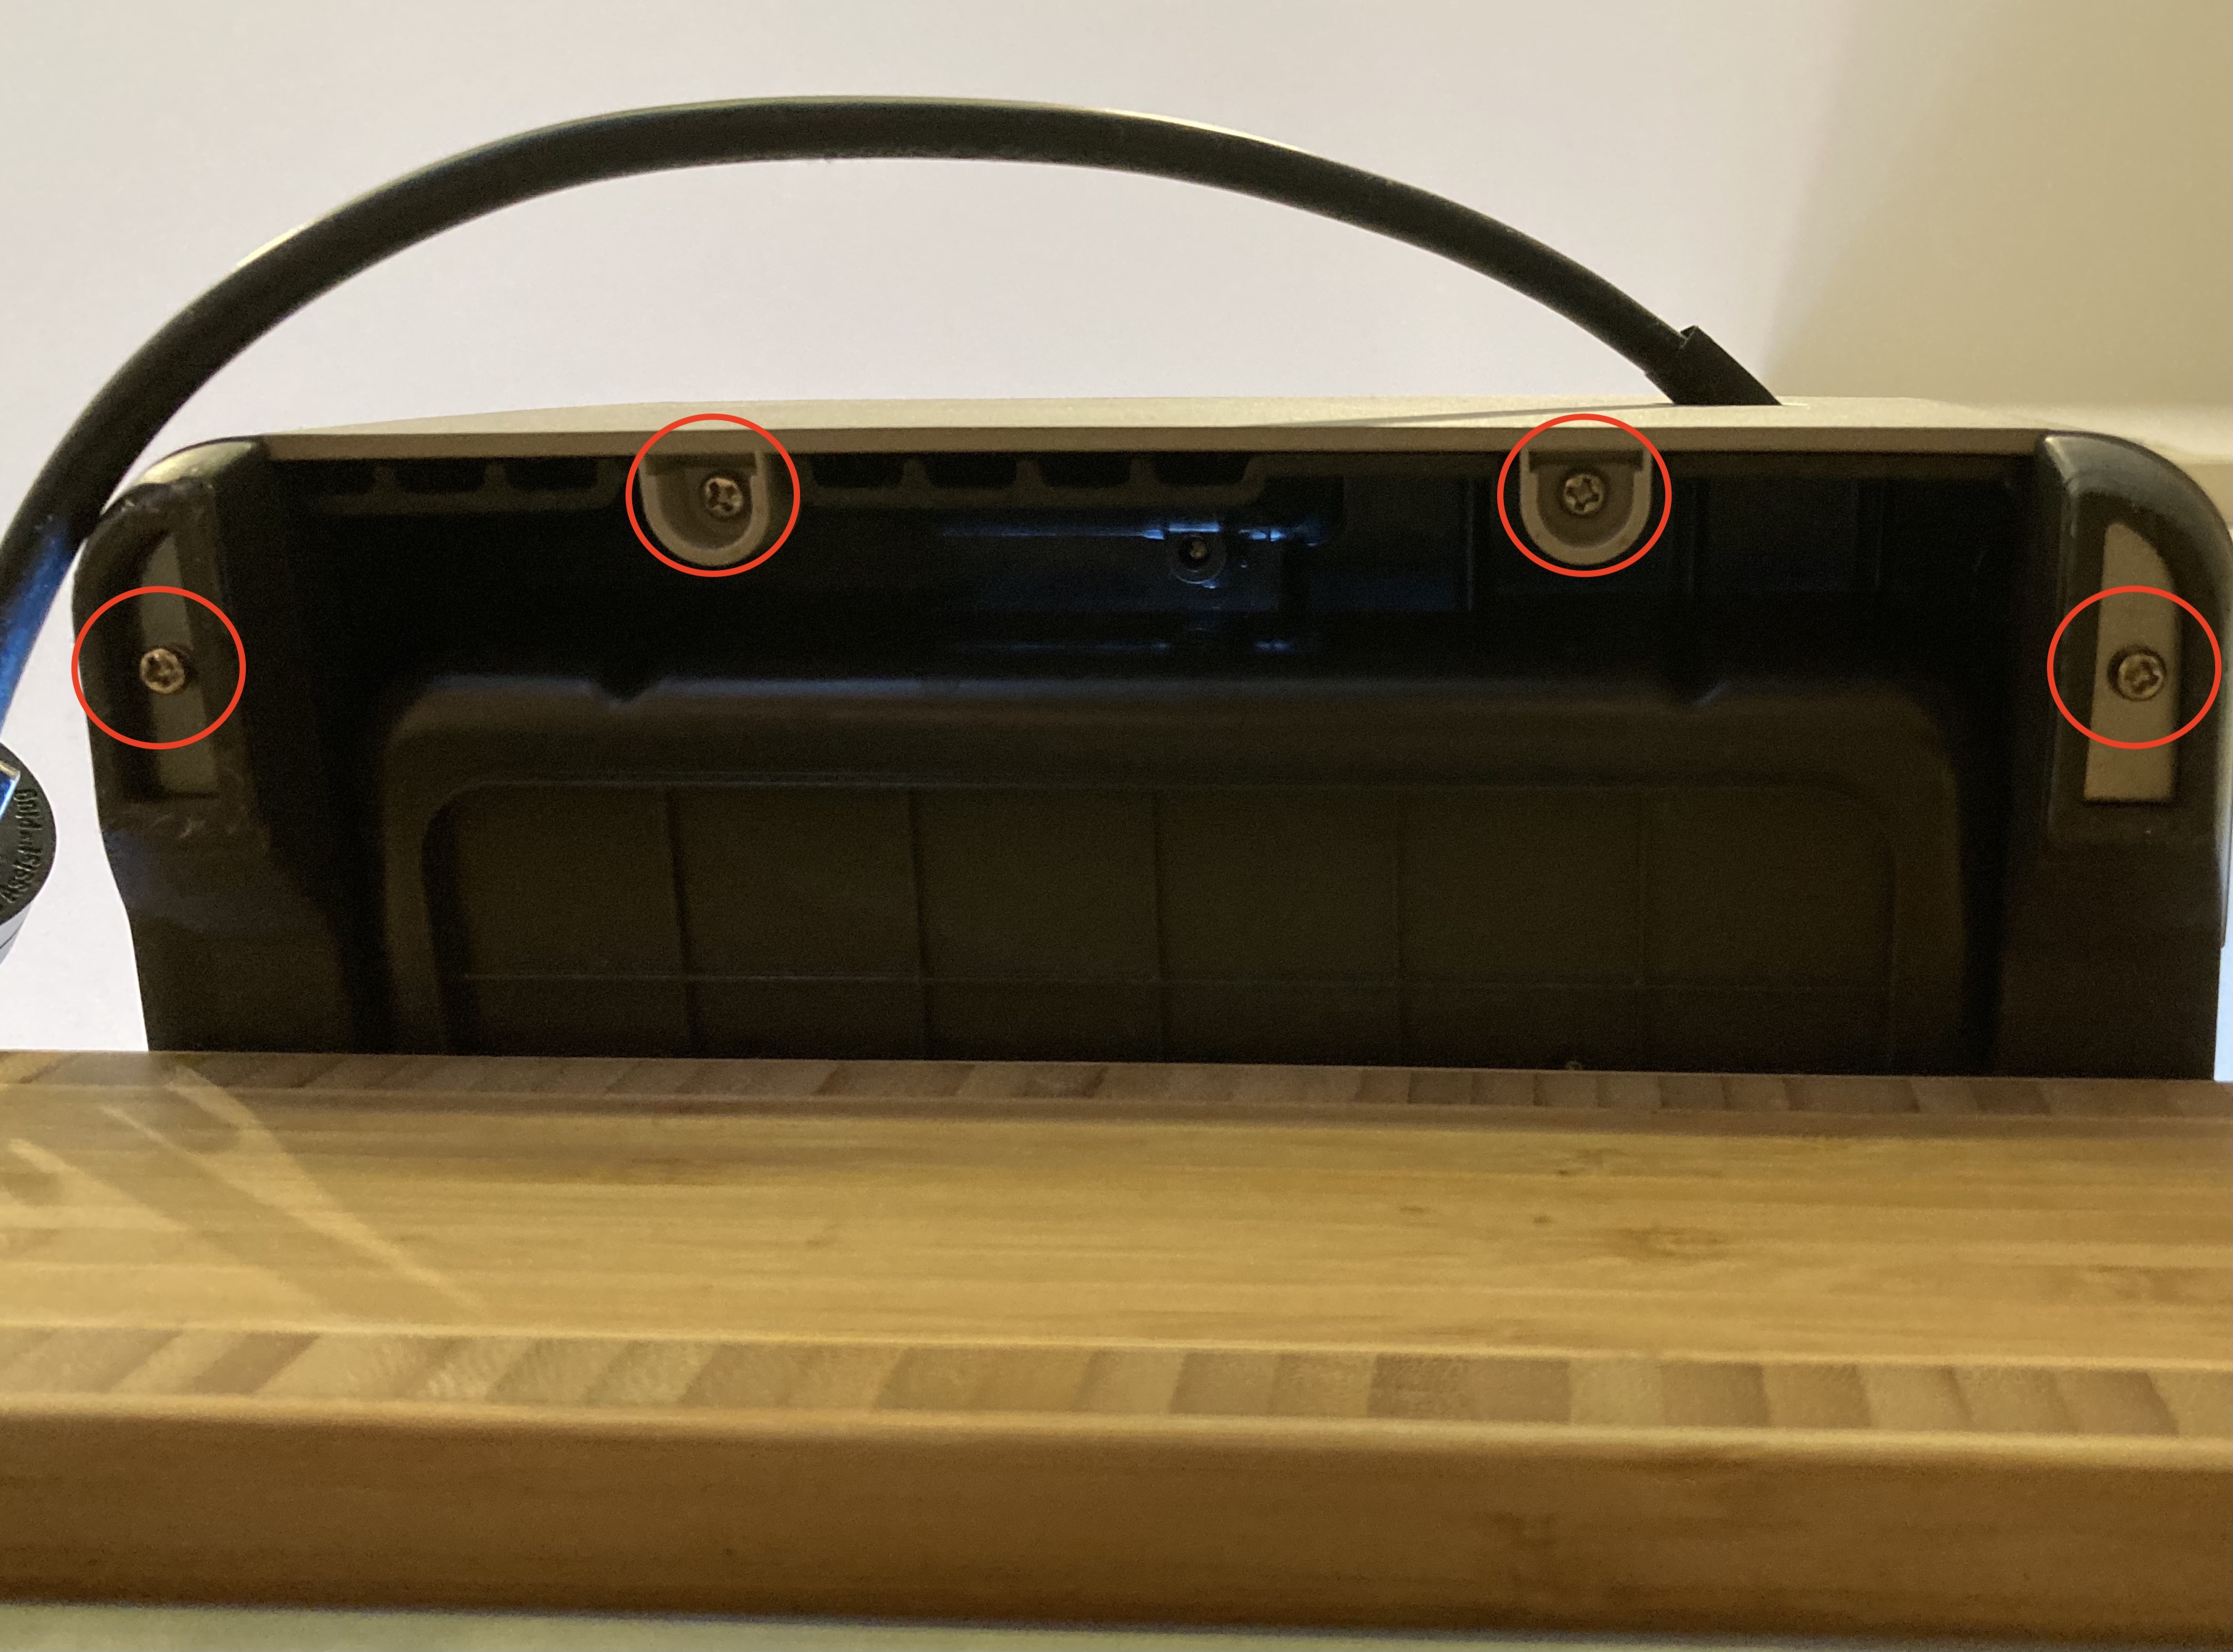
The two screws are the front of the machine are hidden in these two spots next to the group head. 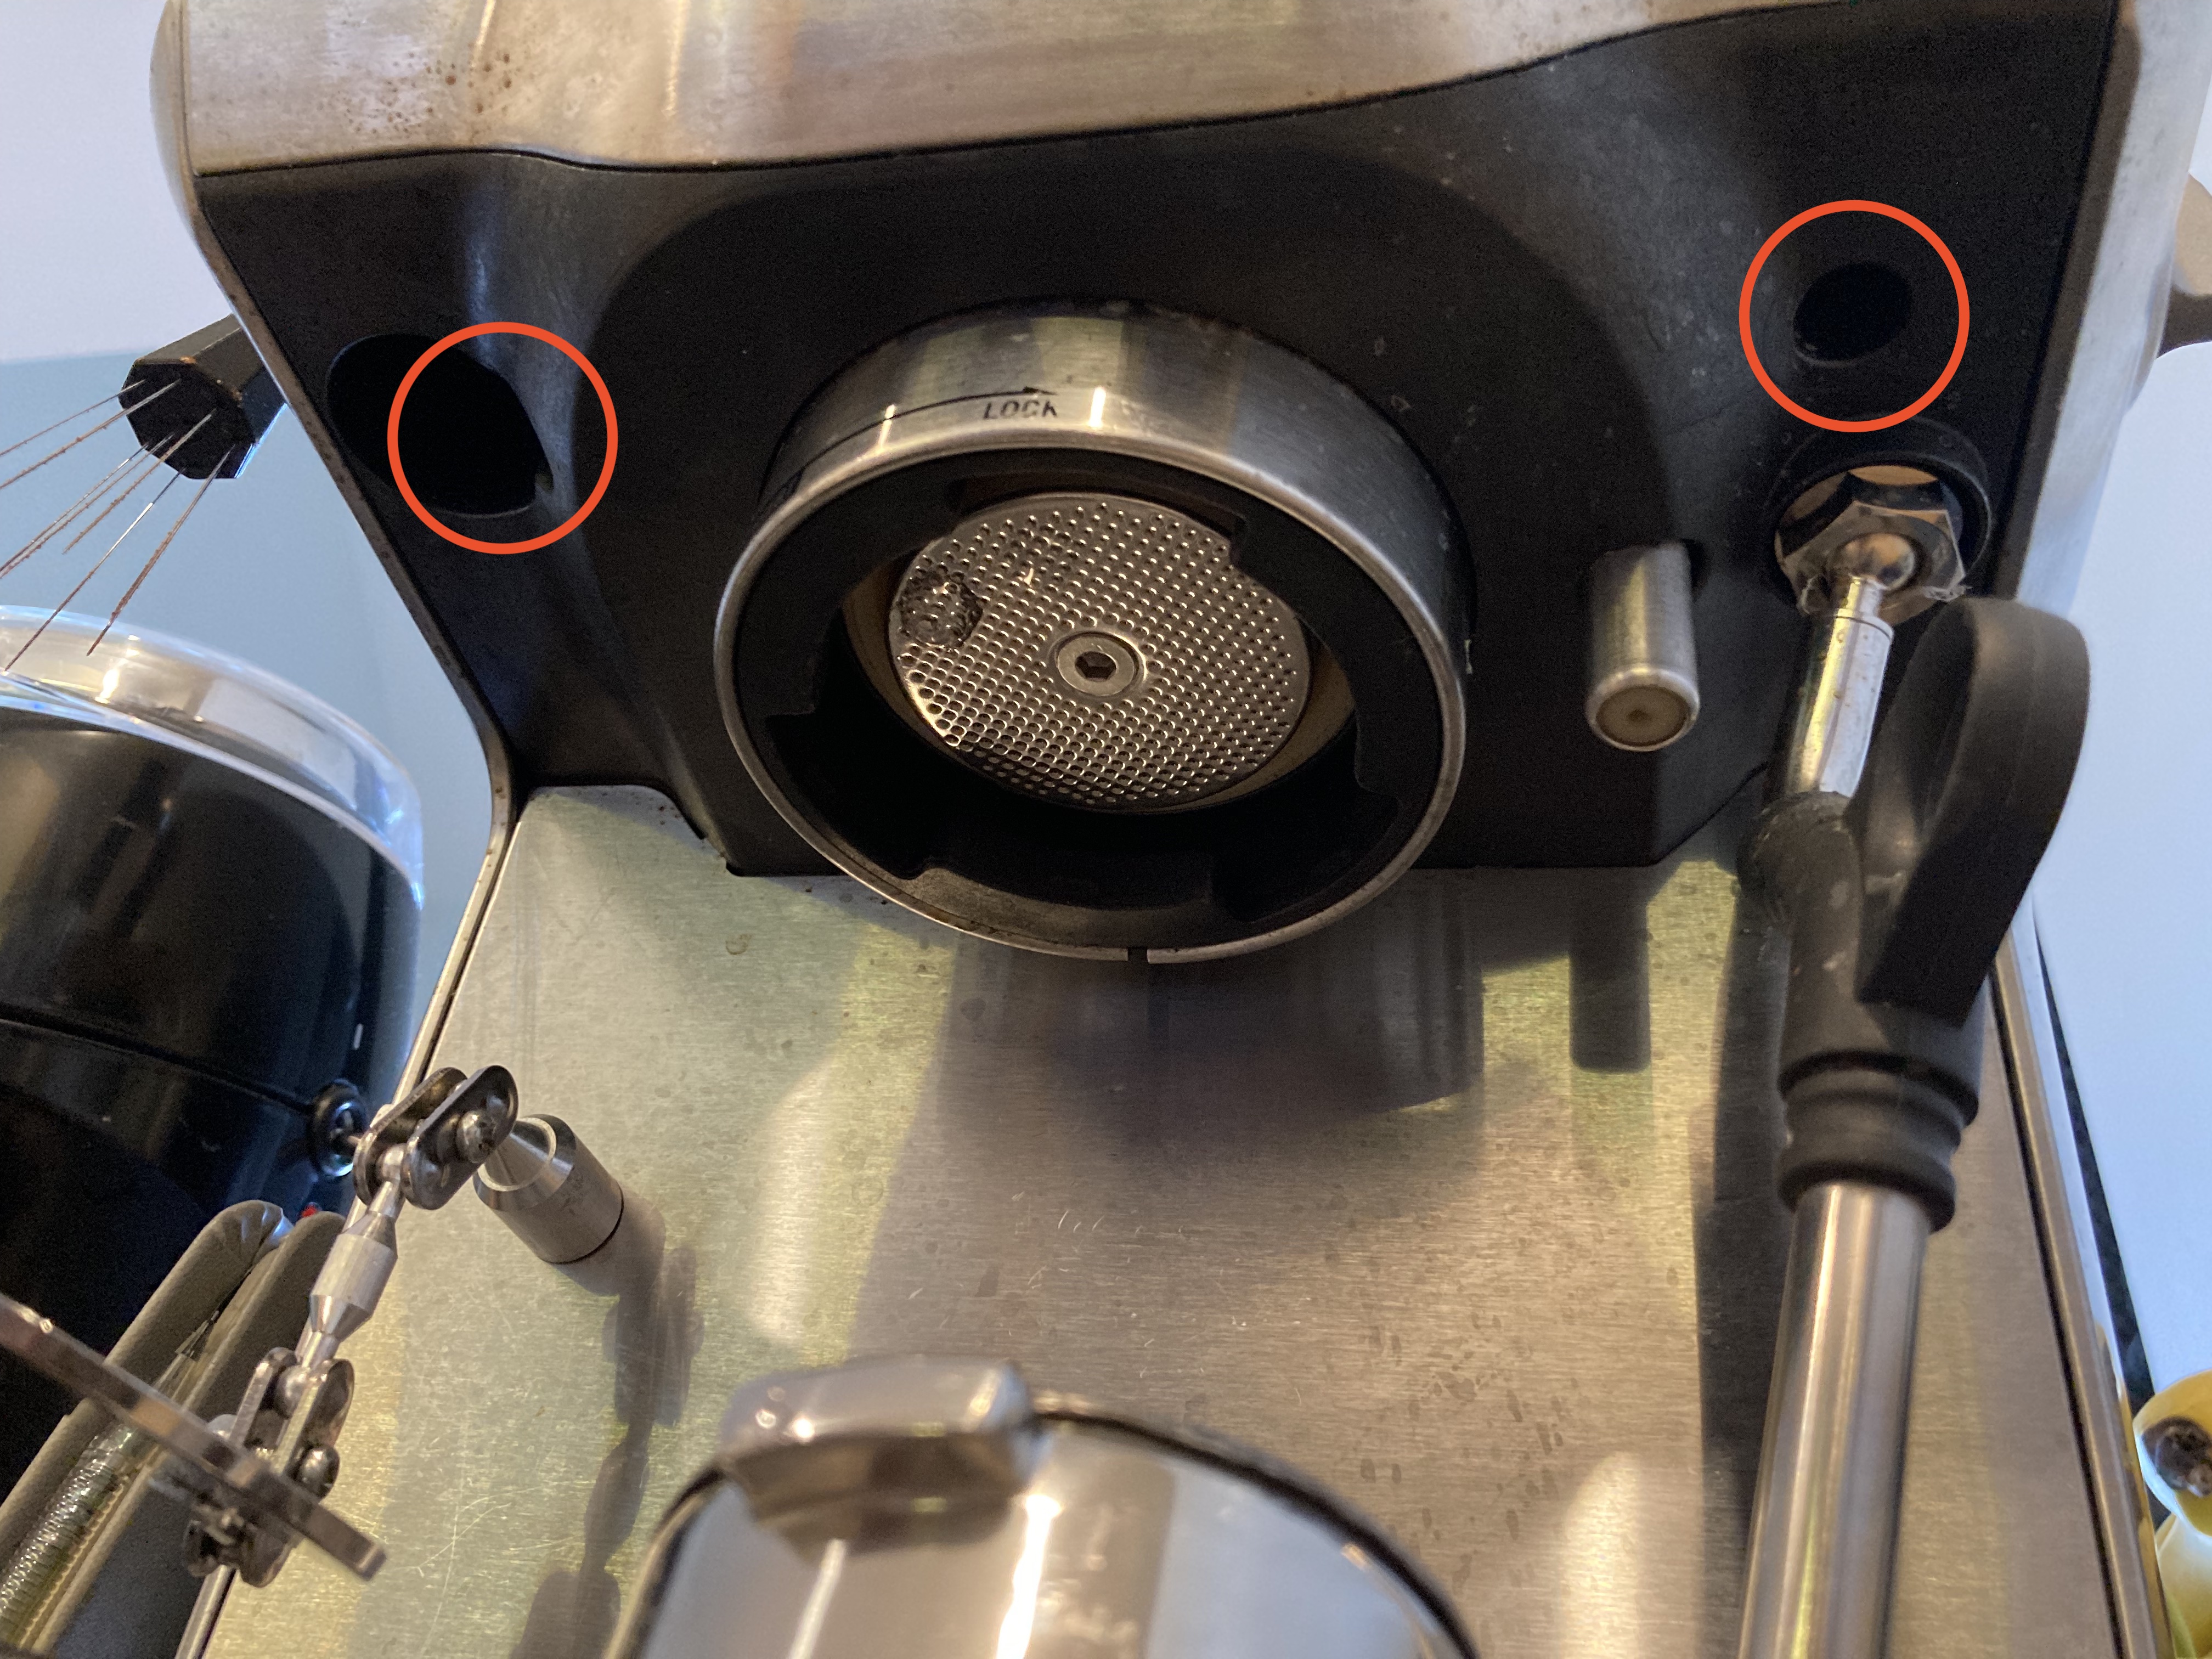
Now that the screws have been removed, you can remove the top cover of the machine.
Next, pull the back cover off in the direction shown to unclip the connections. 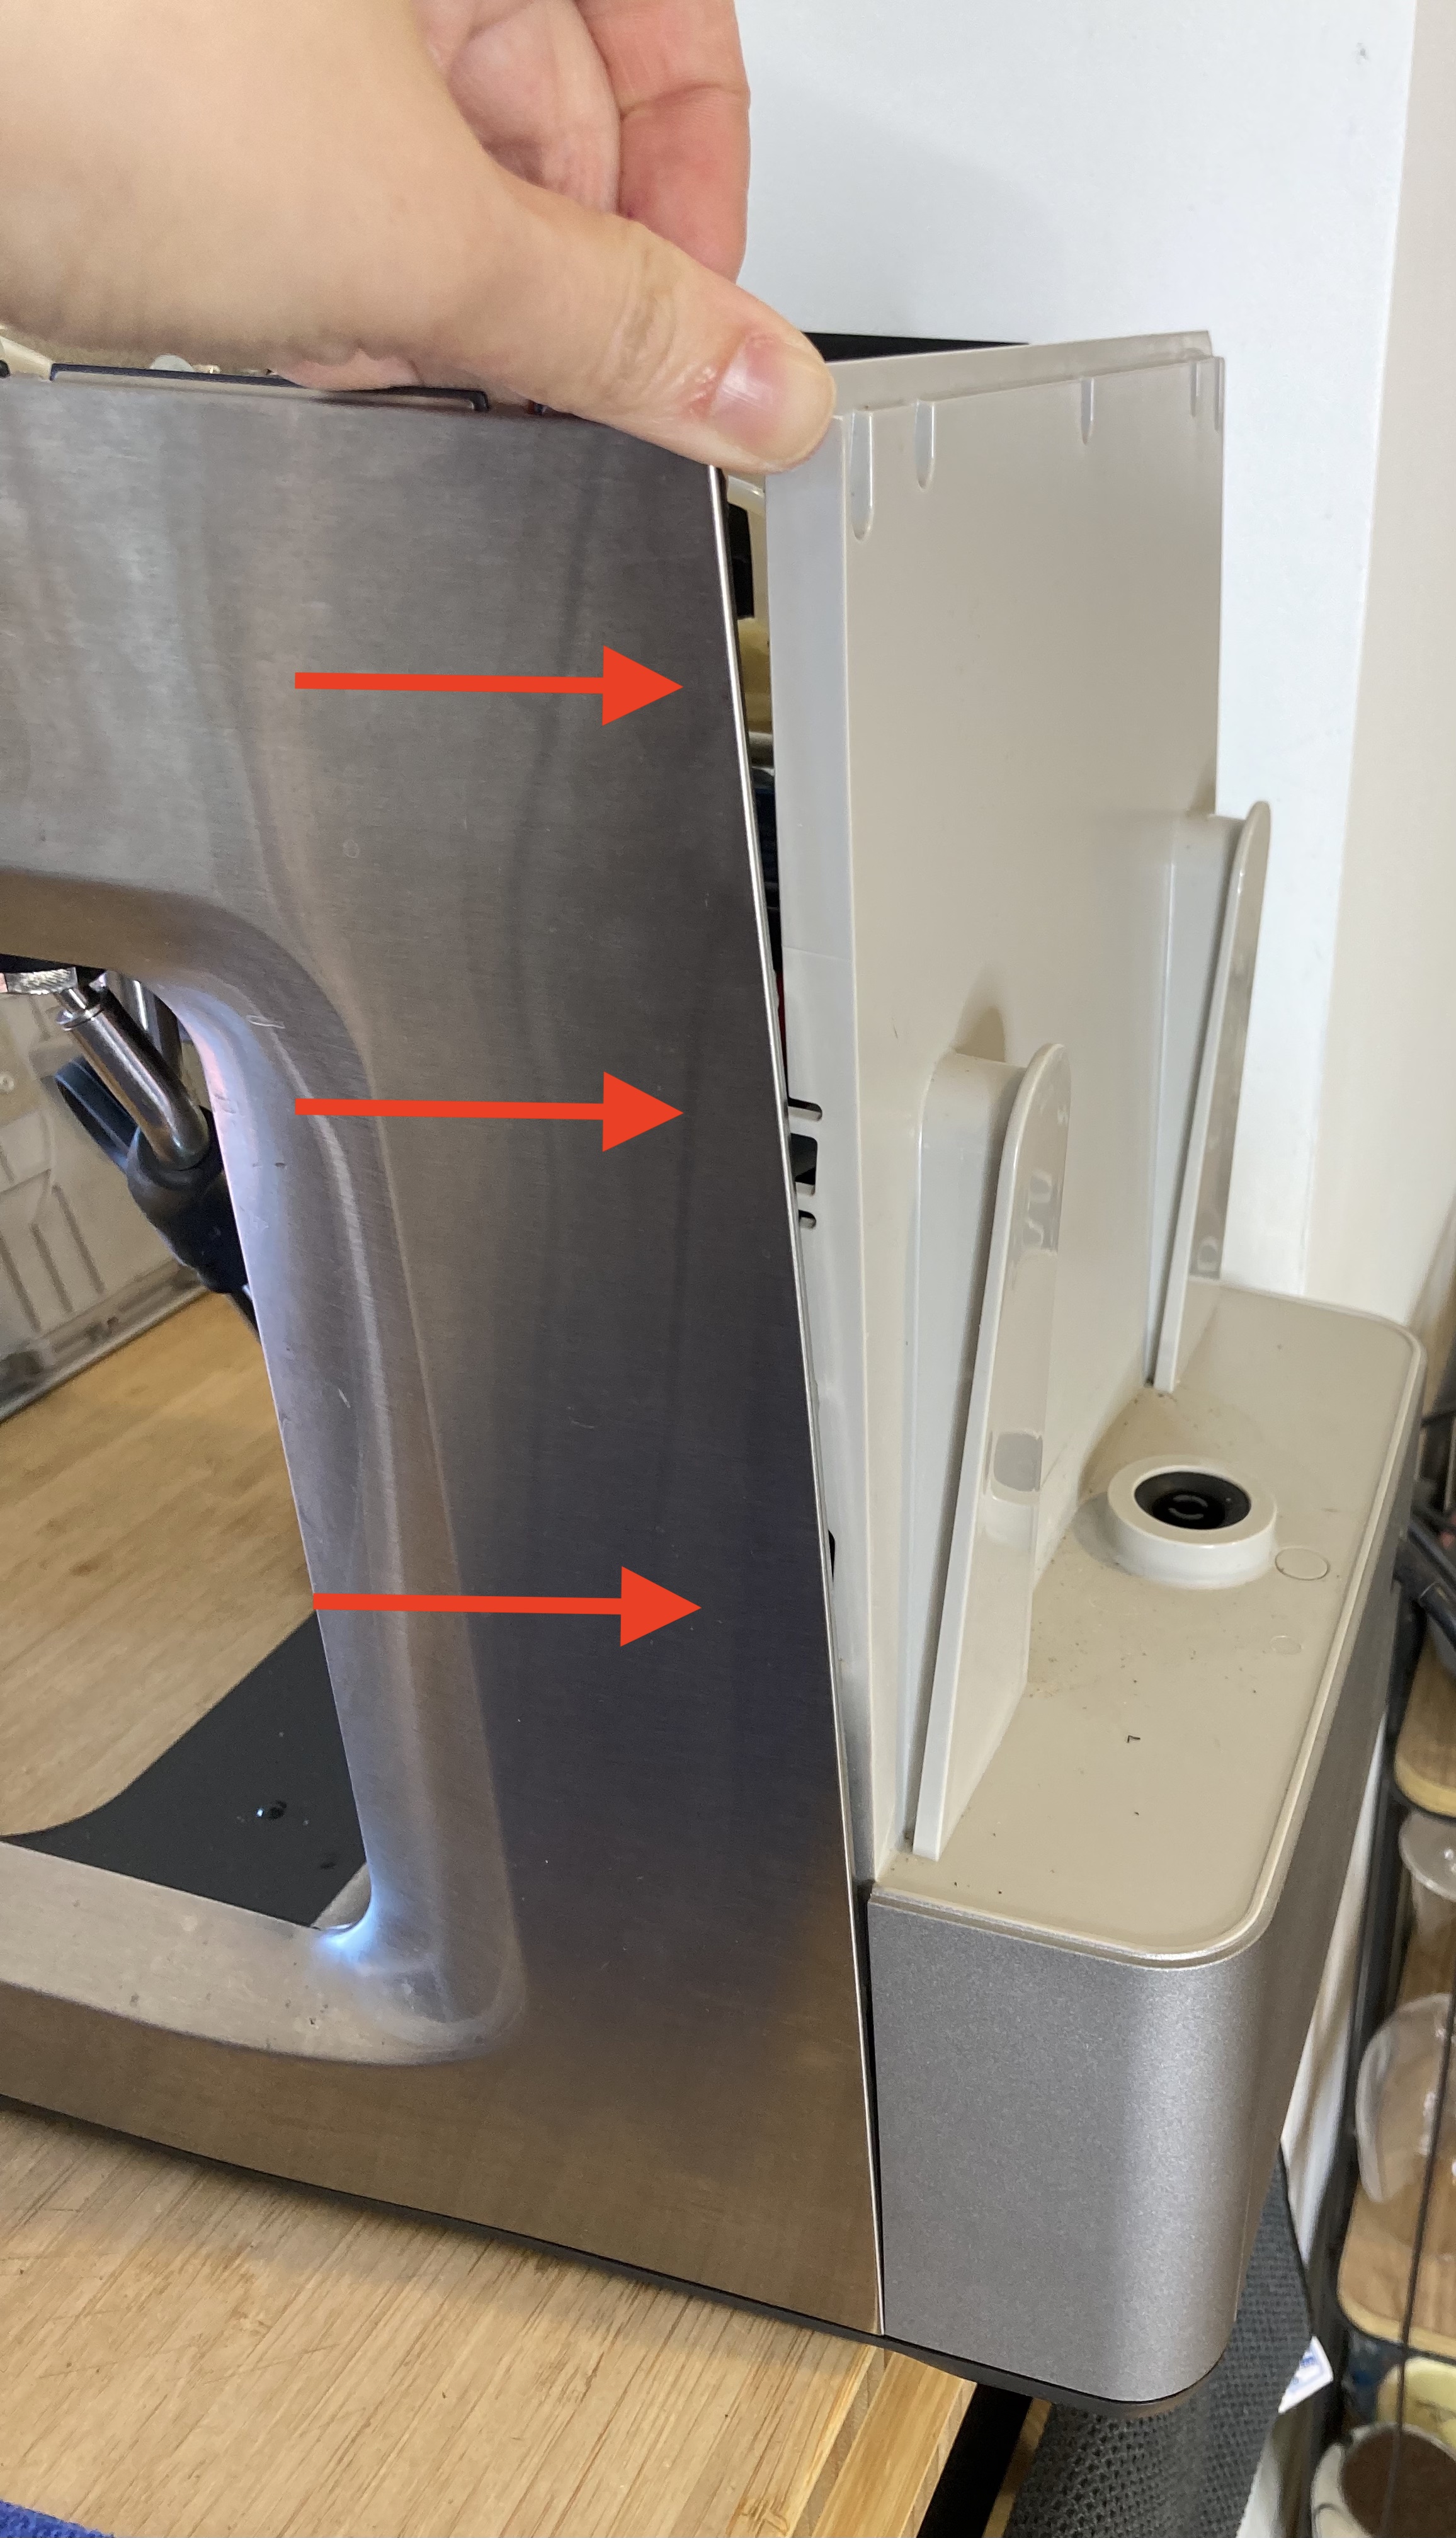
Be careful while removing the back cover - do not pull the back cover off completely as it will remain attached via the tube connected to the water tank port.
Attaching the dimmer
The red circle is the location of the pump, and where you’re headed to connect your dimmer. You can snip the cable tie securing the bunch of wires near the pump for easier access.
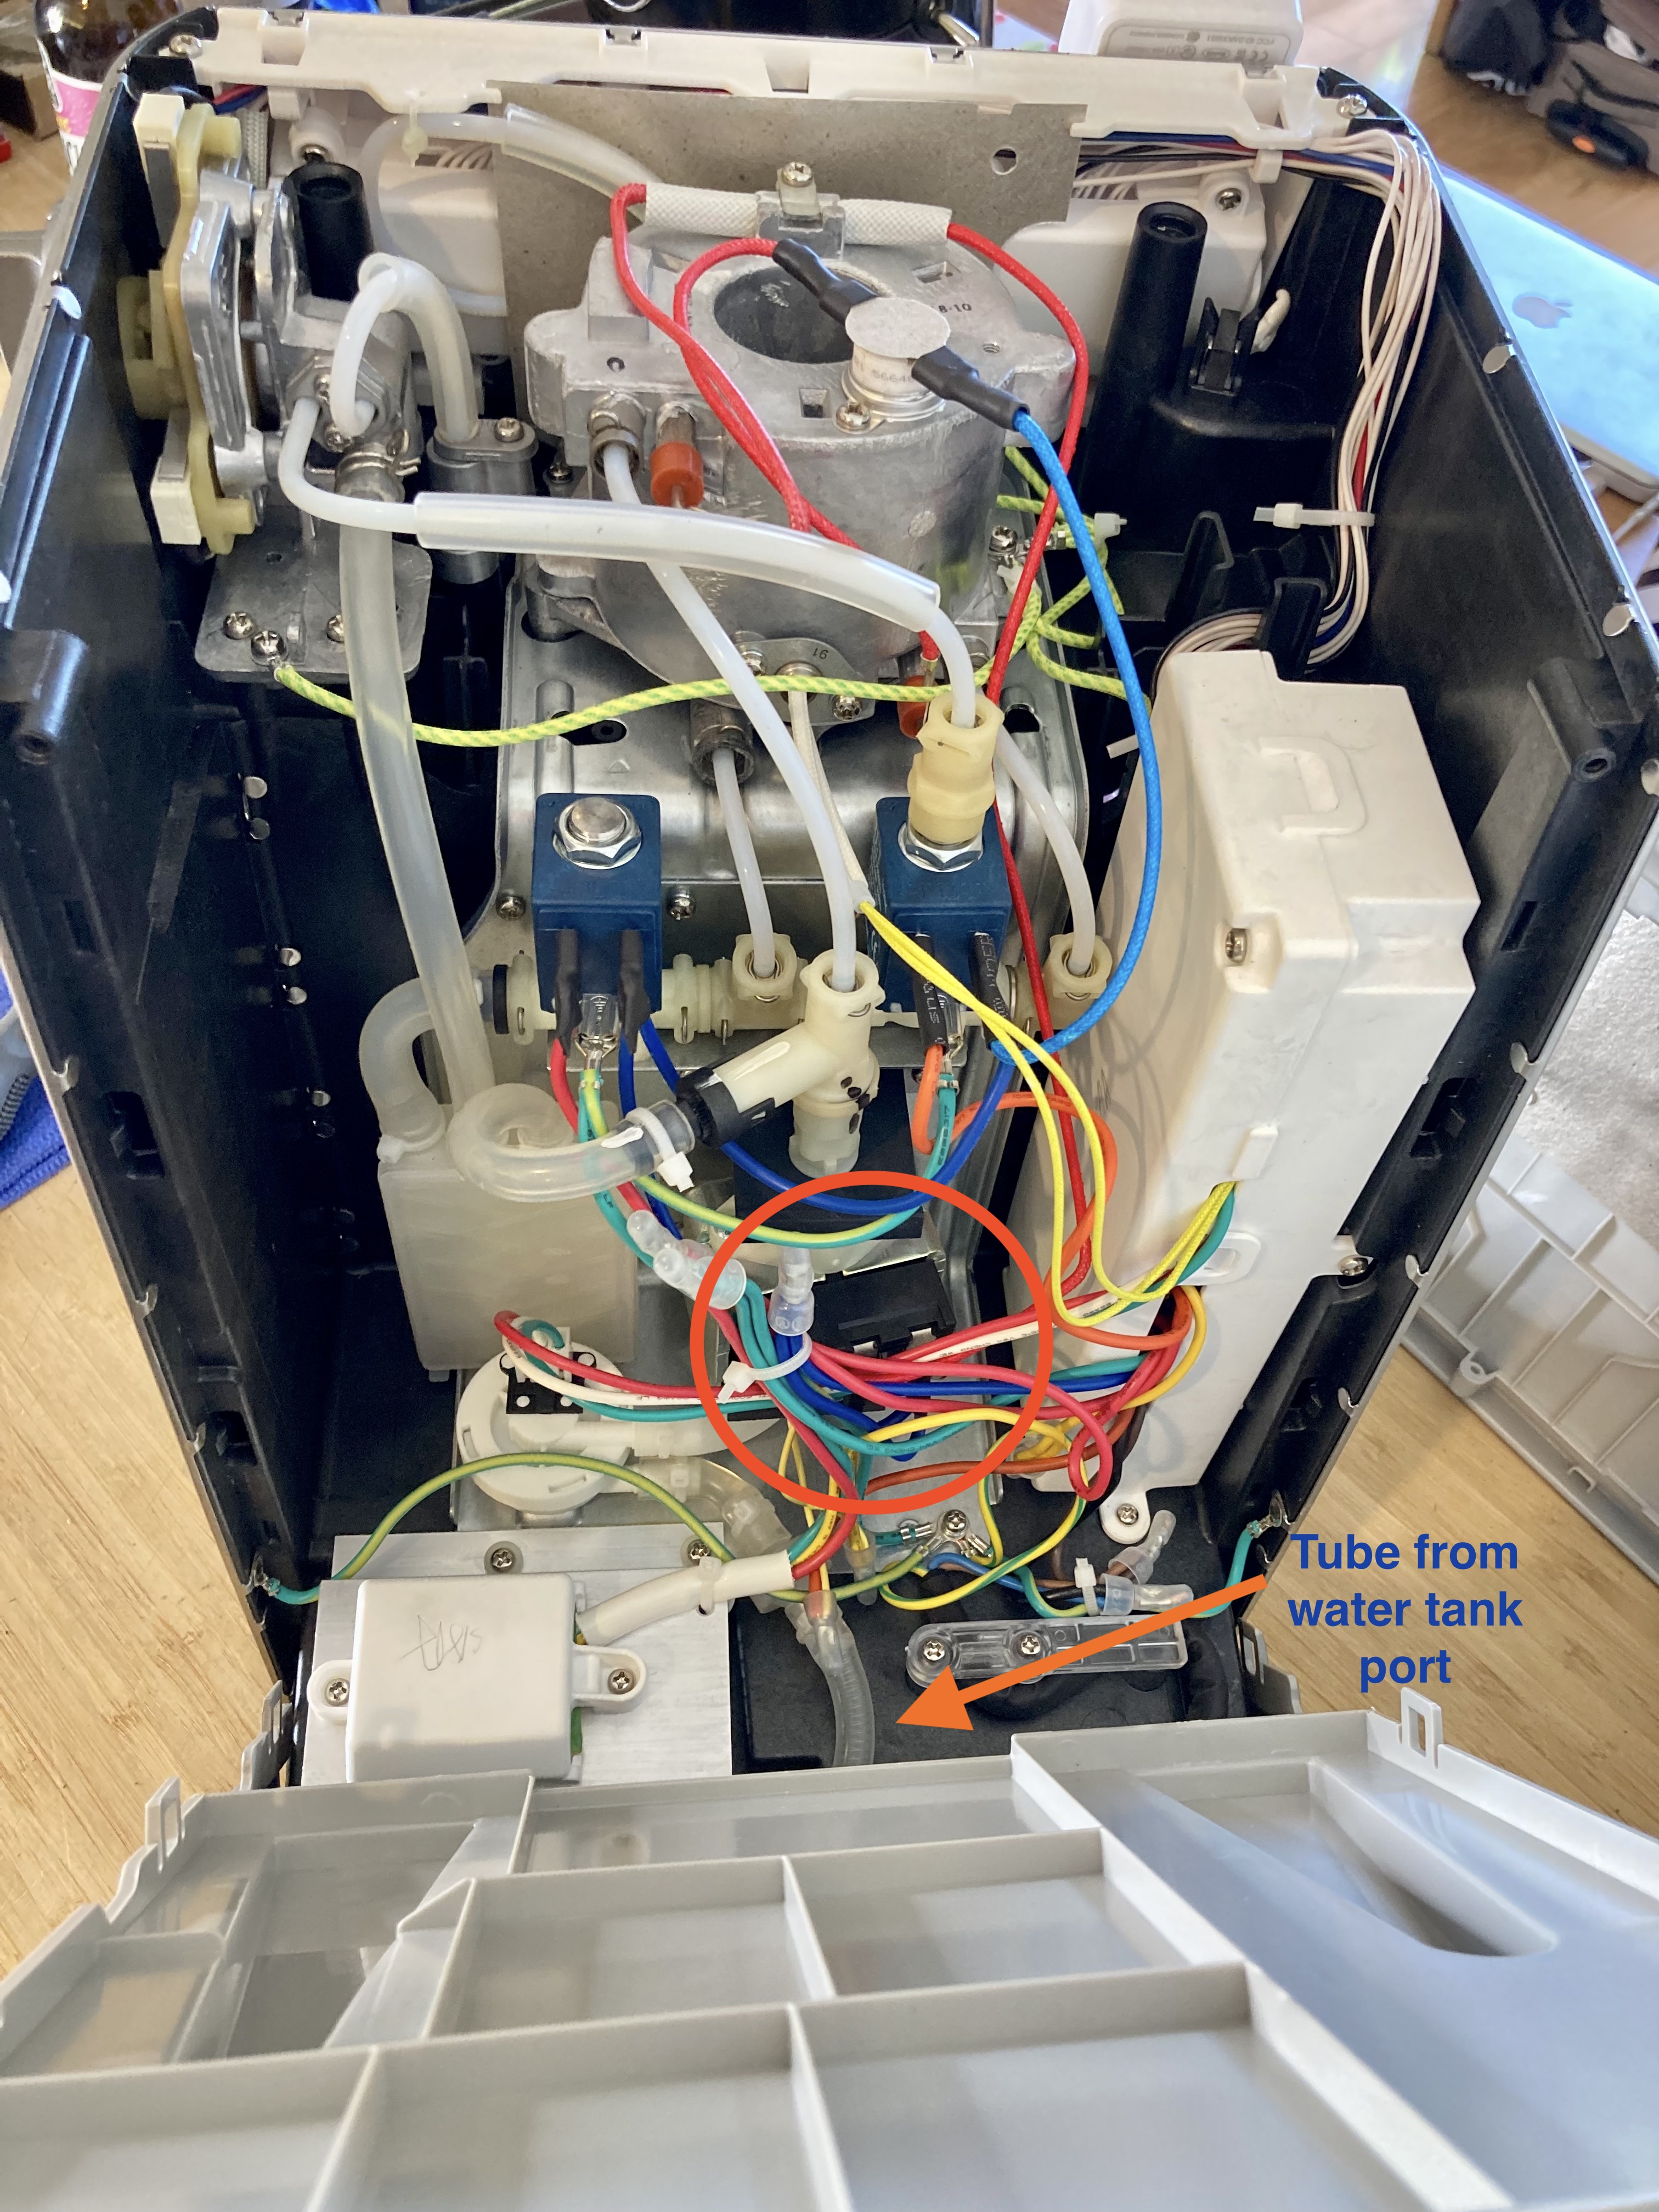
The spade connector with the yellow wire (circled in red) is where power is connected to the pump. You will interrupt this connection with your dimmer.
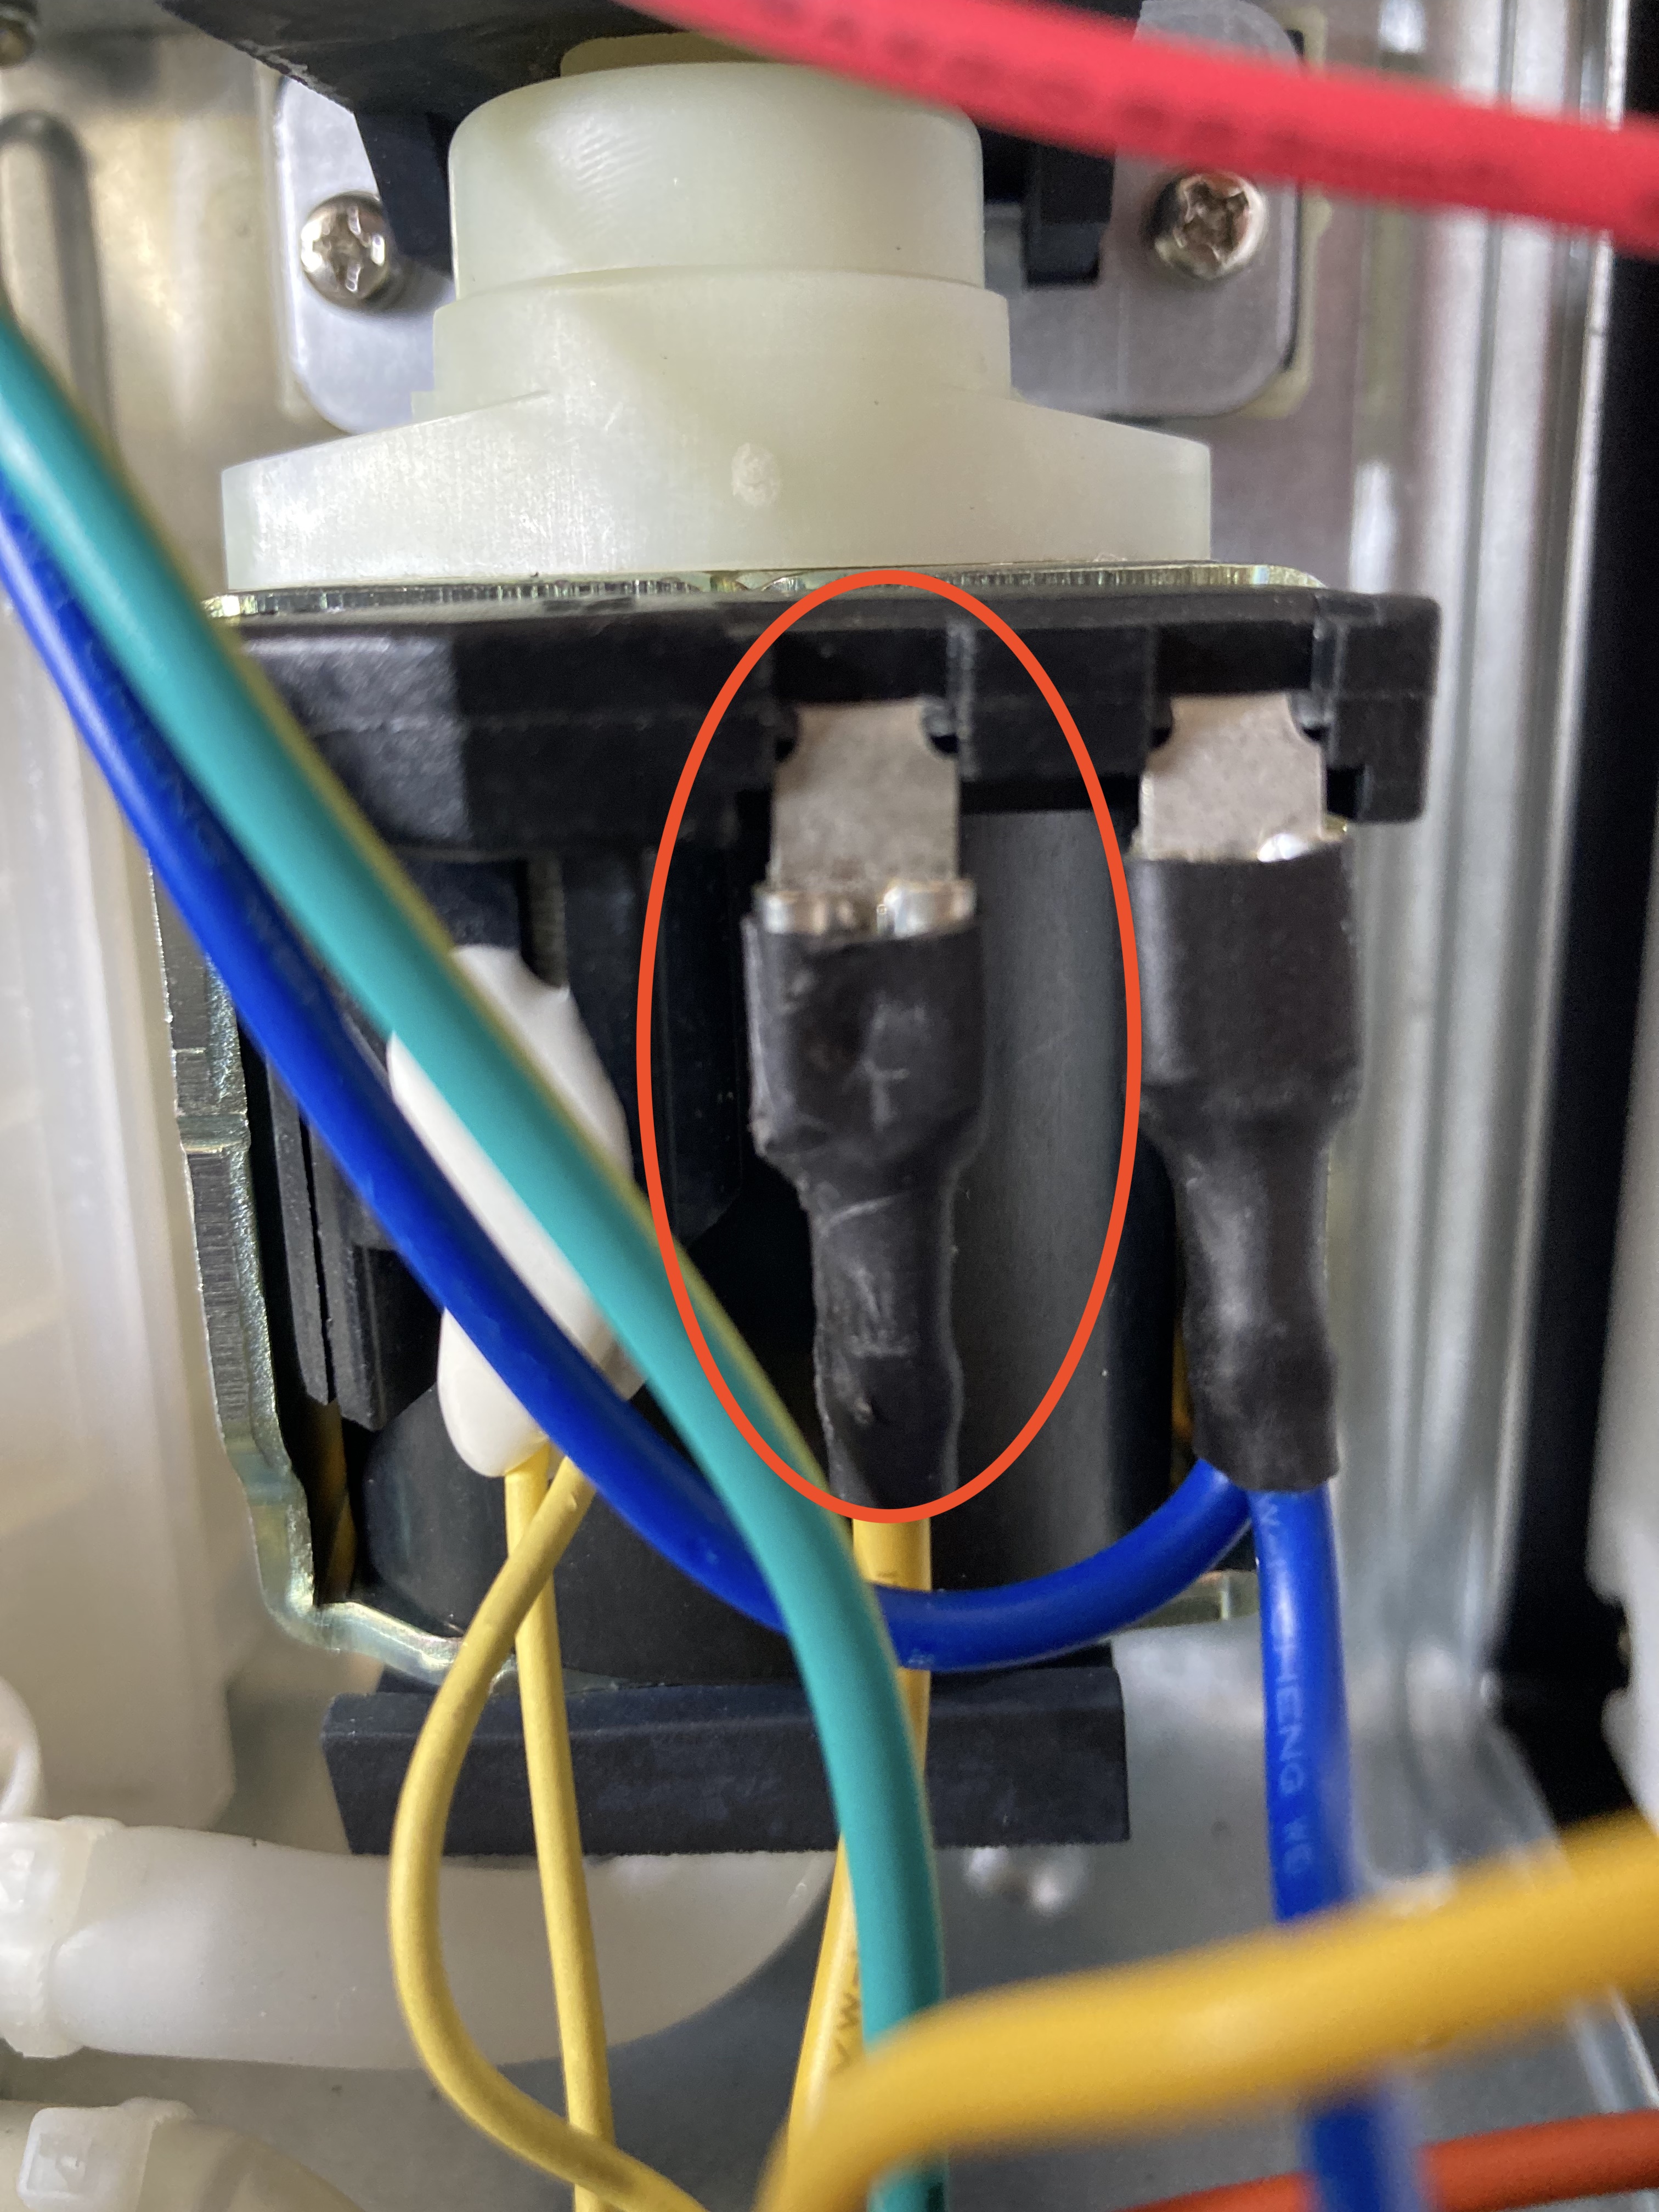
Removing this spade connection can be tricky. Grip the spade connector with your needle nose pliers and wiggle the connector down. At some point it might get stuck - I’ve found that the easiest way to remove the connector at this point is to slide the insulating jacket off, use a fingernail to depress that tab circled in blue, using the pliers in your other hand to pull the connector the rest of the way. As you can tell by how mangled the insulation looks, this took me a few tries to figure out. 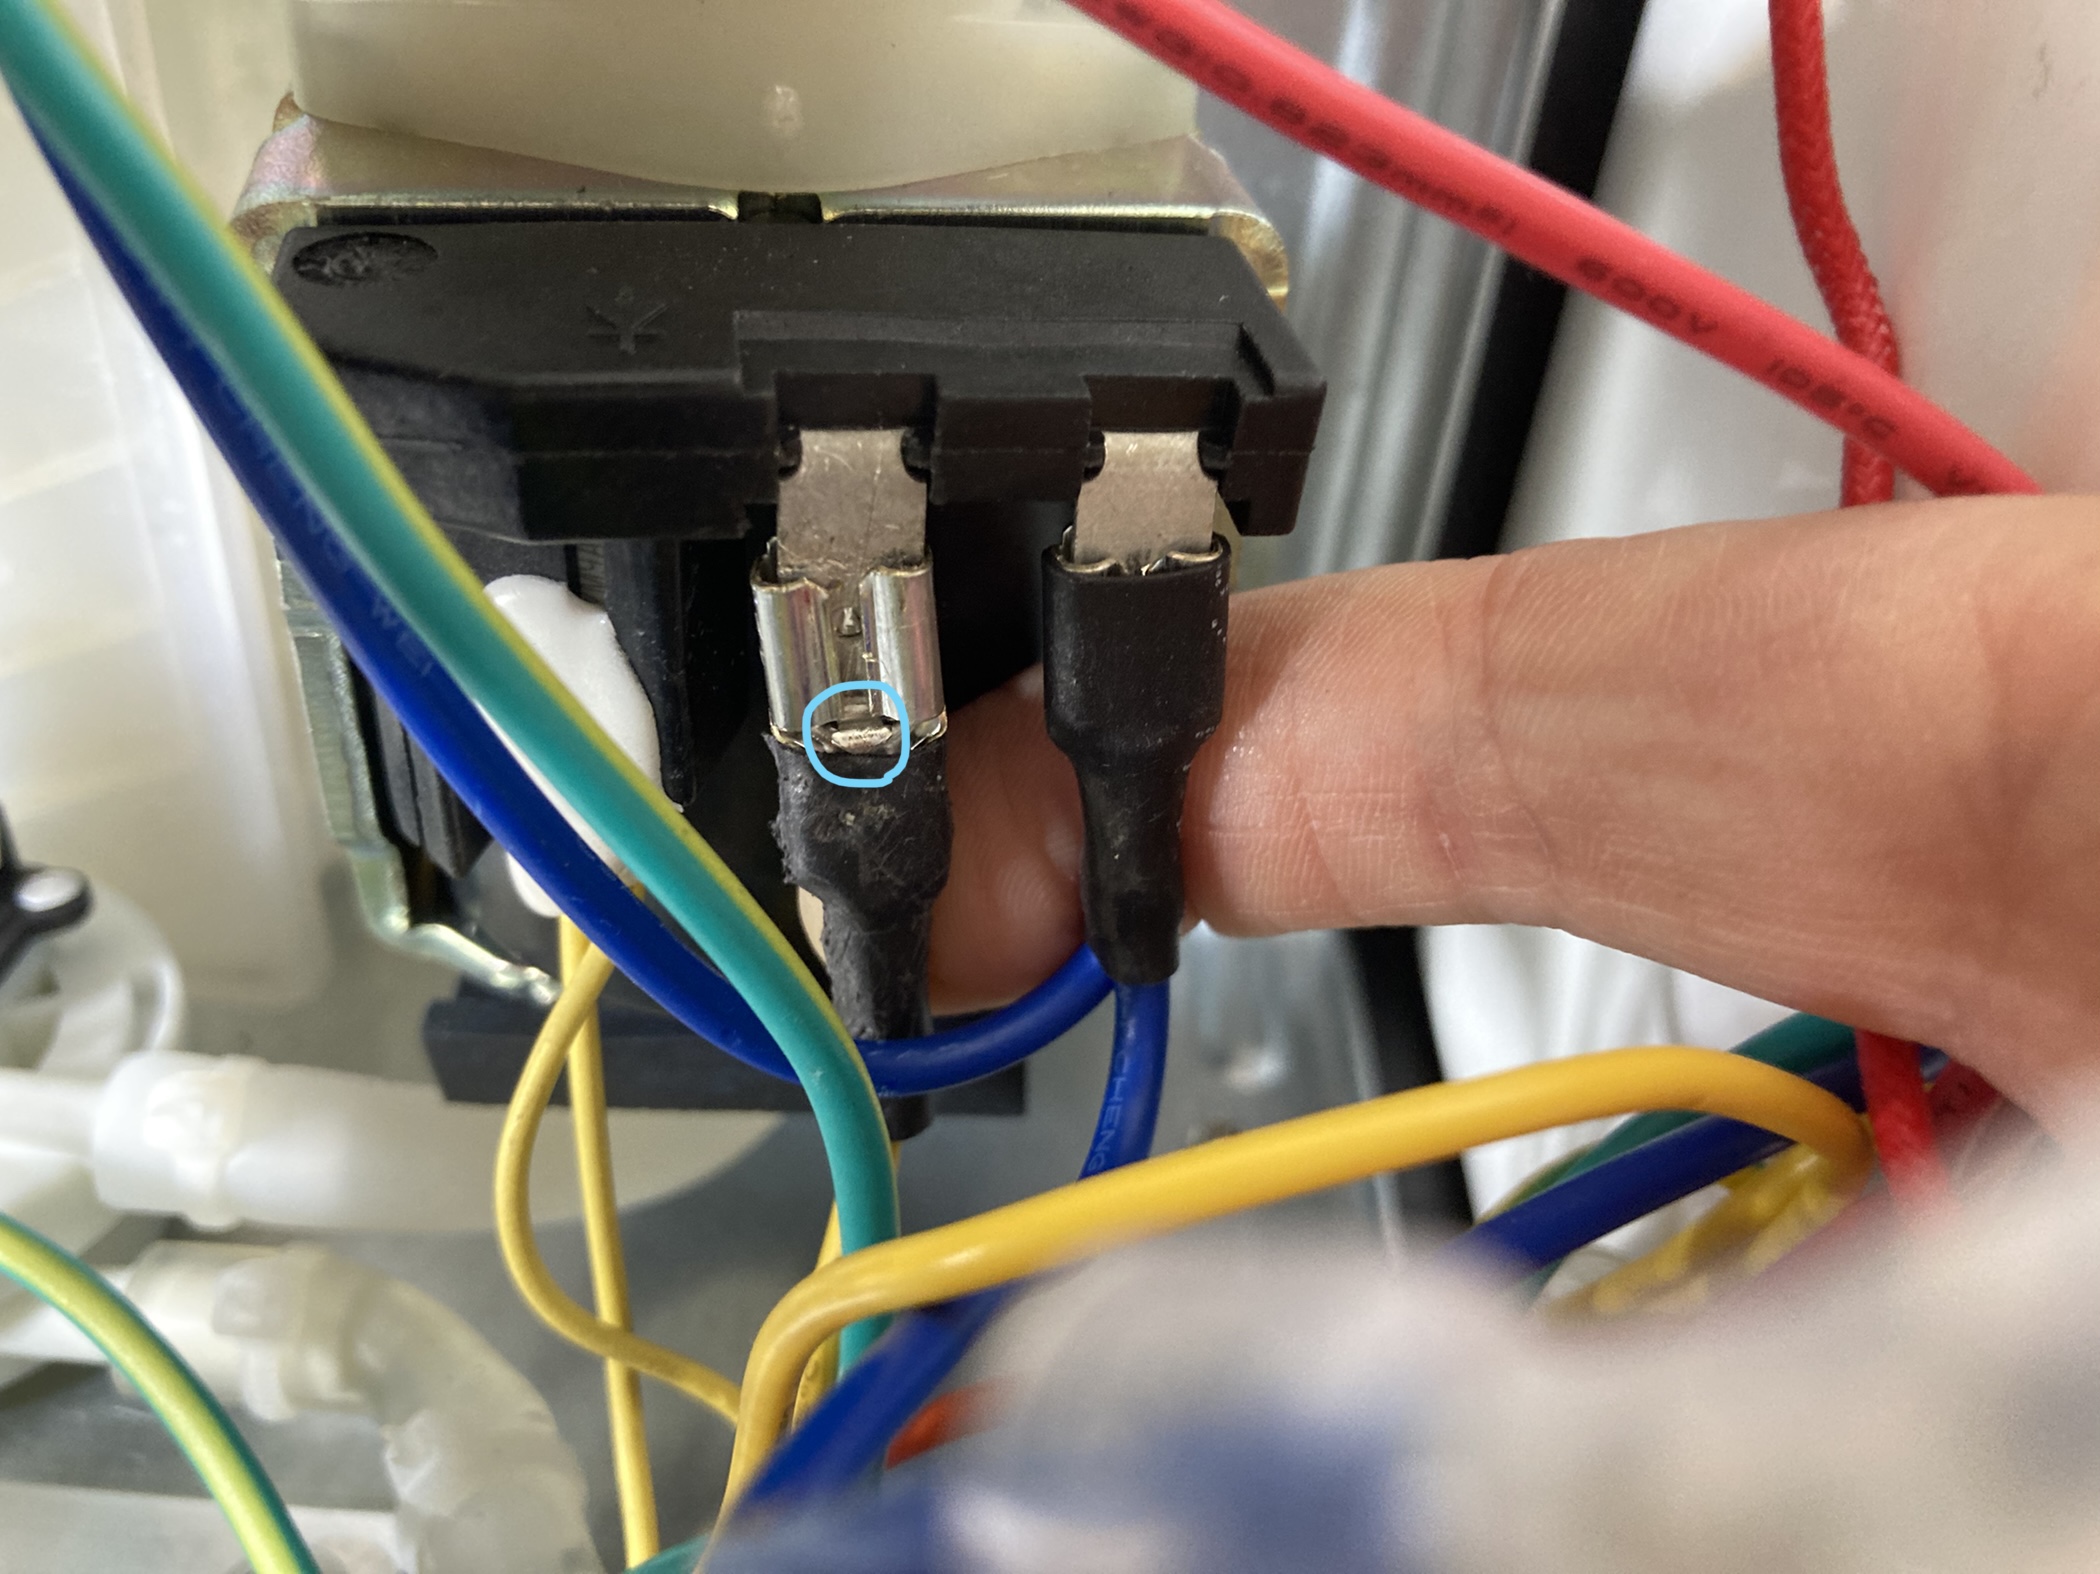
From there, attach the dimmer at either end like so.
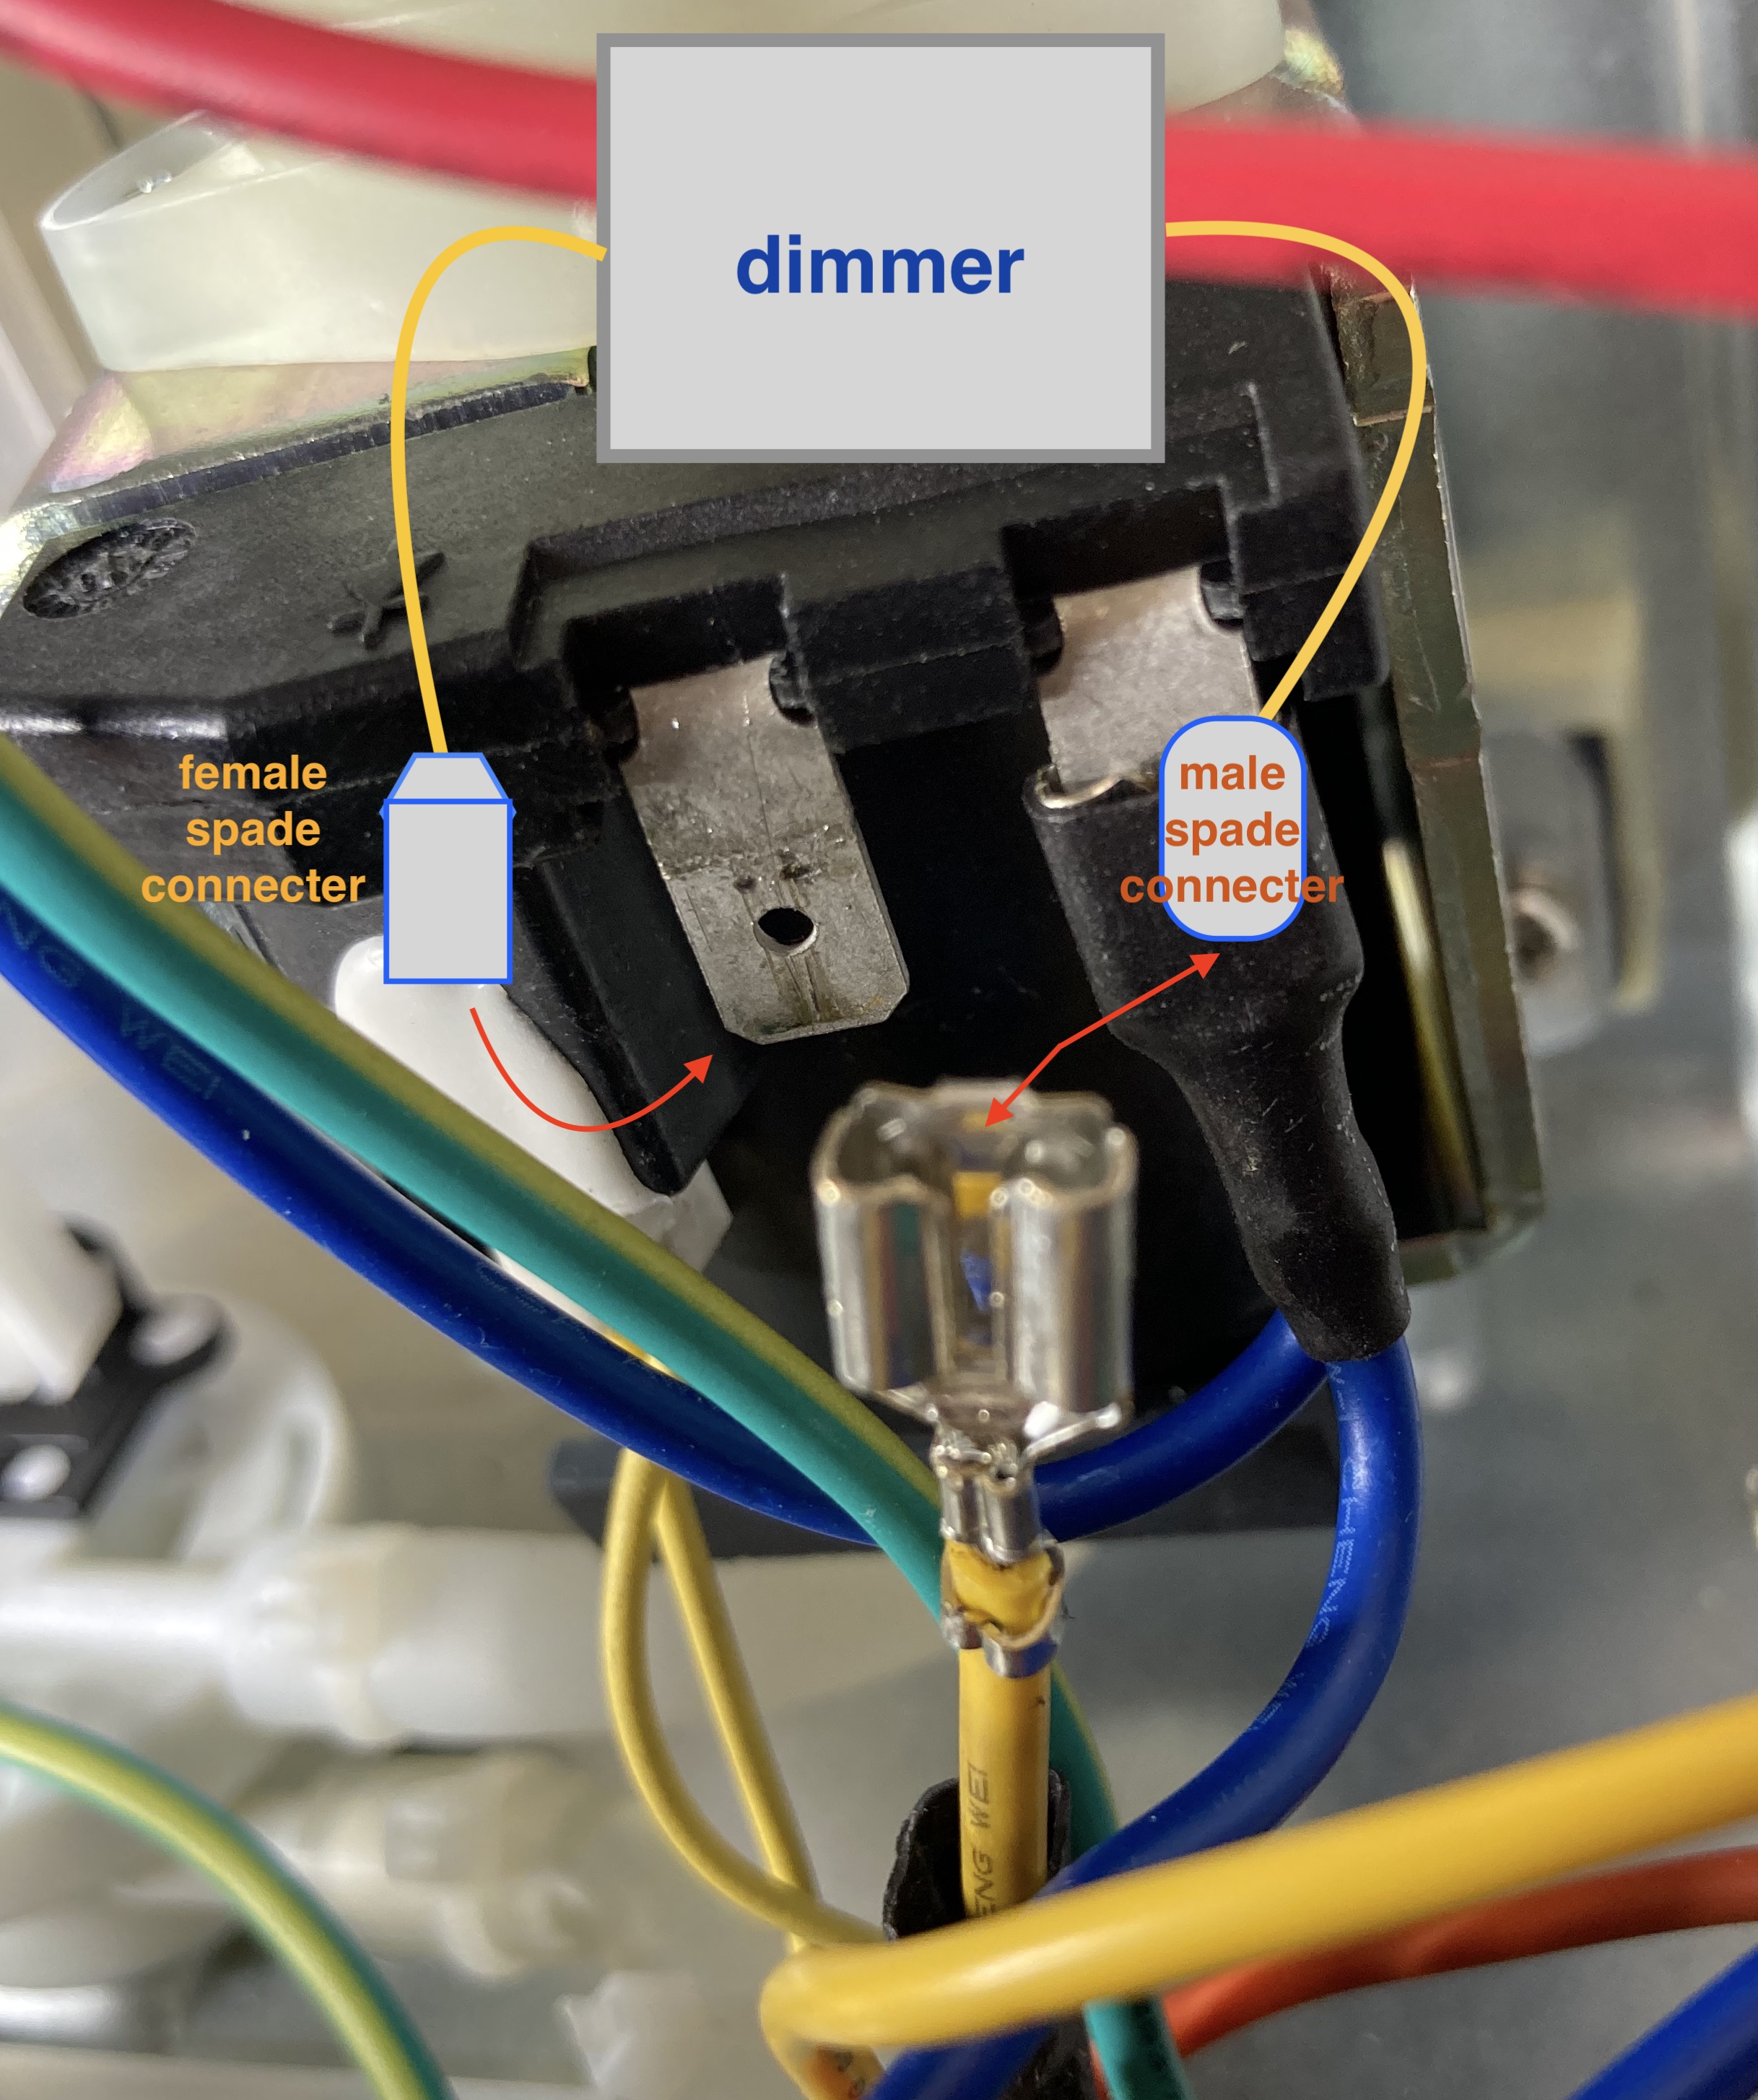
The completed connection will look like this. (Note that the yellow wire -> dimmer connection is hidden behind a piece of heatshrink in the image).
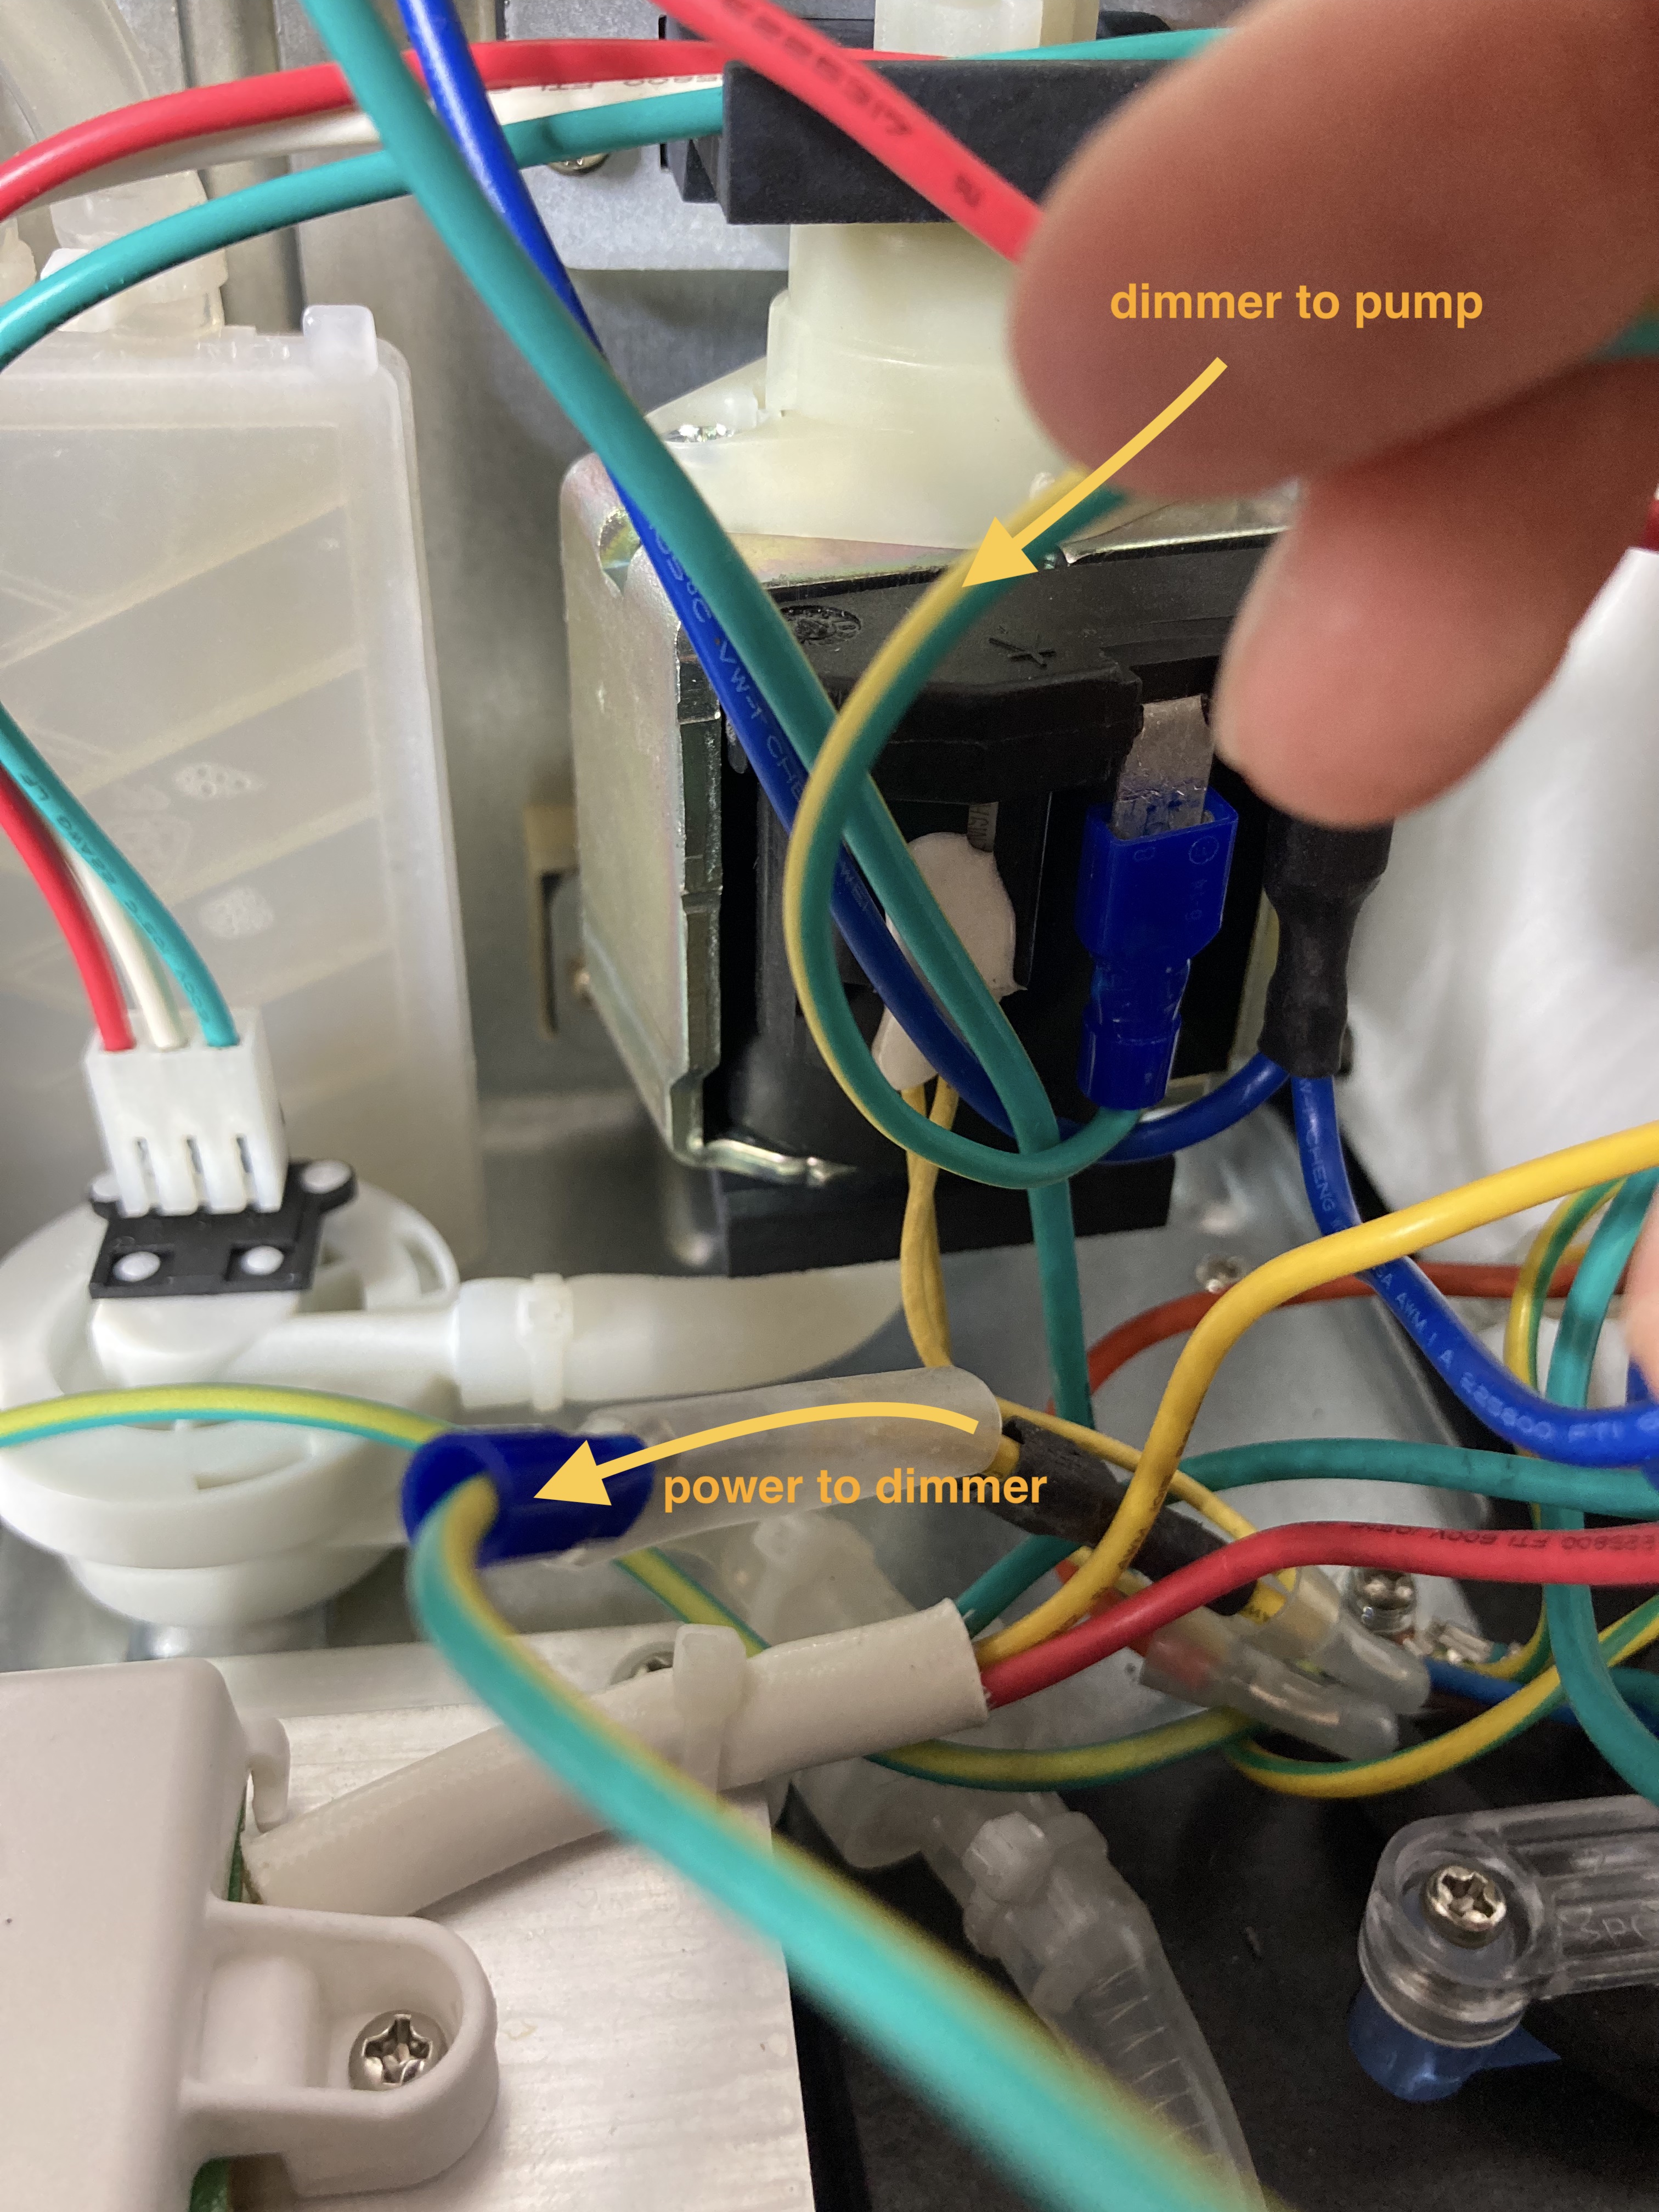
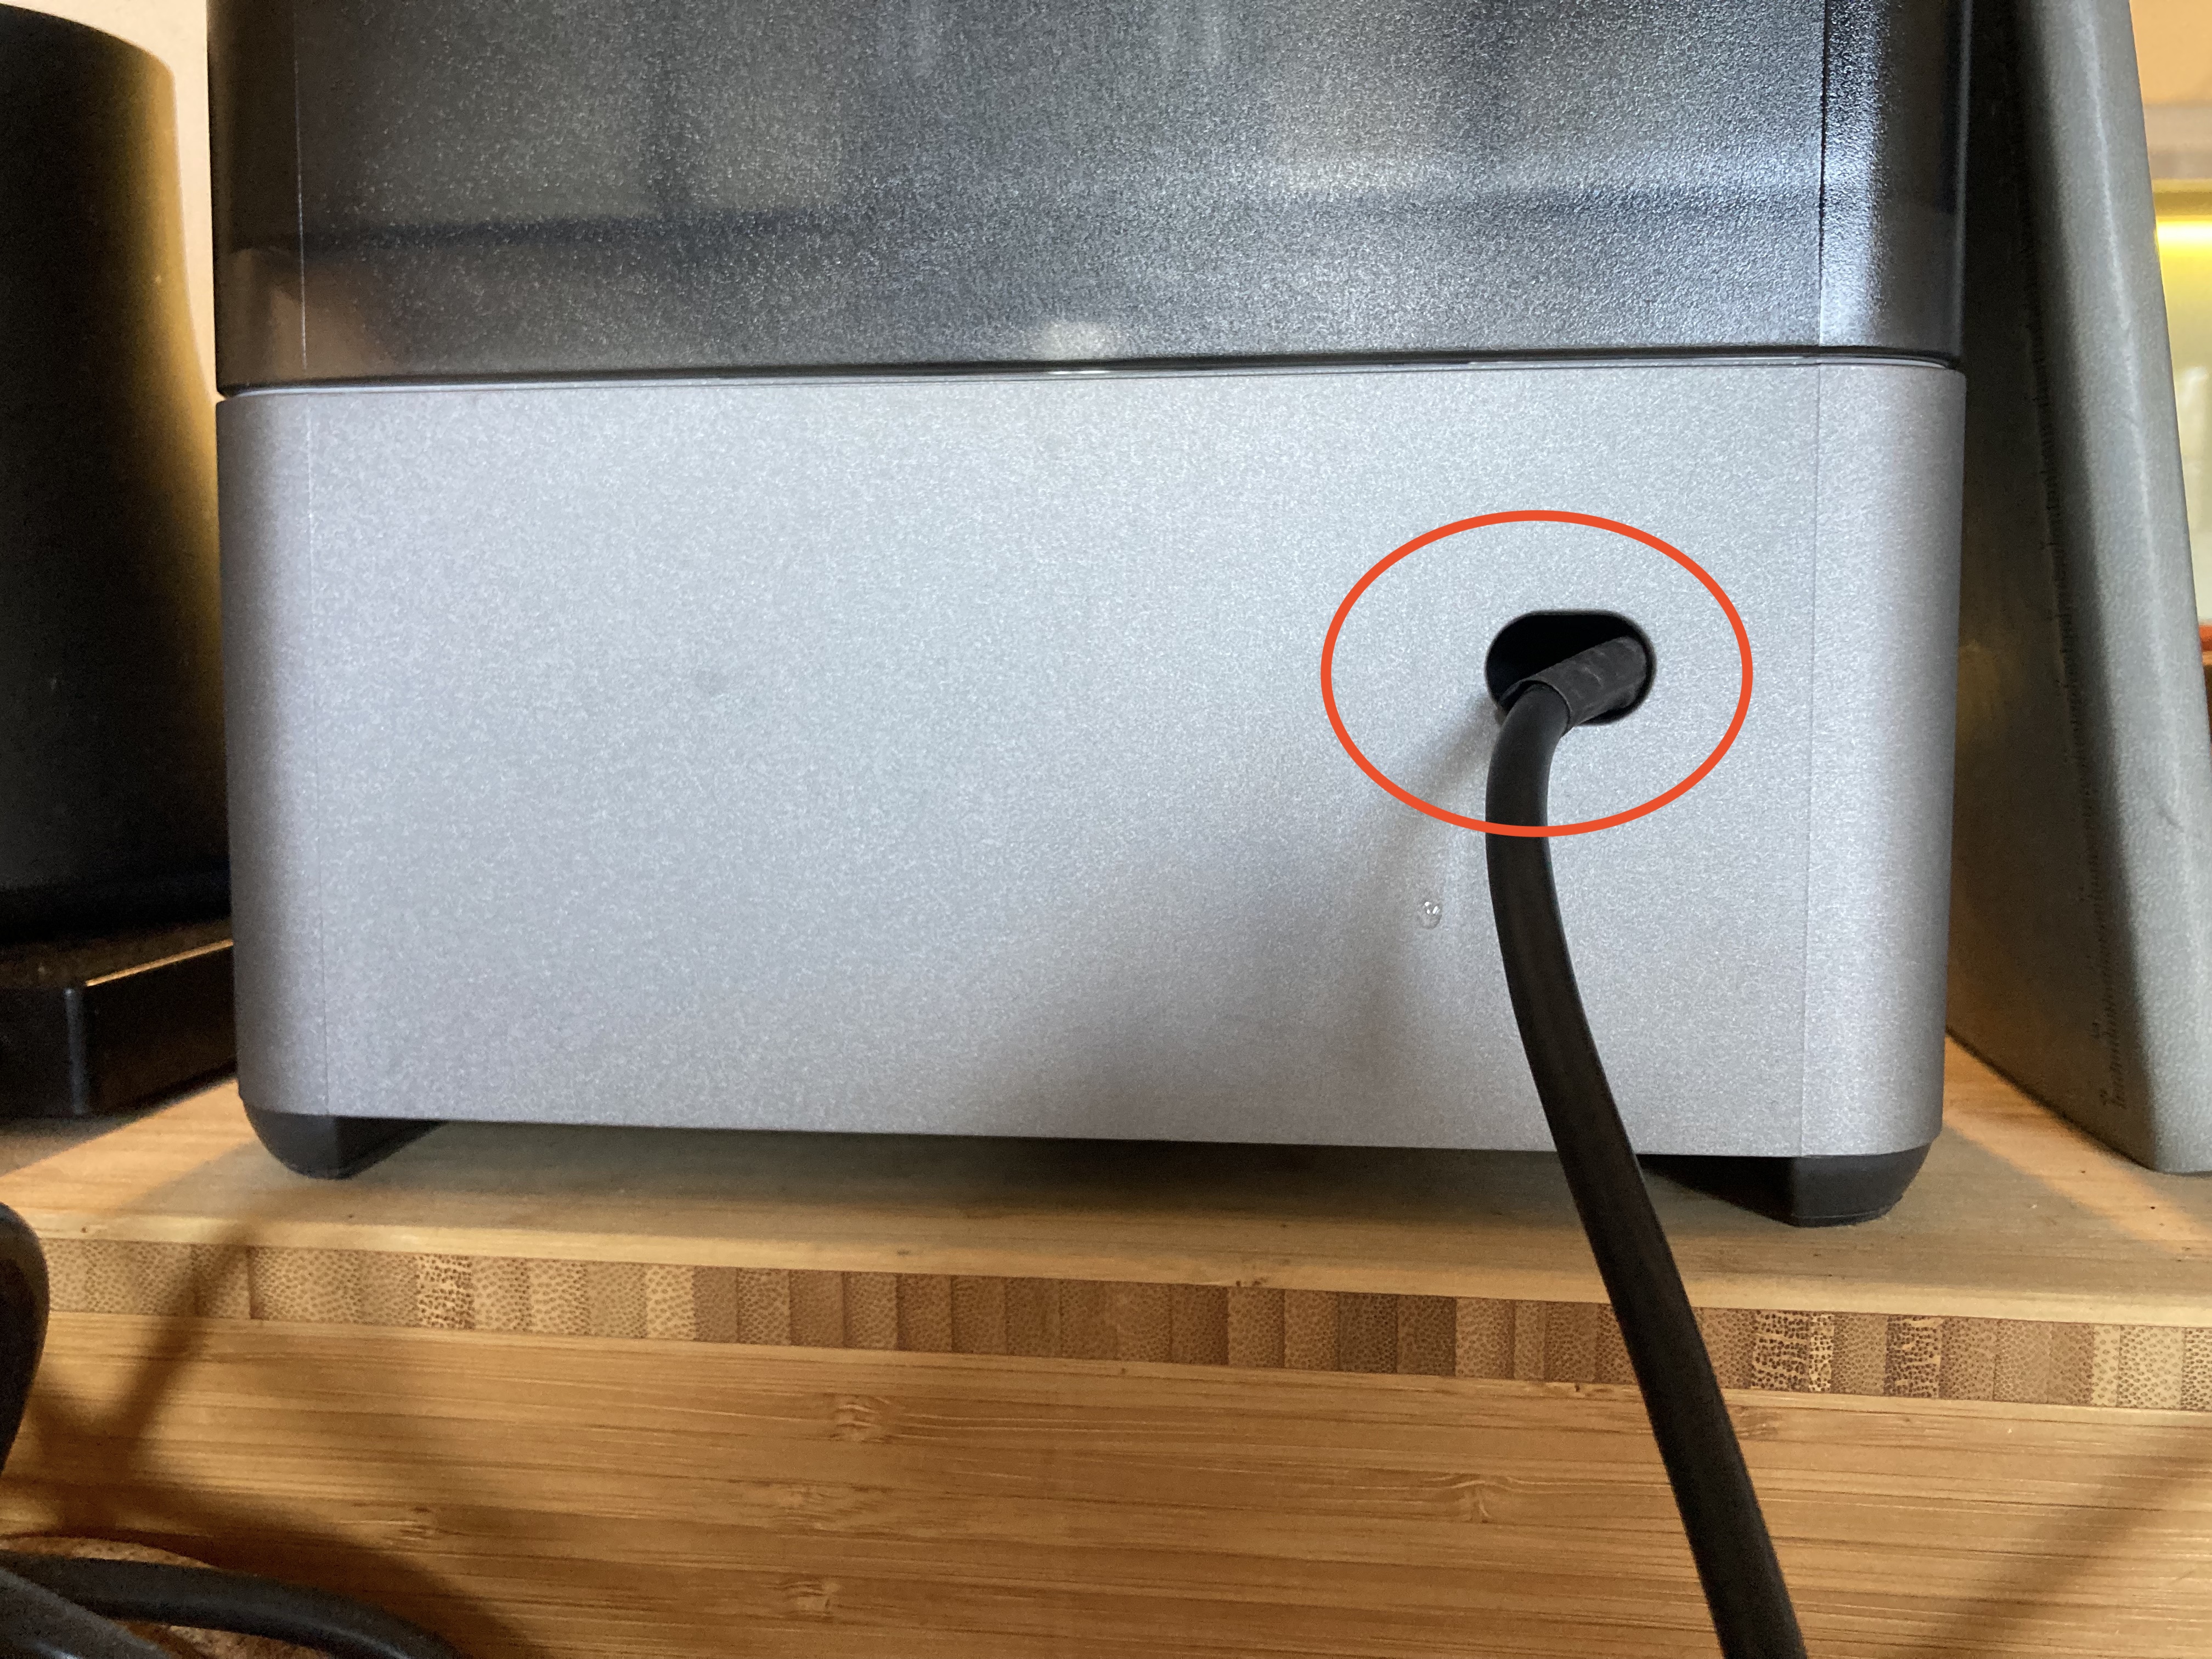
Your dimmer mod is now pretty much complete! At this point you can mount your dimmer at the location of your choosing. If you want to avoid drilling a hole in the case of your machine, you can thread the wiring from the inside through to the outside of your machine via this back port here.
Reassemble the machine, and you’re ready to flow profile.
Things to note
The dimmer should be on 100% power at any time outside of actually pulling a shot. It should be at 100% when you power the machine on as well as during steaming.
The dimmer mod does not disable the machine’s auto stop at 60 seconds into pulling the shot, nor does it disable the solenoid from triggering after 60 seconds or when the shot is stopped. This is important to remember if/when you are attempting long, slow shots. There are options to get around the 60 second limit, such as adding manual control to the solenoid, but that is a guide for another day..
Need more help or have questions?
Join us over at https://discord.gg/espresso